
Hello and welcome readersJ!! Hope you are enjoying our tutorials. Today we shall learn something more interesting. We will learn how to use camera from our own application. We already use camera hardware from the native application. But today you will access the camera from your own app.Exciting!! yes it is and even i am very excited to do this tutorial for you. Let us start the session with a brief introduction followed by the application.
8.3.1 Introduction
Camera is a huge concept. So we will summarize the things. Android framework supports various cameras on various devices respectively. Important classes related to camera API or camera intent are as follows:
- Intent: An intent action type of MediaStore.ACTION_IMAGE_CAPTURE or MediaStore.ACTION_VIDEO_CAPTURE is used to capture images and/or videos respectively.
- MediaRecorder: Video is recorded from camera by using this class.
- Camera: Camera devices are controlled primarily by this API. When we build a camera application we use this class to capture image or video.
- SurfaceView: A live camera preview is presented to user by this class.
The easiest way to capture image is via intent. Our application would fire intent for capturing the image.
startActivityforResult(new Intent(MediaStore.ACTION_IMAGE_CAPTURE), TAKE_PICTURE);
This will launch the camera application and we can easily capture photo. Full suite of camera functionality is provided to the user. Result would be returned to the handler. The steps are listed as shown below:
- Create a camera intent
- Start the camera intent
- Receive the result of intent
We can control camera directly by adding the camera permission in the manifest file. The permission is shown in the following box:
<uses-permission android:name=”android.permission.CAMERA”/>
The features of camera are controlled by the following declaration in manifest file:
<uses-feature android:name="android.hardware.camera" />
There is storage permission as well. It is required when we want to store images in external storage like an SD card and it is listed in the following box:
<uses-permission android:name="android.permission.WRITE_EXTERNAL_STORAGE" />
We set the camera settings by using Camera.Parameters object. We use the Camera.getParameters() method. When we work in the stable API levels like API 9 or above, we use the Camera.getCameraInfo(). This method can be used to determine whether camera is in front or back of the device. Orientation of image is also decided by this method. Let us create a simple and useful example.
8.3.2. Example
Create a project and name it as you like. I am naming it CameraTest Application. In this project we will create an application. We will have two buttons. One is used to capture photo and the other button will load the clicked photo. Image will be stored in gallery of our device. We will have an image view where the image will be loaded from camera. So please follow the instructions. Open your activity_main.xml file and code it as shown in the following listing:
<LinearLayout xmlns:android="http://schemas.android.com/apk/res/android"
    xmlns:tools="http://schemas.android.com/tools"
    android:layout_width="match_parent"
    android:layout_height="match_parent"
    android:orientation="vertical" >
    <ImageView
        android:id="@+id/imageView1"
        android:layout_width="match_parent"
        android:layout_height="wrap_content"
        android:src="@drawable/mylogo" />
    <ImageButton
        android:id="@+id/imageButton1"
        android:layout_width="match_parent"
        android:layout_height="wrap_content"
        android:src="@drawable/ic_launcher" />
    <Button
        android:id="@+id/button1"
        android:layout_width="match_parent"
        android:layout_height="wrap_content"
        android:text="Load" />
</LinearLayout>
Figure activity_main.xml file
Graphical layout of application would look alike as shown in the following snapshot:

Figure Graphical layout of application
Open your main activity file and populate the class with the following code:
package com.android.tution.CameraTest;
import java.io.InputStream;
import android.app.Activity;
import android.content.Intent;
import android.graphics.Bitmap;
import android.graphics.BitmapFactory;
import android.os.Bundle;
import android.view.Menu;
import android.view.View;
import android.view.View.OnClickListener;
import android.widget.Button;
import android.widget.ImageButton;
import android.widget.ImageView;
public class CameraActivity extends Activity implements OnClickListener {
    ImageButton ibutton;
    Button load;
    ImageView iview;
    Intent intent;
    Bitmap bitmap;
    public static int cameraData = 0;
    @Override
    protected void onCreate(Bundle savedInstanceState) {
        super.onCreate(savedInstanceState);
        setContentView(R.layout.activity_camera);
        ibutton = (ImageButton) findViewById(R.id.imageButton1);
        load = (Button) findViewById(R.id.button1);
        iview = (ImageView) findViewById(R.id.imageView1);
        InputStream is = getResources().openRawResource(R.drawable.ic_launcher);
        bitmap = BitmapFactory.decodeStream(is);
        load.setOnClickListener(this);
        ibutton.setOnClickListener(this);
    }
    @Override
    public boolean onCreateOptionsMenu(Menu menu) {
        // Inflate the menu; this adds items to the action bar if it is present.
        getMenuInflater().inflate(R.menu.camera, menu);
        return true;
    }
    @Override
    public void onClick(View v) {
        // TODO Auto-generated method stub
        switch (v.getId()) {
        case R.id.button1:
            Toast.makeText(CameraActivity.this, "Yipee we are done:)",
                    Toast.LENGTH_SHORT).show();
            finish();
            break;
    case R.id.imageButton1:
            Toast.makeText(CameraActivity.this, "Please check your gallery",
                    Toast.LENGTH_SHORT).show();
            intent = new Intent(
                    android.provider.MediaStore.ACTION_IMAGE_CAPTURE);
            startActivityForResult(intent, cameraData);
            break;
        }
    }
}
Figure main activity file
You have to save an image in your drawable folder and name it mylogo. We will reference this image in our xml file. This may not be the same logo as shown in the output. You can save any image and name it mylogo. And that image would appear in the image view. We have to set permissions in the manifest file. Now open your manifest file and cross check with the following listing:
<?xml version="1.0" encoding="utf-8"?>
<manifest xmlns:android="http://schemas.android.com/apk/res/android"
    package="com.android.tution.CameraTest"
    android:versionCode="1"
    android:versionName="1.0" >
    <uses-sdk
        android:minSdkVersion="8"
        android:targetSdkVersion="17" />
    <application
        android:allowBackup="true"
        android:icon="@drawable/ic_launcher"
        android:label="@string/app_name"
        android:theme="@style/AppTheme" >
        <activity
            android:name="com.Debosmita.CameraTest.CameraActivity"
            android:label="@string/app_name" >
            <intent-filter>
                <action android:name="android.intent.action.MAIN" />
                <category android:name="android.intent.category.LAUNCHER" />
            </intent-filter>
        </activity>
    <uses-permission android:name=”android.permission.CAMERA”/>
 <application/>
Figure manifest file
Now we are ready to test our application. If you get a similar output then your code is working as it is meant to be. The output should look similar to the following snapshot:

Figure Homepage of application
When you press the image button with camera picture (blue camera), the emulated camera of emulator would pop us as shown in the following snapshot: This is because emulator cannot mimic the actual hardware. But definitely it is a good tool to test the things. At least we can debug in the IDE itself. If there is an error it can be detected easily and then test on a real device.
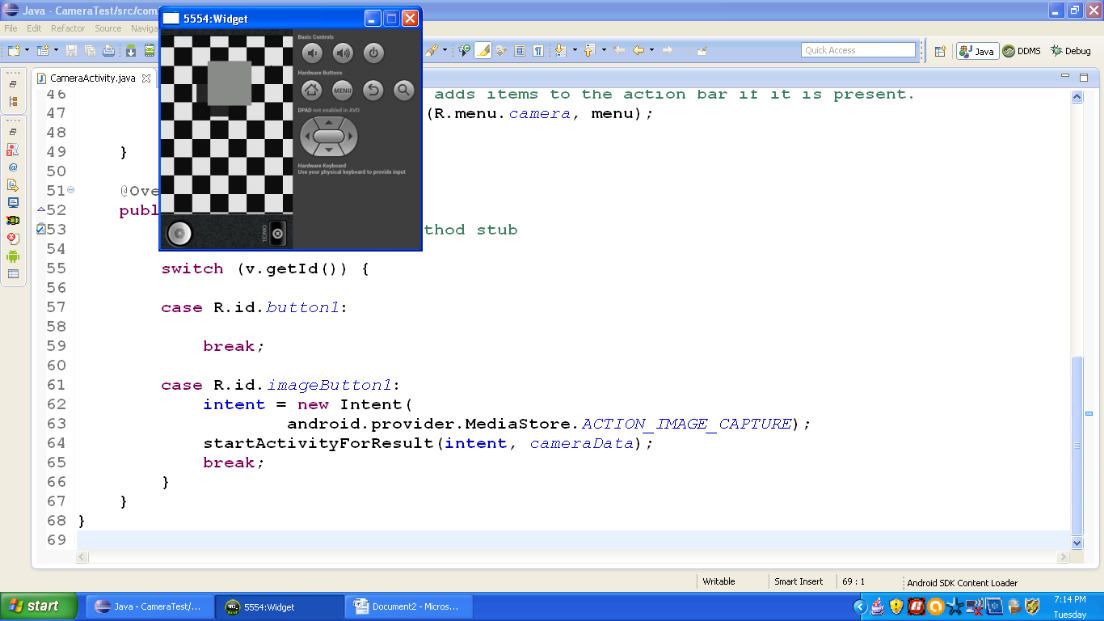
Figure Output after pressing the blue camera button
You might think our tutor is smart enough to fool us. Don’t worry I have the proof of innocence. I have tested this application on my device. And you can see I was not fooling you, this app actually worksJ. When you press the blue button the actual camera hardware responds to it and you would be prompted with a window like the one shown below. You can save the image or discard it according to your wish.

Figure Actual output after pressing blue button
There is one more button below the blue button saying load. This button would load the gallery of your device. And you can select the image clicked by you with this button. In other words, this button would load the image.

Figure Output after pressing the load button
CongratulationsJ ladies and gentleman!! We are done. I hope you liked our small, simple and useful tutorial. See you in the next section. Till then keep practicing. Happy App Developing!!!