
3.8.2 Android Notification
An Android notification is a message which is not displayed on application’s normal user interface. It is displayed by system. It will appear on the notification area as an icon. To check out the details user opens the drawer or slide the status bar vertically down to read the detailed notification. These areas are controlled by system and hence can be checked by user any time he / she wishes to do so. Notifications have their own design guidelines which are to be followed. The notification system allows your app to keep the user informed about events, such as new chat messages or a calendar event. Best example of notifications will be “1 friend request on facebook!!” Most of you would be familiar to this isn’t it!! Anyways let’s not discuss fb here. We have two prominent styles of displaying notifications which varies from device to device and they are:
- Normal View: This is the standard form of view in notification area.
- Expanded View: Large notification area is opened when notification is expanded. This view is introduced in Android 4.1

Figure - Types of notification views
Now let us create our own notification which will make things more clear. Open your IDE and create a new project. Name it as you like I am naming it as NotificationExampleApp. After project opens, create a new java class and name it Notificationviews. Open that class and type the code as shown below:
package com.android.tution.Notifications;

import android.app.Activity;
import android.app.NotificationManager;
import android.os.Bundle;

public class Notificationview extends Activity {

    @Override
    protected void onCreate(Bundle savedInstanceState) {
          // TODO Auto-generated method stub
          super.onCreate(savedInstanceState);

          setContentView(R.layout.notification);
          NotificationManager nmanager = (NotificationManager) getSystemService(this.NOTIFICATION_SERVICE);
          nmanager.cancel(getIntent().getExtras().getInt("notificationID"));
    }
}
Notificationview class of NotificationsExampleApp App
Now create an xml file and name it notification.xml. Open the file and type the code as shown below:
<?xml version="1.0" encoding="utf-8"?>
<LinearLayout xmlns:android="http://schemas.android.com/apk/res/android"
       android:layout_width="match_parent"
       android:layout_height="match_parent"
       android:orientation="vertical" >

        <TextView
            android:id="@+id/textView1"
            android:layout_width="match_parent"
            android:layout_height="wrap_content"
            android:text="Detailed Notification is....."
            android:textAppearance="?android:attr/textAppearanceLarge" />

</LinearLayout>
notification.xml file of NotificationsExampleApp App
Graphical layout of the file should be similar to the following snapshot:
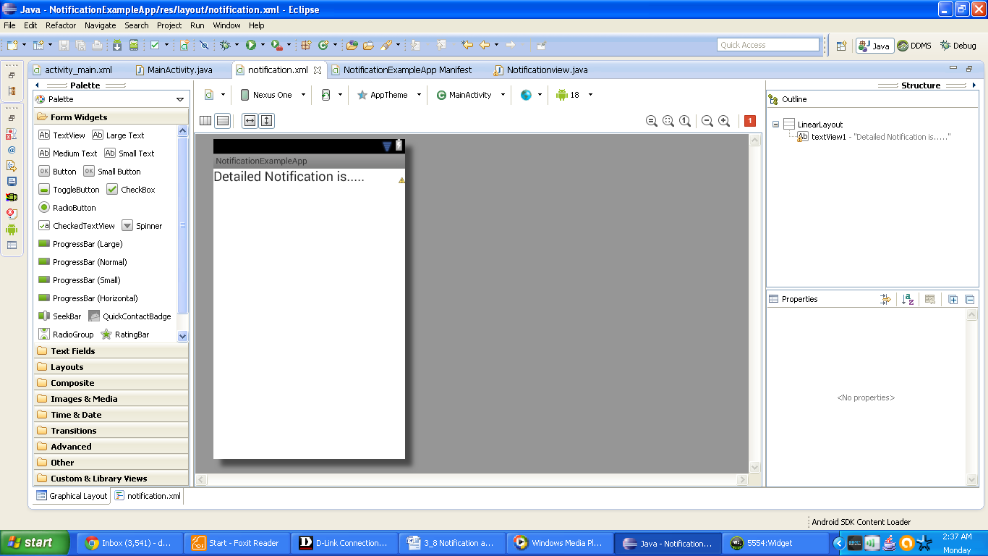
Figure - Graphical layout of notification.xml file
After this open your activity_main.xml file and type the code as shown below:
<RelativeLayout xmlns:android="http://schemas.android.com/apk/res/android"
      xmlns:tools="http://schemas.android.com/tools"
      android:layout_width="match_parent"
      android:layout_height="match_parent"
      android:paddingBottom="@dimen/activity_vertical_margin"
      android:paddingLeft="@dimen/activity_horizontal_margin"
      android:paddingRight="@dimen/activity_horizontal_margin"
      android:paddingTop="@dimen/activity_vertical_margin"
      tools:context=".MainActivity" >

      <Button
          android:id="@+id/bdisplay"
          android:layout_width="wrap_content"
          android:layout_height="wrap_content"
          android:layout_centerHorizontal="true"
          android:layout_centerVertical="true"
          android:text="NOTIFICATION" />

</RelativeLayout>
activity_main.xml file of NotificationsExampleApp App
Graphical layout of our example app should be similar to the following snapshot.
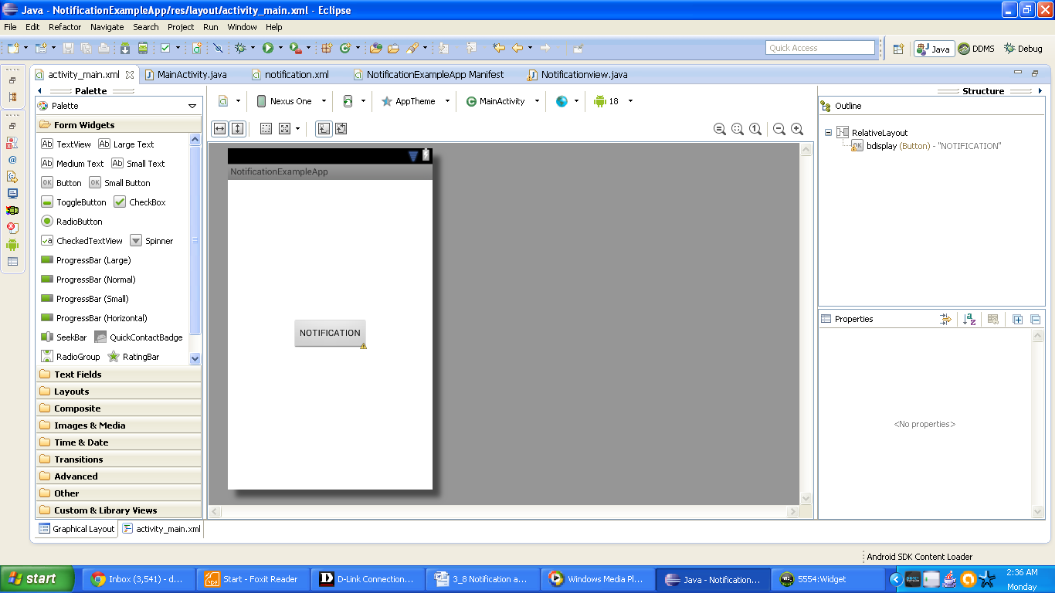
Figure - Graphical layout of our app
Open the MainActivity.java file and populate it as shown below:
package com.android.tution.Notifications;

import android.app.Activity;
import android.app.Notification;
import android.app.NotificationManager;
import android.app.PendingIntent;
import android.content.Intent;
import android.os.Bundle;
import android.view.View;
import android.widget.Button;

public class MainActivity extends Activity implements View.OnClickListener {

       int notificationID = 1;
       CharSequence from = "System Alarm";
       CharSequence message = "Meeting";

       @Override
       protected void onCreate(Bundle savedInstanceState) {
        super.onCreate(savedInstanceState);
        setContentView(R.layout.activity_main);
        Button b = (Button) findViewById(R.id.bdisplay);
        b.setOnClickListener(this);
      }

      @Override
      public void onClick(View v) {
          // TODO Auto-generated method stub
        display();
      }
      protected void display() {

          // TODO Auto-generated method stub
          Intent i = new Intent(this, Notificationview.class);
          i.putExtra("notificationID", notificationID);
          PendingIntent pendingIntent = PendingIntent.getActivity(this, 0, i, 0);
          NotificationManager nmanager = (NotificationManager) getSystemService(NOTIFICATION_SERVICE);
          Notification notice = new Notification(R.drawable.ic_launcher,
                "Reminder", System.currentTimeMillis());

          CharSequence from = "System Alarm";
          CharSequence message = "Meeting";
          notice.setLatestEventInfo(this, from, message, pendingIntent);
          nmanager.notify(notificationID, notice);
     }
}
MainActivity.java file of NotificationsExampleApp App
To display a notification we have created an Intent object which points to the Notificationview class. This intent will be used to launch another activity when the user selects a notification from the list of notifications. In this example, we have added key/value pair to the Intent object so that we can use the notification ID, identifying the notification to the target activity. This ID will be used to dismiss the notifications after you are done. PendingIntent object helps us to perform an action on our application’s behalf after some time regardless of whether application is running or not. The Notification class enables us to specify the notification’s main information when the notification first appears on the status bar. The second argument to the Notification constructor sets the “ticker text” on the status bar. When the user clicks on the notification, the Notificationview activity is launched. Here, we dismiss the notification by using the cancel()method of the NotificationManager object and for this we pass it the ID of notification. Thus we are done. Let us run our application on emulator and check out the notification application. As soon as app is launched, press the button. Output should be similar to the following snapshot:
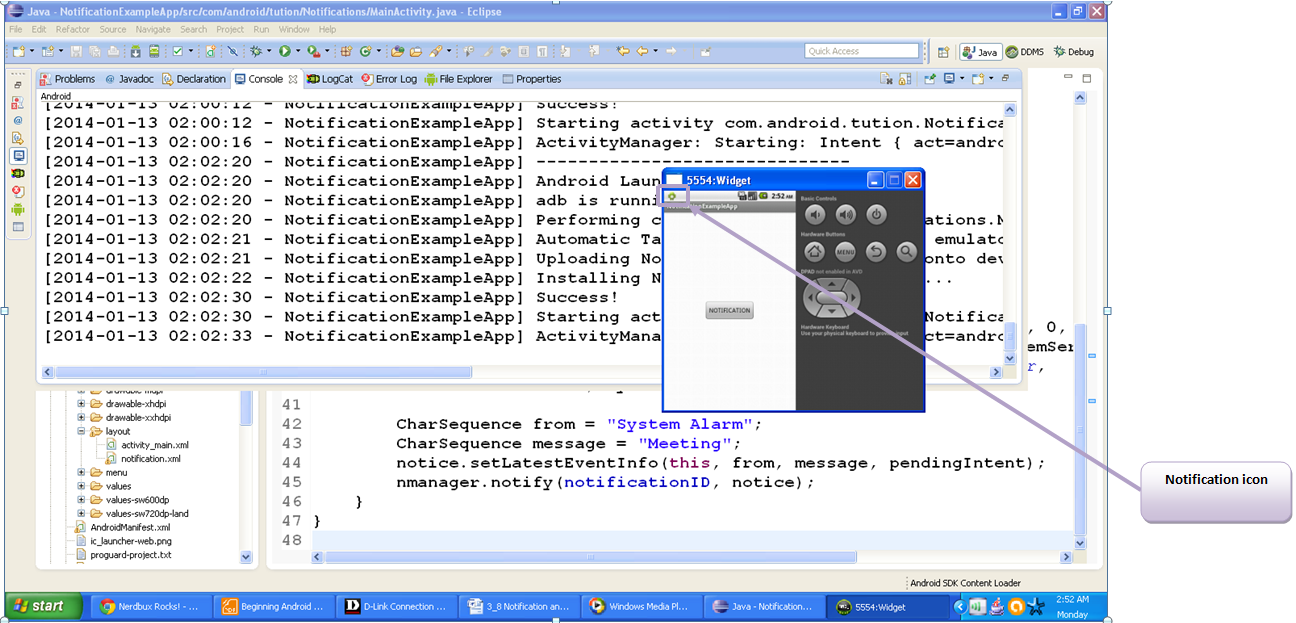
Figure - Output of NotificationsExampleApp App
In the status bar you can see your notification has already arrived with a small android launcher icon attached to it. You can select any image for this purpose. Now go back to main menu and slide your status bar of virtual device. Here comes your notification. This step should be similar to the snapshot listed below.
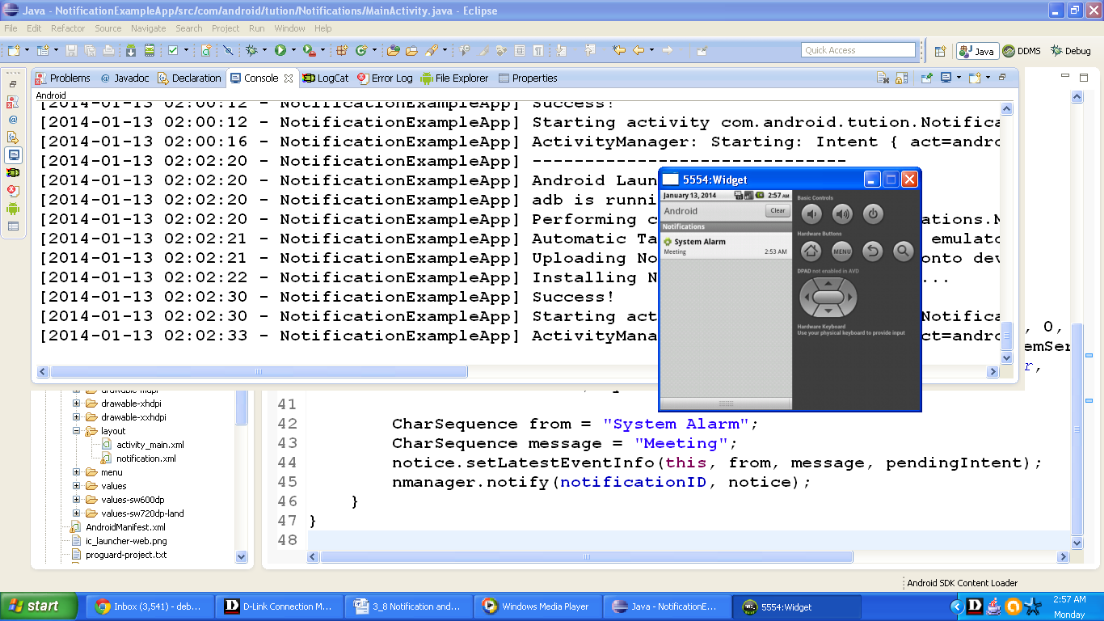
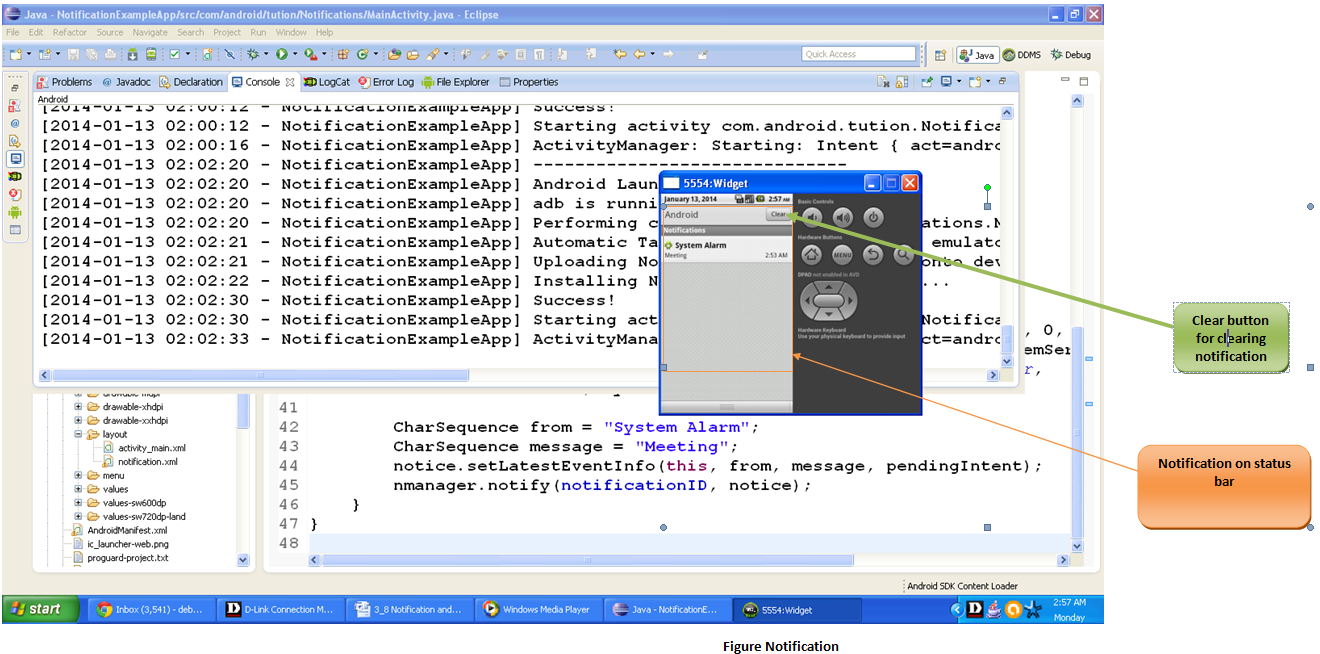
After reading the notification, press the clear button and guess what! You have read your notification and you are done. Your device doesn’t have any new notification for you now. Your emulator screen would be similar to the following snapshot
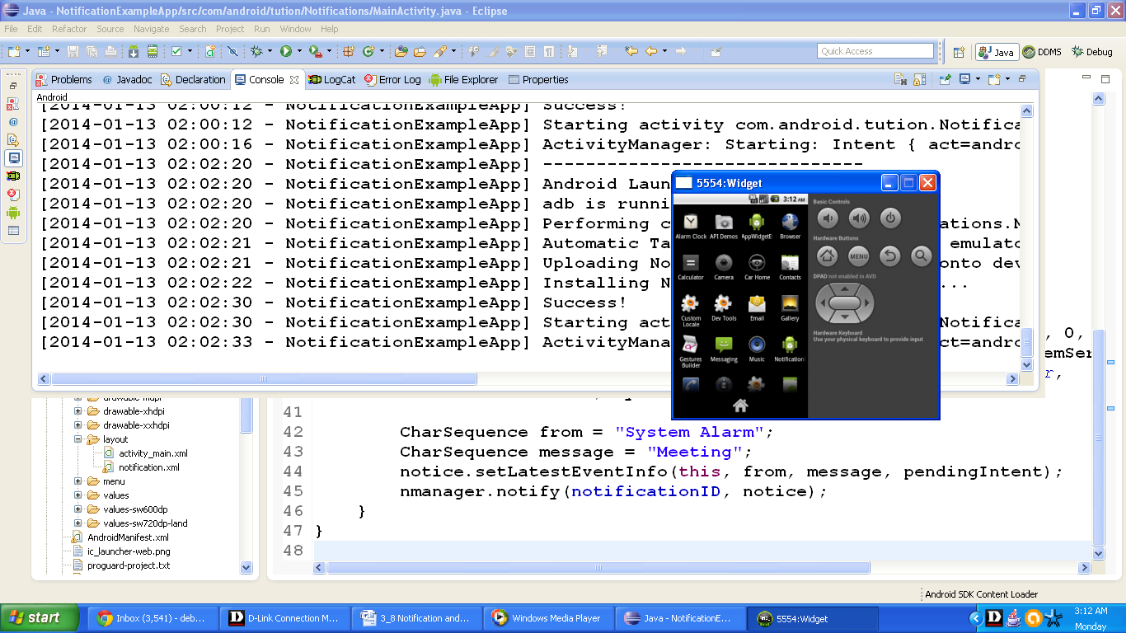
Figure - After clearing notification
Congratulations!!! We are done with notifications. Keep practicing. See you in the next section. Till then Happy App Developing!!!