
4.2.1 Advancing Android Basic Views
We have already covered easy android widgets topic. Now before starting android picker views there is one topic about which you should know and I am sure practically you have seen this in various apps. So let us start that and name of this view is ProgressBar View.
4.2.1.1 Android ProgressBar View
Progress Bar as the name suggests, it is related to progress of application. In other words, Android ProgressBar View shows the progress of Android application visually. Visually you can understand the launch status of application. Not only launch status, if you want visual effect of task completion then progress bar is the best option. It has a cyclic animation which is useful for tasks which are not under direct control i.e., finishing time are unknown.
4.2.1.2 Android ProgressBar Example
Let us create a small app which will display progress bar and hide it after specified amount of time. For that, open your eclipse and create a new project. Name it as you like and I am naming it BasicViewsExampleSecond app. Open your xml file and code it as shown in the following listing:
 <RelativeLayout xmlns:android="http://schemas.android.com/apk/res/android"
       xmlns:tools="http://schemas.android.com/tools"
       android:layout_width="match_parent"
       android:layout_height="match_parent"
       android:paddingBottom="@dimen/activity_vertical_margin"
       android:paddingLeft="@dimen/activity_horizontal_margin"
       android:paddingRight="@dimen/activity_horizontal_margin"
       android:paddingTop="@dimen/activity_vertical_margin"
       tools:context=".MainActivity" >

       <TextView
           android:id="@+id/textView1"
           android:layout_width="wrap_content"
           android:layout_height="wrap_content"
           android:text="Progress Bar Example" />
       <ProgressBar
           android:id="@+id/progressBar1"
           style="?android:attr/progressBarStyleLarge"
           android:layout_width="wrap_content"
           android:layout_height="wrap_content"
           android:layout_alignLeft="@+id/textView1"
           android:layout_below="@+id/textView1"
           android:layout_marginTop="60dp" />

</RelativeLayout>
Figure - xml file of Android BasicexampleSecond App
The graphical layout of file should be similar to the following snapshot:
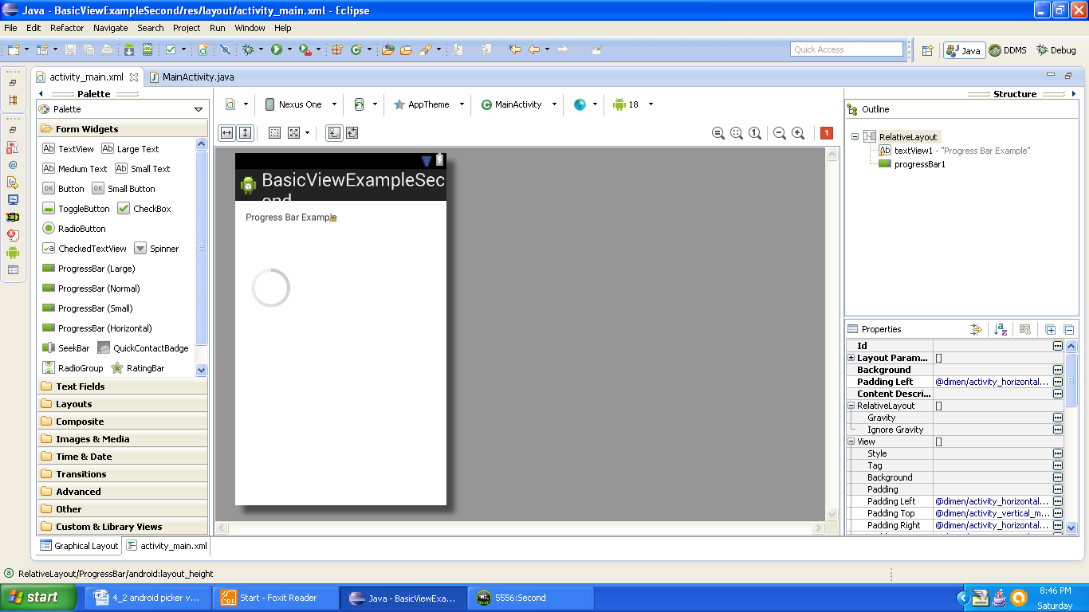
Figure - graphical layout of Android progess bar app
Now open the main activity file of your app and code it as shown below:
package com.android.tution.ProgressBar;

import android.app.Activity;
import android.os.Bundle;
import android.os.Handler;
import android.widget.ProgressBar;

public class MainActivity extends Activity {

      private static int progress;
      private ProgressBar progressBar;
      private int progressStatus = 0;
      private Handler handler = new Handler();

      @Override
      protected void onCreate(Bundle savedInstanceState) {
                super.onCreate(savedInstanceState);
                setContentView(R.layout.activity_main);

                progress = 0;
                progressBar = (ProgressBar) findViewById(R.id.progressBar1);
                // progressBar.setMax(200);
                new Thread(new Runnable() {
                     public void run() {
                           while (progressStatus < 10) {
                                progressStatus = doSomeWork();
                           }
                           handler.post(new Runnable()

                           {

                                public void run() {
                                    progressBar.setVisibility(8);
                                       // progressBar.setProgress(progressStatus);
                                }
                           });
                     }

                     private int doSomeWork()
                     {
                         try {
                             Thread.sleep(500);
                         } catch (InterruptedException e) {
                            e.printStackTrace();
                          }
                          return ++progress;
                      }
              }).start();

       }
}
Figure - main activity file of Android progress bar app
Now open a suitable emulator and run your app. Output should be similar to following snapshot. Progress Bar appears for 5 seconds and then it disappears from screen.
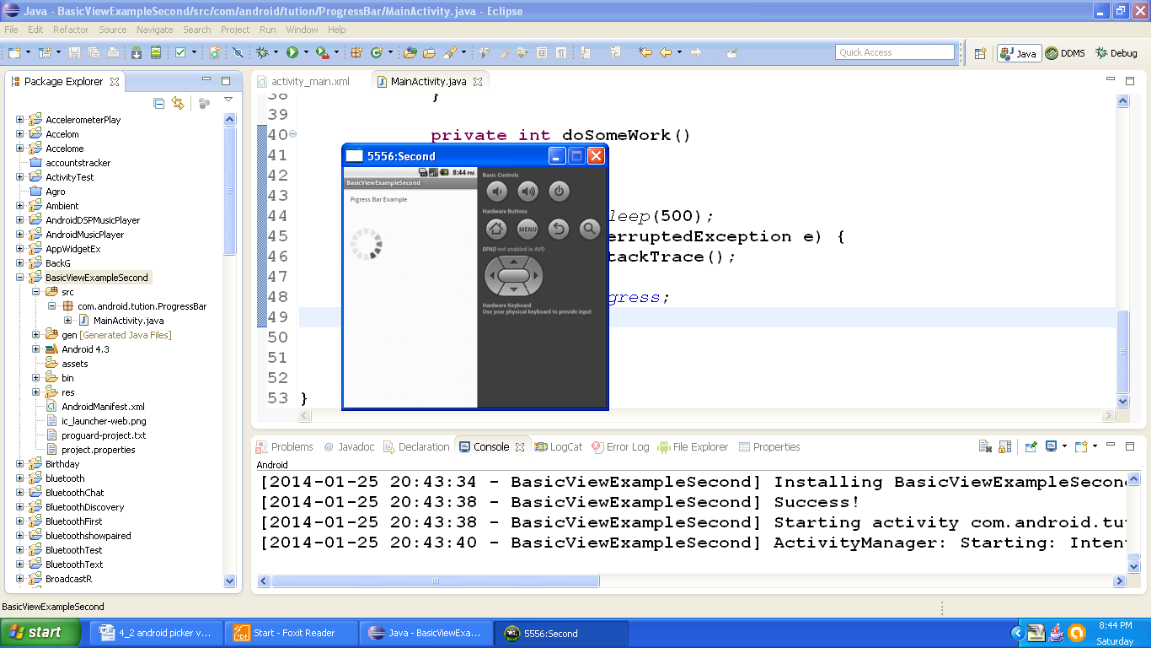
Figure - Output of Android BasicViewExampleSecond app
So first congratulations to everyone. We are done with progress bars. Now let us move to picker views.
4.2.2 Android Picker Views
Android supports two picker views namely, time and date. Let us check out them one by one.
4.2.2.1 Android Time Picker View
We are programmatically setting time. There is nothing to explain only we have to learn how to use them. Open your IDE and create a project. Name it as you like. I am naming it as PickerViewExample app. Open the xml file and code it as shown below:
<RelativeLayout xmlns:android="http://schemas.android.com/apk/res/android"
      xmlns:tools="http://schemas.android.com/tools"
      android:layout_width="match_parent"
      android:layout_height="match_parent"
      android:paddingBottom="@dimen/activity_vertical_margin"
      android:paddingLeft="@dimen/activity_horizontal_margin"
      android:paddingRight="@dimen/activity_horizontal_margin"
      android:paddingTop="@dimen/activity_vertical_margin"
      tools:context=".MainActivity" >

      <TextView
          android:id="@+id/textView1"
          android:layout_width="wrap_content"
          android:layout_height="wrap_content"
          android:text="HELLO READERS!!" />
      <TimePicker
          android:id="@+id/timePicker1"
          android:layout_width="wrap_content"
          android:layout_height="wrap_content"
          android:layout_alignParentLeft="true"
          android:layout_below="@+id/textView1" />
      <Button
          android:id="@+id/buttonTime"
          android:layout_width="wrap_content"
          android:layout_height="wrap_content"
          android:layout_alignLeft="@+id/timePicker1"
          android:layout_below="@+id/timePicker1"
          android:layout_marginTop="16dp"
          android:text="Set" />
</RelativeLayout>
Figure - xml file of Andoid picker view app
Now open your activity file and code it as shown below:
package com.android.tution.PickerView;

import android.app.Activity;
import android.os.Bundle;
import android.view.Menu;
import android.view.View;
import android.widget.Button;
import android.widget.TimePicker;
import android.widget.Toast;

public class MainActivity extends Activity {

    TimePicker timePicker;
    Button set;

    @Override
    protected void onCreate(Bundle savedInstanceState) {
        super.onCreate(savedInstanceState);
        setContentView(R.layout.activity_main);
        timePicker = (TimePicker) findViewById(R.id.timePicker1);
        timePicker.setIs24HourView(true);

        set = (Button) findViewById(R.id.buttonTime);
        set.setOnClickListener(new View.OnClickListener() {

         @Override
         public void onClick(View v) {
                // TODO Auto-generated method stub

                Toast.makeText(
                        getBaseContext(),
                        "Time Selected:" + timePicker.getCurrentHour() + ":"
                                + timePicker.getCurrentMinute(),
                        Toast.LENGTH_SHORT).show();
          }
        });
    }
    @Override
    public boolean onCreateOptionsMenu(Menu menu) {
        // Inflate the menu; this adds items to the action bar if it is present.
        getMenuInflater().inflate(R.menu.main, menu);
        return true;
    }
}
Figure - main activity file of android picker view app
Create an emulator and run your app. It should be similar to the following snapshot:

Figure - Output of Android PickerViewExample app
Now your time is set. If you want to change it then in emulator you can change the time without running the application. Just make the changes and press the Set button and prompted with the new time set. It should be similar to the following snapshot.
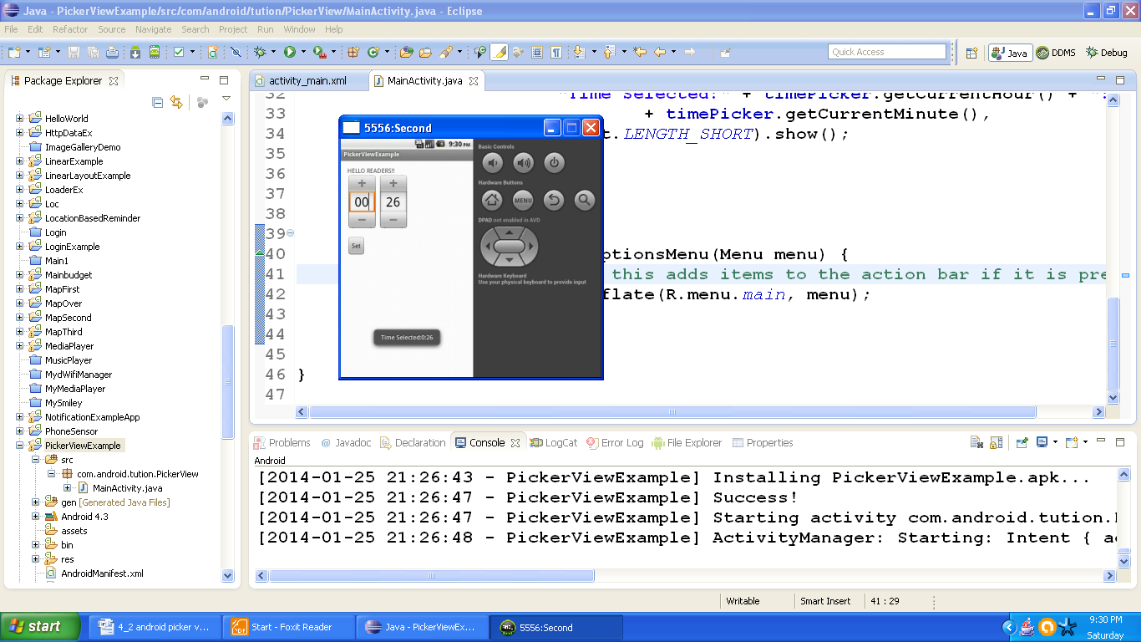
Figure - Ooutput after changing the time
Congratulations for the second time. Yeah you did it. But it’s not the end. One more picker view is left. Let us create an app for that.
4.2.2.2 Android Date Picker View
Android DatePicker view allows users to set date dynamically just like TimePicker View. So create another project. Name it as you like. I am naming it PickerViewSecondExample app. Now open your xml file and code it as shown in the following listing:
<RelativeLayout xmlns:android="http://schemas.android.com/apk/res/android"
    xmlns:tools="http://schemas.android.com/tools"
    android:layout_width="match_parent"
    android:layout_height="match_parent"
    android:paddingBottom="@dimen/activity_vertical_margin"
    android:paddingLeft="@dimen/activity_horizontal_margin"
    android:paddingRight="@dimen/activity_horizontal_margin"
    android:paddingTop="@dimen/activity_vertical_margin"
    tools:context=".MainActivity" >

    <TextView
        android:id="@+id/textView1"
        android:layout_width="wrap_content"
        android:layout_height="wrap_content"
        android:text="Hello Readers !!" />
    <DatePicker
        android:layout_width="wrap_content"
        android:layout_height="wrap_content"
        android:layout_alignParentLeft="true"
        android:layout_below="@+id/textView1"
        android:layout_marginTop="75dp" />

    <Button
        android:id="@+id/button1"
        android:layout_width="wrap_content"
        android:layout_height="wrap_content"
        android:layout_alignLeft="@+id/datePicker1"
        android:layout_below="@+id/datePicker1"
        android:text="Set" />
</RelativeLayout>
Figure - xml file of Android date picker app
Your graphical layout should be similar to the following snapshot.
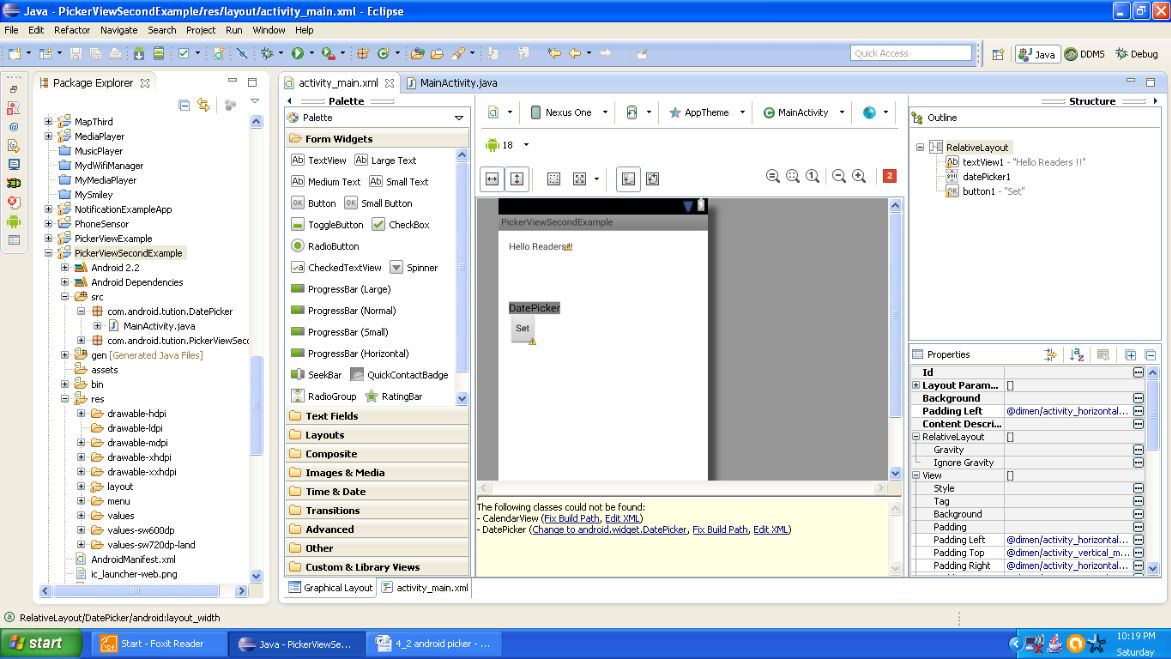
Figure - Graphical layout of Android date picker app
Open your activity file and code it as shown in the following listing;
package com.android.tution.DatePicker;

import android.app.Activity;
import android.os.Bundle;
import android.view.Menu;
import android.view.View;
import android.widget.Button;
import android.widget.DatePicker;
import android.widget.Toast;

public class MainActivity extends Activity {

       DatePicker datePicker;
       Button set;

       @Override
       protected void onCreate(Bundle savedInstanceState) {
               super.onCreate(savedInstanceState);
               setContentView(R.layout.activity_main);
               datePicker = (DatePicker) findViewById(R.id.datePicker1);
               set = (Button) findViewById(R.id.button1);
               set.setOnClickListener(new View.OnClickListener() {

                     @Override
                     public void onClick(View v) {
                           // TODO Auto-generated method stub
                           Toast.makeText(
                                           getBaseContext(),
                                           "Date Selected: " + datePicker.getMonth() + 1 + "/"
                                                + datePicker.getDayOfMonth() + "/"
                                                + datePicker.getYear() + "\n",
                                           Toast.LENGTH_SHORT).show();

                     }
               });
       }
       @Override
       public boolean onCreateOptionsMenu(Menu menu) {
             // Inflate the menu; this adds items to the action bar if it is present.
             getMenuInflater().inflate(R.menu.main, menu);
             return true;
       }
 }
Figure - main activity file of Android date picker app
Create an emulator and run your app. Output should be similar to the following snapshot.
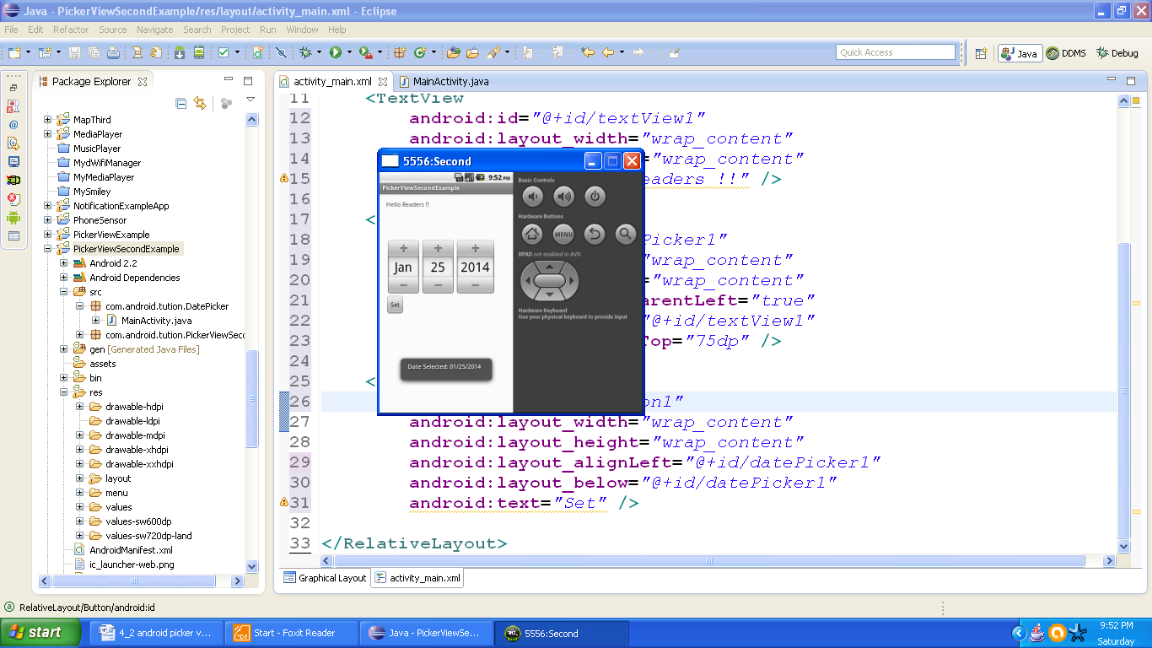
Figure - Output of Android date picker app
If you want to change the date dynamically, then change the date and press the button. It will be set. Output should be similar to the following snapshot.

Figure - Output after changing date
Hey congratulations!! We are done with picker views. See you in the next section. Keep practicing! Till then Happy App Developing!!!