
Introduction
You can make any HTML element selectable using a simple jQuery UI method: selectable. A selectable element can be selected individually or in a group. You can select multiple elements that are contiguous by dragging a box (known as lasso) with the mouse over the elements. You can select multiple elements, especially which are not contiguous, by clicking each of them holding the Ctrl key. You can also control the behavior of the element while being selected if you want using a number of options and methods. You need to specify the options as key/value pairs and you can directly call methods inside the selectable method.
Syntax
The syntax of selectable method is
$(selector).selectable();
OR
$(selector).selectable({option1:value1, option2:value2,……..});
OR
$(selector).selectable("method_name", [parameters]);
The options will set the behaviour of the element while being selected. The option and its corresponding value are set as key value pairs. While specifying actions using method names, we need to pass the method name along with its parameters (if any) to the draggable method. We will see all the popular options and methods one by one with the help of code samples. While trying the code samples, make sure that you add reference to the jQuery UI related files (one .css file and two .js files) correctly.
The selectable() Method
Open a new file and add the following lines of code:
<!DOCTYPE html>
  <html>
   <head>
     <title>Sample Code</title>
     <link rel="stylesheet" href="jquery-ui.min.css">
     <script src="jquery.js"></script>
     <script src="jquery-ui.min.js"></script>
     <style>
        ol
        {
     list-style-type:none;
        }
        li
        {
       height:30px;
       width: 100px;
       border:1px solid black;
       background-color:pink;
       margin:2px;
       font-size:20px;
        }
        #selectme .ui-selecting
        {
       background:aqua;
        }
        #selectme .ui-selected
        {
       background: gray;
       color: white;
       font-size:30px;
        }
     </style>
     <script>
       $(document).ready(function()
       {
    $("#selectme").selectable();
       });
     </script>
  </head>
  <body>
    <ol id="selectme">
      <li class="ui-widget-content">Item 1</li>
      <li class="ui-widget-content">Item 2</li>
      <li class="ui-widget-content">Item 3</li>
      <li class="ui-widget-content">Item 4</li>
      <li class="ui-widget-content">Item 5</li>
    </ol>
  </body>
</html>
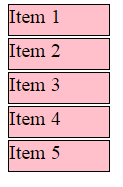
Save the file as index.html. Open it using your browser and you will get a screen like this:
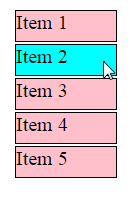
Now just click on any of the item. Once you click the item and before releasing the mouse, you will get a screen like this:
Once you release the mouse button, your screen will look like this:
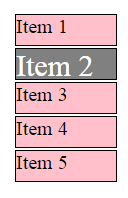
You could see that we have set the style while being selected and after being selected using .ui-selecting and .ui-selected respectively. To select multiple contiguous elements, just drag the mouse over the elements to be selected as shown below:

You could see a black dotted rectangle over the elements while being selected. This is also known as lasso. Once you release the mouse button, you will get a screen like this:
If you want to select multiple non-contiguous elements, then hold down the Ctrl key and click the items that you want to select which will select those elements.
Setting Values to delay, disabled and distance Options
You can delay the selection by setting the value of delay to the time in milliseconds to be delayed. You can make an element non-selectable by setting the value of disabled to true. If you set the value of distance in pixels, the element will be selected only if the mouse moves beyond the specified distance.
Open a new file and add the following lines of code:
<!DOCTYPE html>
<html>
  <head>
    <title>Sample Code</title>
    <link rel="stylesheet" href="jquery-ui.min.css">
    <script src="jquery.js"></script>
    <script src="jquery-ui.min.js"></script>
    <style>
      ol
      {
     list-style-type:none;
     float:left;
      }
      li
      {
     height:30px;
     width: 150px;
     border:1px solid black;
     margin:2px;
     font-size:20px;
      }
      #selectme1 li
      {
         background-color:pink;
      }
      #selectme2 li
      {
         background-color: fuchsia;
      }
      #selectme1 .ui-selecting
      {
         background:aqua;
      }
      #selectme2 .ui-selecting
      {
         background:lime;
      }
      #selectme1 .ui-selected
      {
         background: gray;
         color: white;
         font-size:30px;
      }
      #selectme2 .ui-selected
      {
         background: silver;
         color: white;
         font-size:25px;
      }
   </style>
   <script>
     $(document).ready(function()
     {
    $("#selectme1").selectable({delay:500});
    $("#selectme2").selectable({distance:100});
    $("#btnDisable").click(function(){
        $("#selectme1").selectable({disabled:true});
        alert("The first list is not selectable now");
    });
     });
   </script>
  </head>
  <body>
   <button id="btnDisable">Disable</button><br />
   <ol id="selectme1" class="selectme">
     <li class="ui-widget-content">Item 1</li>
     <li id="donotselect" class="ui-widget-content">Item 2</li>
     <li class="ui-widget-content">Item 3</li>
     <li class="ui-widget-content">Item 4</li>
     <li class="ui-widget-content">Item 5</li>
   </ol>
   <ol id="selectme2" class="selectme">
     <li class="ui-widget-content">Product 1</li>
     <li class="ui-widget-content">Product 2</li>
     <li class="ui-widget-content">Product 3</li>
     <li class="ui-widget-content">Product 4</li>
     <li class="ui-widget-content">Product 5</li>
   </ol>
  </body>
</html>
Save the file as options1.html. Open it using your browser and you will get a screen like this:
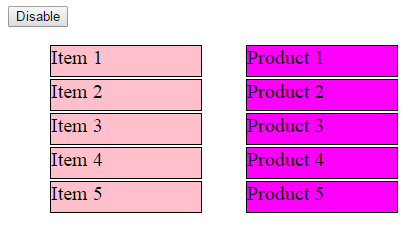
Try selecting any of the element from the Item 1 to Item 5. You could find that the selection starts only after half a second. So, you cannot select even an individual element by just clicking on it. You will have to drag the mouse over the element at least for half a second to get it selected. Try selecting any of the element from Product 1 to Product 5. You could find that the element gets selected only if you drag the mouse at least 75 pixels (half the width of the element as the width is set to 150px). Try selecting the elements in the first list (Item 1 through Item 5) after clicking the Disable button. You could find that the elements are not selectable anymore.
Setting Values to cancel, filter and tolerance Options
You can prevent certain elements from being selected by setting the value of cancel option to the id or class of the element. The filter option is just the opposite of cancel option. You can specify which elements are to be selectable by setting the value of filter option to the id or class of the element. You can decide when an element needs to be considered selected using the tolerance option. The two possible values are fit and touch and the default value is touch.
Open a new file and add the following lines of code:
<!DOCTYPE html>
<html>
  <head>
    <title>Sample Code</title>
    <link rel="stylesheet" href="jquery-ui.min.css">
    <script src="jquery.js"></script>
    <script src="jquery-ui.min.js"></script>
    <style>
      ol
      {
     list-style-type:none;
     float:left;
      }
      li
      {
     height:30px;
     width: 150px;
     border:1px solid black;
     margin:2px;
     font-size:20px;
      }
      #selectme1 li
      {
         background-color:pink;
      }
      #selectme2 li
      {
     background-color: fuchsia;
      }
      #selectme1 .ui-selected
      {
     background: gray;
     color: white;
     font-size:30px;
      }
      #selectme2 .ui-selected
      {
     background: silver;
     color: white;
     font-size:25px;
      }
      #selectme1 .ui-selecting
      {
     background:aqua;
      }
      #selectme2 .ui-selecting
      {
     background:lime;
      }
      #selectme3 .ui-selected
      {
     background: aqua;
     font-weight:bold;
      }
      #selectme3 .ui-selecting
      {
    background:lime;
      }
    </style>
    <script>
      $(document).ready(function()
      {
    $("#selectme1").selectable({cancel:"#donotselect"});
    $("#selectme2").selectable({filter:"#filterme"});
    $("#selectme3").selectable({tolerance:"fit"});
       });
    </script>
  </head>
  <body>
    <ol id="selectme1" class="selectme">
      <li class="ui-widget-content">Item 1</li>
      <li id="donotselect" class="ui-widget-content">Item 2</li>
      <li class="ui-widget-content">Item 3</li>
      <li class="ui-widget-content">Item 4</li>
      <li class="ui-widget-content">Item 5</li>
   </ol>
   <ol id="selectme2" class="selectme">
      <li class="ui-widget-content">Product 1</li>
      <li class="ui-widget-content">Product 2</li>
      <li id="filterme" class="ui-widget-content">Product 3</li>
      <li class="ui-widget-content">Product 4</li>
     <li class="ui-widget-content">Product 5</li>
   </ol>
   <ol id="selectme3" class="selectme">
     <li class="ui-widget-content">Book 1</li>
     <li class="ui-widget-content">Book 2</li>
     <li class="ui-widget-content">Book 3</li>
     <li class="ui-widget-content">Book 4</li>
     <li class="ui-widget-content">Book 5</li>
   </ol>
  </body>
</html>
Save the file as options2.html. Open it using your browser and you will get a screen like this:
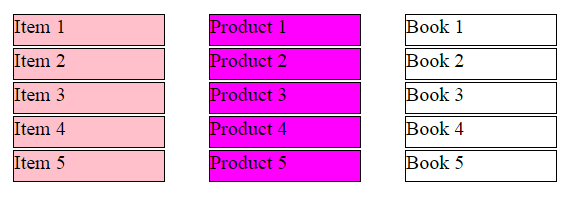
Try selecting the items in the first list (Item 1 through Item 5) and you could find that Item 2 is not selectable. It is because that we have set the value of cancel to the id of Item 2. Try selecting the items in the second list (Product 1 through Product 5) and you could find that only Product 3 is selectable. It is because that we have set the value of filter to the id of Product 3. Try selecting the items in the third list and you could find that the element becomes selectable only when the lasso overlaps the element completely as we set the value of tolerance to fit.
Calling Methods
We can perform an action on the selectable elements by passing the method that performs the action as the parameter of the selectable method. You can remove the selectable functionality completely by calling the destroy method. You can temporarily remove the selectable functionality using the disable method and then again make the element selectable by calling the enable method. You can get the values of all options as an object by calling the option method without passing any parameter. You can get the value of a specific option by calling the method named option with the name of the option as parameter. You can set the value of options by calling the option method and passing the option name and its corresponding value as parameters.
Open a new file and add the following lines of code:
<!DOCTYPE html>
  <html>
   <head>
     <title>Sample Code</title>
     <link rel="stylesheet" href="jquery-ui.min.css">
     <script src="jquery.js"></script>
     <script src="jquery-ui.min.js"></script>
     <style>
       ol
       {
      list-style-type:none;
      float:left;
       }
       li
       {
      height:30px;
      width: 150px;
      border:1px solid black;
      margin:2px;
      font-size:20px;
       }
       #selectme1 li
       {
      background-color:pink;
       }
       #selectme2 li
       {
      background-color: fuchsia;
       }
       #selectme1 .ui-selected
       {
      background: gray;
      color: white;
      font-size:30px;
       }
       #selectme2 .ui-selected
       {
      background: silver;
      color: white;
      font-size:25px;
       }
       #selectme1 .ui-selecting
       {
      background:aqua;
       }
       #selectme2 .ui-selecting
       {
      background:lime;
       }
       #selectme3 .ui-selected
       {
      background: aqua;
      font-weight:bold;
       }
       #selectme3 .ui-selecting
       {
      background:lime;
       }
    </style>
     <script>
         $(document).ready(function()
         {
          $("#selectme1").selectable();
          $("#btnDisable").click(function(){
          $("#selectme1").selectable('disable');
          alert("The first list is not selectable now!!!");
         });
          $("#btnEnable").click(function(){
          $("#selectme1").selectable('enable');
          alert("The first list is selectable now!!!");
        });
        $("#selectme2").selectable();
        $("#btnDestroy").click(function(){
        $("#selectme2").selectable('destroy');
        alert("The second list is not  selectable anymore!!!");
        });
        $("#selectme3").selectable({delay:300});
        $("#btnGetSet").click(function(){
        var time = $("#selectme3").selectable('option', 'delay');
        alert("You have to wait " + time + " milliseconds to start selecting items in the third list!!!");
        $("#selectme3").selectable('option', "cancel", "#cancelme");
        alert("Now the fourth item in the third list is not selectable!!!");
            });
        });
     </script>
   </head>
   <body>
    <button id="btnDisable">Disable</button>
    <button id="btnEnable">Enable</button>
    <button id="btnDestroy">Destroy</button>
    <button id="btnGetSet">Get & Set Values</button><br />
    <ol id="selectme1" class="selectme">
      <li class="ui-widget-content">Item 1</li>
      <li class="ui-widget-content">Item 2</li>
      <li class="ui-widget-content">Item 3</li>
      <li class="ui-widget-content">Item 4</li>
      <li class="ui-widget-content">Item 5</li>
    </ol>
    <ol id="selectme2" class="selectme">
      <li class="ui-widget-content">Product 1</li>
      <li class="ui-widget-content">Product 2</li>
      <li class="ui-widget-content">Product 3</li>
      <li class="ui-widget-content">Product 4</li>
      <li class="ui-widget-content">Product 5</li>
    </ol>
    <ol id="selectme3" class="selectme">
      <li class="ui-widget-content">Book 1</li>
      <li class="ui-widget-content">Book 2</li>
      <li class="ui-widget-content">Book 3</li>
      <li id="cancelme" class="ui-widget-content">Book 4</li>
      <li class="ui-widget-content">Book 5</li>
    </ol>
   </body>
</html>
Save the file as callingmethods.html. Open it using your browser and you will get a screen like this:
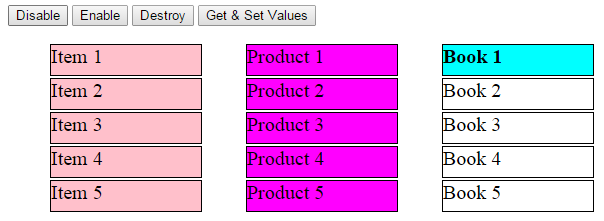
Try selecting the items in the first list (Item 1 through Item 5) and you will be able to select items. Again try after clicking the Disable button and you will not be able to select the items and you could select them again if you click the Enable button. If you click the Destroy button, the second list will not be selectable anymore which were previously selectable. Click the Get & Set Values button which will return the value of delay option of the third list in an alert box. It will also set the value of cancel option to the id of the fourth item that will make the Book 4 element non-selectable.
Managing Events on Moving Elements
Different events get triggered in different stages of a selectable element. The create event will be triggered when a selectable element is created or when the element becomes selectable. The start event is triggered at the beginning of the select operation. The stop event is triggered at the end of the select operation. The unselecting event is triggered when an element is being unselected. The unselected event is triggered when an element is unselected. The selecting event is triggered when an element is being selected. The selected event is triggered when an element is selected.
Open a new file and add the following lines of code:
<!DOCTYPE html>
  <html>
   <head>
     <title>Sample Code</title>
     <link rel="stylesheet" href="jquery-ui.min.css">
     <script src="jquery.js"></script>
     <script src="jquery-ui.min.js"></script>
     <style>
       ol
       {
      list-style-type:none;
      float:left;
       }
       li
       {
      height:30px;
      width: 150px;
      border:1px solid black;
      margin:2px;
      background-color:pink;
      font-size:20px;
       }
     </style>
     <script>
        $(document).ready(function()
        {
       $("#btnSelectable").click(function(){
       $("#selectme1").selectable({create:function(){
         alert("The items are now selectable!!!")
       },
       selecting:function(event, ui){
        $(ui.selecting).css("background-color", "aqua");
       },
       selected:function(event, ui){
        $(ui.selected).css("background-color", "gray");
       },
       stop:function(event, ui){
            alert("Selection over");
        }});
     });
       });
     </script>
   </head>
   <body>
     <button id="btnSelectable">Make Selectable</button><br />
     <ol id="selectme1" class="selectme">
       <li class="ui-widget-content">Item 1</li>
       <li class="ui-widget-content">Item 2</li>
       <li class="ui-widget-content">Item 3</li>
       <li class="ui-widget-content">Item 4</li>
       <li class="ui-widget-content">Item 5</li>
     </ol>
   </body>
</html>
Save the file as eventmanagement.html. Open it using your browser and you will get a list of items that are not selectable. Once you click the button, the list of items become selectable. You could find different events getting triggered for events including create, selecting, selected and stop.
Summary
In this tutorial, we have seen how to make an HTML element resizable using jQuery UI writing only a couple of lines of code. We have also seen a number of options, methods and events that can be used to change the behaviour of the element while resizing.