
Introduction
You can make a number of HTML elements sortable or reorder-able within a list or grid using a simple method: sortable. You just have to click and drag a sortable element to a new position within the list or grid so that the remaining elements will adjust to fit. Of course, all sortable elements are draggable by default. You can also control the behavior of the element during sorting if you want using a number of options and methods. You need to specify the options as key/value pairs and you can directly call the methods inside the sortable method.
Syntax
The syntax of sortable method is
$(selector).sortable();
OR
$(selector).sortable({option1:value1, option2:value2,……..});
OR
$(selector).sortable("method_name", [parameters]);
The options will set the behavior of the element while being sorted. The option and its corresponding value are set as key value pairs. While specifying actions using method names, we need to pass the method name along with its parameters (if any) to the sortable method. We will see all the popular options and methods one by one with the help of code samples. While trying the code samples, make sure that you add reference to the jQuery UI related files (one .css file and two .js files) correctly.
The sortable() Method
Open a new file and add the following lines of code:
<!DOCTYPE html>
<html>
<head>
<title>Sample Code</title>
<link rel="stylesheet" href="jquery-ui.min.css">
<script src="jquery.js"></script>
<script src="jquery-ui.min.js"></script>
<style>
ul
{
list-style-type: none;
width: 20%;
}
li
{
margin: 3px;
font-size: 20px;
border:2px solid black;
background-color: #FFCCFF;
width:20%;
text-align: center;
}
#sortable li span
{
position: absolute;
margin-left: -1.3em;
}
</style>
<script>
$(document).ready(function(){
$("#sortable").sortable();
});
</script>
</head>
<body>
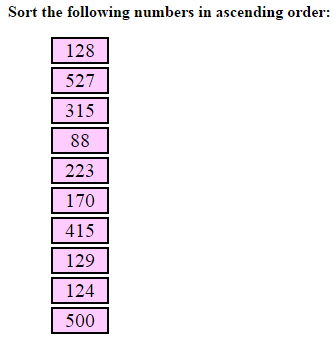
<b>Sort the following numbers in ascending order:</b><br />
<ul id="sortable">
<li>128</li>
<li>527</li>
<li>315</li>
<li>88</li>
<li>223</li>
<li>170</li>
<li>415</li>
<li>129</li>
<li>124</li>
<li>500</li>
</ul>
</body>
</html>
Save the file as index.html. Open it using your browser and you will get a screen like this:
You can drag any number and drop it to a new position like this:
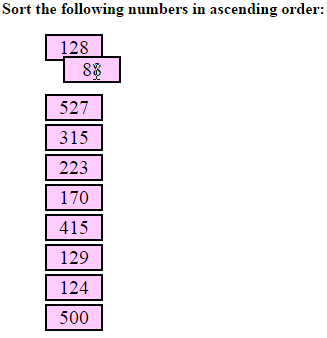
By doing this repeatedly, the entire list of items can be sorted.
Setting Values to axis, containment, cursor, distance and delay Options
You can control the direction of the move, that is whether the items can be dragged only horizontally or vertically, by setting value of axis parameter. The possible values are x and y. If you set the value of axis to x, then the element will move only horizontally and if the value is y, then the element will move only vertically. You can set boundary for the sortable elements using containment option so that the sortable items are constrained to the specified boundary while dragging. You can change the style of the cursor while the element is being sorted using cursor option. Any of the CSS cursor styles can be set as the value of cursor option. Some of the examples are crosshair, pointer, help and so on. You can set the value of delay option to time in milliseconds in order to define when sorting should start. You can set the value of distance option to distance in milliseconds so that sorting will not start until the mouse is dragged more than the specified distance.
Open a new file and add the following lines of code:
<!DOCTYPE html>
<html>
  <head>
    <title>Sample Code</title>
    <link rel="stylesheet" href="jquery-ui.min.css">
    <script src="jquery.js"></script>
    <script src="jquery-ui.min.js"></script>
    <style>
      ul
      {
        list-style-type: none;
        width: 200px;
      }
      li
      {
        margin: 3px;
        font-size: 20px;
        border:2px solid black;
        width:200px;
        text-align: center;
      }
      #box
      {
        border:3px solid black;
        width:300px;
        height:250px;
        margin:4px;
      }
      #sortable-1 li
      {
        background-color: #A3E0FF;
      }
      #sortable-2 li
      {
        background-color: #FFB2FF;
      }
    </style>
    <script>
      $(document).ready(function(){
      $("#sortable-1").sortable({containment:"#box", distance:20});
      $("#sortable-2").sortable({axis:"y",cursor:"pointer", delay:1000});
      });
    </script>
  </head>
  <body>
    First List:
    <div id="box">
      <ul id="sortable-1" class="sortable">
        <li>Product 1</li>
        <li>Product 2</li>
        <li>Product 3</li>
        <li>Product 4</li>
        <li>Product 5</li>
      </ul>
    </div><br />
    Second List:
      <ul id="sortable-2" class="sortable">
        <li>Item 1</li>
        <li>Item 2</li>
        <li>Item 3</li>
        <li>Item 4</li>
        <li>Item 5</li>
     </ul>
  </body>
</html>
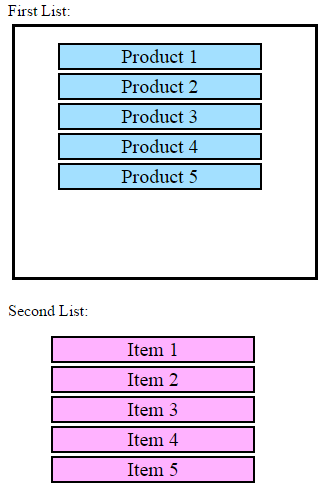
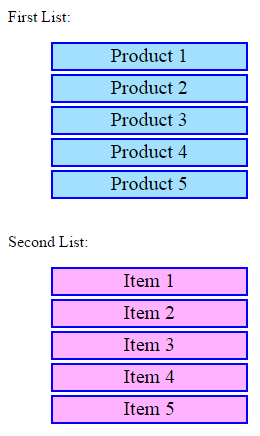
Save the file as options1.html. Open it using your browser and you will get a screen like this:
Try moving the items in the first list. You could see that as we have set the boundary, the items in the first list cannot be dragged out of the outer big black box. As soon as the item touches the boundary of the big box, it will stop like this:
You could also find that as we have set the distance as 20, the element starts moving only if the mouse moves at least 20 pixels. Now try sorting the items in the second list. As we have set the value of axis to x, you could find that the sortable items move only vertically. The elements in the second list starts moving only after 1 second you try moving them as we have set the value of delay to 1000 milliseconds. Moreover, you could find that the style of the cursor changes as soon as the element starts moving like this:

Setting Values to placeholder, scroll, opacity, revert, tolerance and grid Options
You can set the value of placeholder to a CSS class name so that the empty space displayed while the sortable element is being dragged will have the properties specified in the CSS class. If you set the value of scroll to false, the scroll ends when page comes to an edge. The opacity of the helper can be set by specifying the value of opacity option. If you set the value of revert option, the sortable element reverts to its new position using a smooth animation. The value can be either true or false or a number in milliseconds that sets the duration of animation. The value of tolerance decides when an element should be considered dropped in the new position. The value can be either intersect or pointer. If the value is intersect, if the item overlaps the other item by at least 50%, the item will be dropped there and if the value is pointer, as soon as the mouse pointer overlaps the other item, it will be dropped. You can decide how many pixels the item should move while being sorted by setting the value of grid option to [x, y].
Open a new file and add the following lines of code:
<!DOCTYPE html>
<html>
  <head>
    <title>Sample Code</title>
    <link rel="stylesheet" href="jquery-ui.min.css">
    <script src="jquery.js"></script>
    <script src="jquery-ui.min.js"></script>
    <style>
      ul
      {
        list-style-type: none;
        width:15%;
      }
      li
      {
        margin: 3px;
        font-size: 20px;
        border:2px solid blue;
        text-align: center;
        height:25px;
      }
      #sortable-1 li
      {
        background-color: #A3E0FF;
      }
      #sortable-2 li
      {
        background-color: #FFB2FF;
      }
      #sortable-1 .myDupe
      {
        margin: 3px;
        border:2px solid black;
        background-color: gray;
      }
    </style>
    <script>
      $(document).ready(function(){
      $("#sortable-1").sortable({placeholder:"myDupe", revert:1000, grid:[20,20]});
      $("#sortable-2").sortable({scroll:false, opacity:0.5, tolerance:"pointer"});
      });
    </script>
   </head>
   <body>
     First List:
     <ul id="sortable-1">
         <li>Product 1</li>
         <li>Product 2</li>
         <li>Product 3</li>
         <li>Product 4</li>
         <li>Product 5</li>
     </ul>
     <br />
     Second List:
    <ul id="sortable-2">
         <li>Item 1</li>
         <li>Item 2</li>
         <li>Item 3</li>
         <li>Item 4</li>
         <li>Item 5</li>
    </ul>
  </body>
</html>
Save the file as options2.html. Open it using your browser and you will get a screen like this:
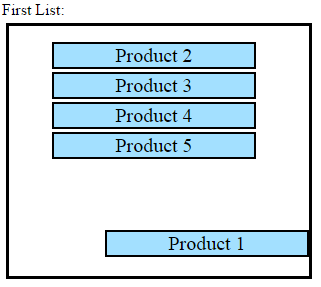
Try sorting the items in the first list and when you move an item, you could see a gray box in the place of the item you dragged as in the following image and it is because that we have set the value of placeholder option to a CSS class name.

Try sorting the items in the first list and if you drag the item towards the right bottom, you could find the scrollbar. But if try the same with items in the second list, you could not find the scrollbar moving as much as in the previous case. This is because that as we have set the value of scroll of the second sortable list to false, scrolling is disabled in the second list. When an item in the second list is sorted, you could see that it becomes transparent while being moving. Try sorting the item in the first list to see the animation effect when you release the mouse button. You could also see that items in the first list moves 20 pixels towards right and 20 pixels downwards per each move as we have set the value of grid to [20,20].
Setting Values to cancel, items, connectWith and dropOnEmpty Options
You can prevent sorting on certain elements by setting the value of cancel to its name or id. The items option is just the opposite of cancel and only the items identified by items option will become sortable. You can move items in one list into other lists by setting the value of the connectWith. If you set the value of dropOnEmpty option of a sortable element to false, items from this sortable can't be dropped on an empty connect sortable list.
Open a new file and add the following lines of code:
<!DOCTYPE html>
<html>
  <head>
    <title>Sample Code</title>
    <link rel="stylesheet" href="jquery-ui.min.css">
    <script src="jquery.js"></script>
    <script src="jquery-ui.min.js"></script>
    <style>
      ul
      {
        list-style-type: none;
        width:50%;
      }
      #sortable-3, #sortable-4
      {
        height:220px;
        border:3px solid green;
      }
      li
      {
        margin: 3px;
        font-size: 20px;
        border:2px solid blue;
        text-align: center;
        height:25px;
      }
      #sortable-1 li, #sortable-4 li
      {
        background-color: #A3E0FF;
      }
      #sortable-2 li, #sortable-3 li
      {
        background-color: #FFB2FF;
      }
      div
      {
        float:left;
        width:450px;
      }
    </style>
    <script>
      $(document).ready(function(){
      $("#sortable-1").sortable({cancel:"#notsortable"});
      $("#sortable-2").sortable({items:".sortable"});
      $("#sortable-3").sortable({connectWith:"#sortable-4"});
      $("#sortable-4").sortable({connectWith:"#sortable-3",dropOnEmpty:false});
      });
    </script>
  </head>
  <body>
    <div>
      First List:
      <ul id="sortable-1">
        <li>Product 1</li>
        <li>Product 2</li>
        <li id="notsortable">Product 3(Not Sortable)</li>
        <li>Product 4</li>
        <li>Product 5</li>
      </ul>
      <br />
      Second List:
      <ul id="sortable-2">
        <li class="sortable">Item 1 (Sortable)</li>
        <li>Item 2</li>
        <li class="sortable">Item 3 (Sortable)</li>
        <li>Item 4</li>
        <li class="sortable">Item 5 (Sortable)</li>
      </ul>
    </div>
    <div>
      Third List:
       <ul id="sortable-3">
         <li>Product 1</li>
         <li>Product 2</li>
         <li>Product 3</li>
       </ul>
       <br />
      Fourth List:
       <ul id="sortable-4">
          <li>Item 1</li>
          <li>Item 2</li>
          <li>Item 3</li>
       </ul>
    </div>
  </body>
</html>
Save the file as options3.html. Open it using your browser and you will get a screen like this:
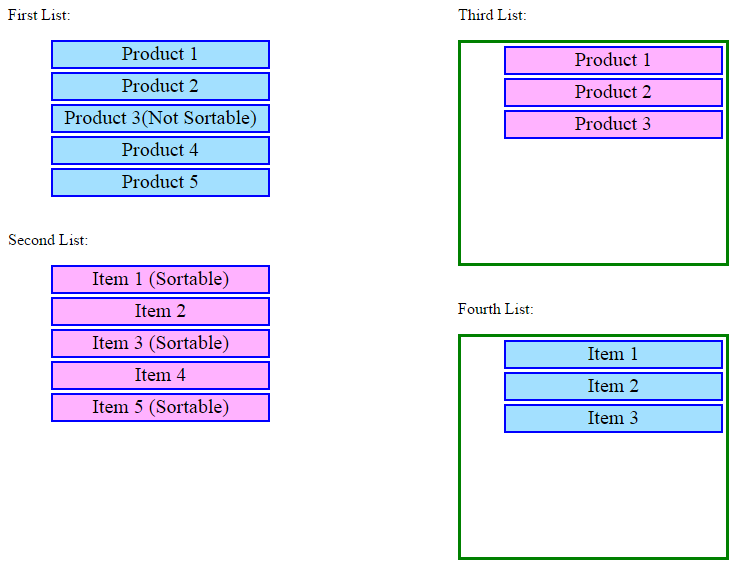
Try sorting the items in the first list and you could find that Product 3 is not sortable as wet the value of cancel to its id. Try sorting the items in the second list and you could find that only Item 1, Item 3 and Item 5 are sortable as we have set the value of items to their class name.
You could move the items in the third list to fourth list and also vice versa because we have set the value of connectWith. Now make the third list empty by moving all the items in the third list to fourth list like this:
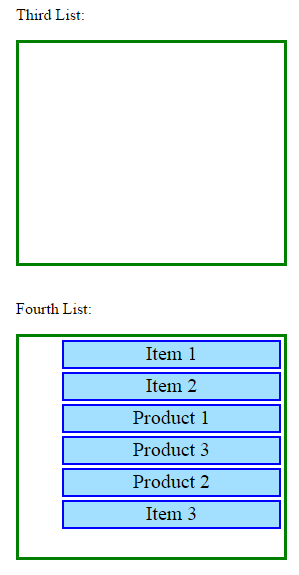
Now try moving the items in the fourth list back to third list and you will not be able to do this as we set the value of dropOnEmpty to false. If you do the reverse, that is make the fourth list empty and try moving the items in the third list to fourth list, you will be able to do it.
Calling Methods
We can perform an action on the sortable elements by passing the method that performs the action as the parameter of the draggable method. You can remove the sortable functionality completely by calling the destroy method. You can temporarily remove the sortable functionality using the disable method and then again make the element sortable by calling the enable method. You can get the values of all options as an object by calling the option method without passing any parameter. You can get the value of a specific option by calling the method named option with the name of the option as parameter. You can set the value of options by calling the option method and passing the option name and its corresponding value as parameters.
Open a new file and add the following lines of code:
<!DOCTYPE html>
<html>
  <head>
    <title>Sample Code</title>
    <link rel="stylesheet" href="jquery-ui.min.css">
    <script src="jquery.js"></script>
    <script src="jquery-ui.min.js"></script>
    <style>
      ul
      {
        list-style-type: none;
        width:15%;
      }
      li
      {
        margin: 3px;
        font-size: 20px;
        border:2px solid blue;
        text-align: center;
        height:25px;
      }
      #sortable-1 li
      {
        background-color: #A3E0FF;
      }
      #sortable-2 li
      {
        background-color: #FFB2FF;
      }
    </style>
    <script>
      $(document).ready(function(){
      $("#sortable-1").sortable();
      $("#btnDisable").click(function(){
      alert("The items are not sortable now!!!");
      $("#sortable-1").sortable("disable");
      });
      $("#btnEnable").click(function(){
      alert("The items are now sortable!!!");
      $("#sortable-1").sortable("enable");
      });
      });
   </script>
  </head>
  <body>
    <ul id="sortable-1">
      <li>Product 1</li>
      <li>Product 2</li>
      <li id="notsortable">Product 3</li>
      <li>Product 4</li>
      <li>Product 5</li>
    </ul><br />
    <button id="btnEnable">Enable</button>
    <button id="btnDisable">Disable</button>
  </body>
</html>
Save the file as callingmethods.html. Click the Disable button and try sorting the items. You cannot sort them and they will be again sortable if you click the Enable button.
Managing Events on Sortable Elements
Different events get triggered in different stages of sorting. The create event will be triggered when a sortable is created or when the element is made sortable. The start event is triggered when sorting starts and the stop event is triggered when sorting stops. The out event is triggered when a sortable item is moved away from a sortable list. The over event is triggered when a sortable item is moved into a sortable list. The receive event is triggered when an item from a connected sortable list has been dropped into another list.
Open a new file and add the following lines of code:
<!DOCTYPE html>
<html>
  <head>
    <title>Sample Code</title>
    <link rel="stylesheet" href="jquery-ui.min.css">
    <script src="jquery.js"></script>
    <script src="jquery-ui.min.js"></script>
    <style>
      ul
     {
        list-style-type: none;
        width:15%;
        height:220px;
        border:3px solid green;
     }
     li
     {
       margin: 3px;
       font-size: 20px;
       border:2px solid blue;
       text-align: center;
       height:25px;
     }
     #sortable-1 li
     {
       background-color: #A3E0FF;
     }
     #sortable-2 li
     {
       background-color: #FFB2FF;
     }
    </style>
    <script>
     $(document).ready(function(){
     $("#sortable-1").sortable({connectWith:"#sortable-2",
     stop:function(event,ui){
     $("#result").html("<b>FIRST sortable: STOP sorting</b>");},
     out:function(event,ui){
     $("#result").html("<b>First Sortable: The item is moved away from the sortable list!!!</b>");} });
     $("#sortable-2").sortable({
     start:function(event,ui){
     $("#result").html("<b>Second sortable: START sorting</b>");},
     stop:function(event,ui){
     $("#result").html("<b>Second sortable: STOP sorting</b>");},
     receive:function(event,ui){
     $("#result").html("<b>Item from FIRST sortable is dropped into SECOND sortable!!!</b>");} });
     });
    </script>
  </head>
  <body>
   First List:
    <ul id="sortable-1">
    <li id="1">Product 1</li>
    <li id="2">Product 2</li>
    <li id="3">Product 3</li>
    </ul>
      Second List:
       <ul id="sortable-2">
        <li>Item 1</li>
        <li>Item 2</li>
        <li>Item 3</li>
      </ul>
      <div id="result"></div>
   </body>
</html>
Save the file as eventmanagement.html. Open it using your browser. Try sorting the elements within the first list and within the second list and see the messages displayed below the second list. Try moving the items from the first list into the second list and see the messages.

Summary
In this tutorial, we have seen how to make HTML elements sortable within a list using jQuery UI by writing only a couple of lines of code. We have also seen a number of options, methods and events that can be used to change the behaviour of the element while being sorted.