
For learning android, we need to set up the Android execution environment. Please follow the following steps to install the software required for android application development. You just need an android SDK and Java Development Kit (JDK). To keep the work simple, we shall use an Integrated Development Environment (IDE). You can use any one of them, but I will prefer and recommend using Eclipse for two simple reasons. First reason is that it is very easy to master this platform and second reason is that if you are using eclipse then you can directly download the ADT from the official site and everything would be ready for you. If you are on windows, Mac OS or Linux, doesn’t matters as every flavor has got a compatible Android SDK, JDK and Eclipse respectively.
Java syntax is used for writing code. Android applications are going to run on Dalvik Virtual Machine so whatever development platform you ought to choose it is not going to create any problem. Let’s stop theoretical discussions, and start working. You should have a active internet connection that’s it. Let’s start.
2.1.1 Downloading and Installing Java Development Kit
Let us download and install JDK. I am writing the steps for Windows. For other platforms you have to follow the same procedure. In case of Mac users, there is no need for this step as it is automatically updated be Apple.
- Type “Java JDK” into your browser and hit Enter
- Now open the first link of Oracle.com. If you are feeling lazy to do that don’t worry I am going to make it easy. Just Copy the following link and paste it on your browser. “http://www.oracle.com/technetwork/java/javase/downloads/index.html”
- In other case, hit the JAVA SE downloads.
- It will open up a page like this
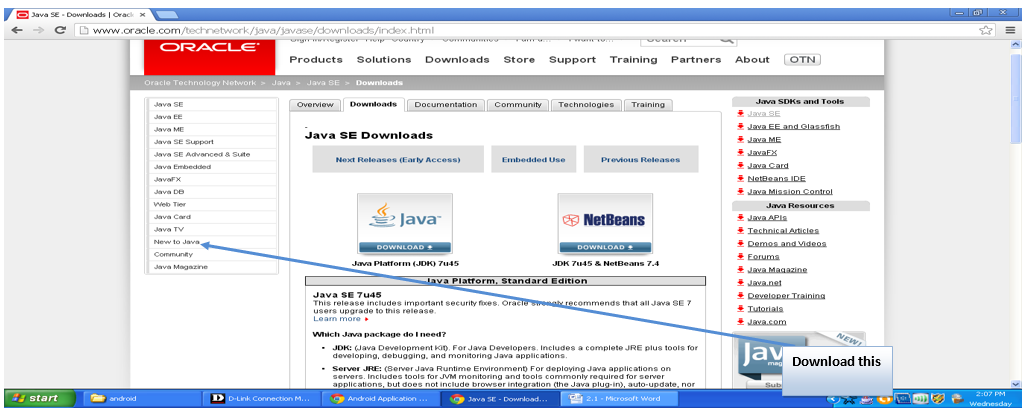
Figure Installing JDK: Home page of oracle.com
You can see java jdk and another jdk & NetBeans. Now we have nothing to do with netbeans. So just click on the standard jdk package. Then you will get a notification about Accepting the License Agreement. Accept it. It looks like this.
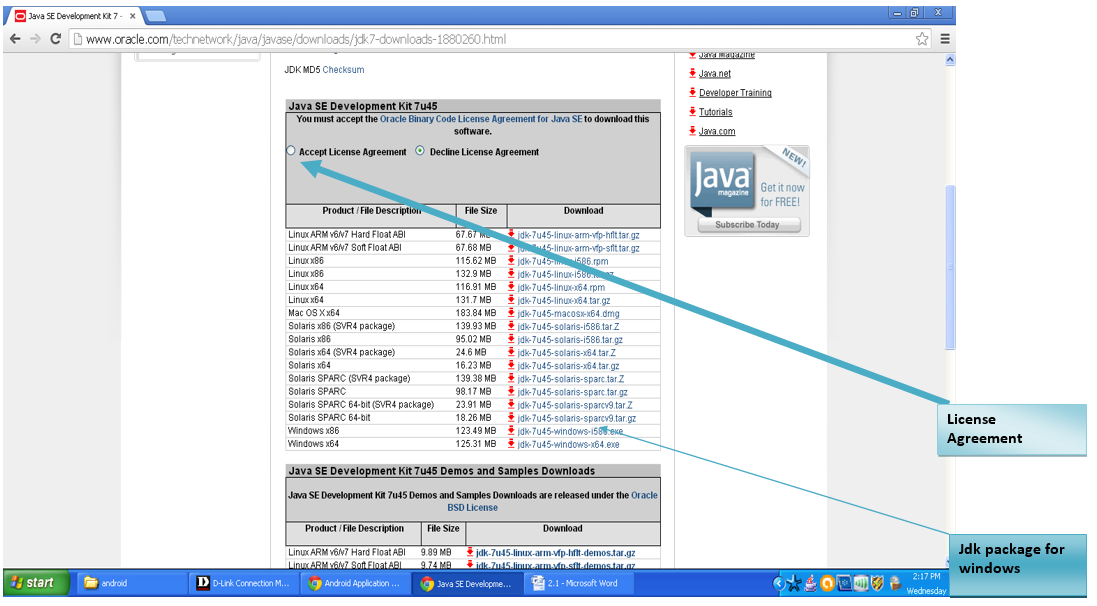
Figure - Accepting the License Agreement
After accepting the license agreement, check the right column saying Download. From here you will download the package. For all platforms you have been given a choice to opt for. For Windows, click on the link and again you will be prompted with a window like this:
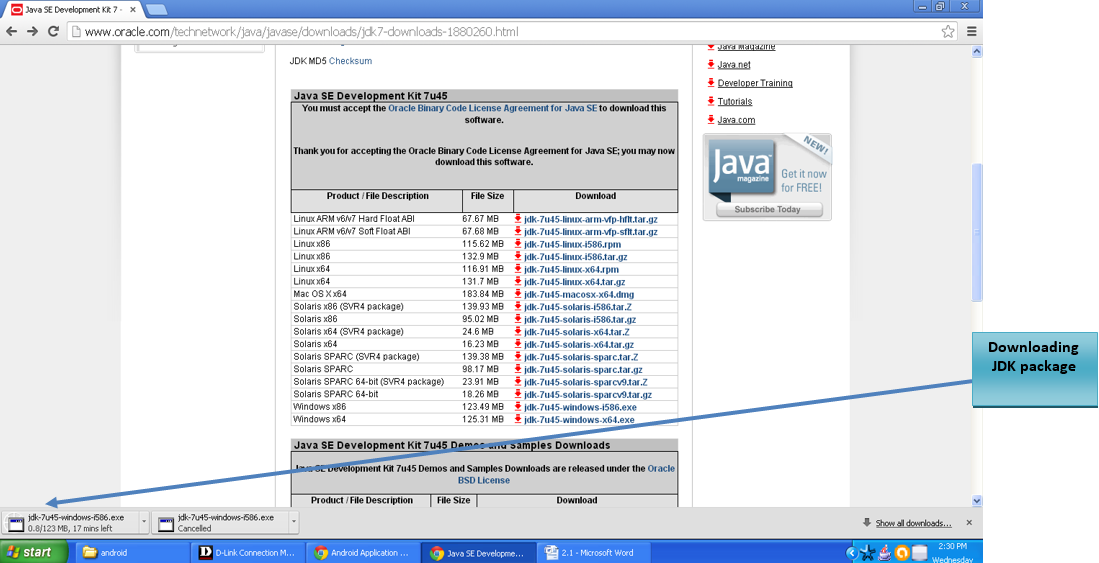
Figure- JAVA JDK is downloading
Since this is already installed in my system so I am going to outline installation procedure. Follow the steps and you are done:
- Install the software like any other piece of software which you regularly do. Let Default settings remain checked and click Next…Next.
- Find the JAVA folder in your hard drive. It will be in a folder called Program Files if it is installed appropriately.
- Find the folder which has a name something like jdk1.6.0_12. Go the folder named bin.
- Find the file named javac . Now you have the location of what you want.
- Open the Environment Variables and create a new user variable. Name it as “PATH” and give the value of “C:\Program Files\Java\jdk1.6.0_ 12\bin (example)”.
- If you had any java program which was not running, now just go to command prompt and compile your program with command javac.
2.1.2 Downloading and Installing Eclipse
Now, we have downloaded and installed JDK. We have to download the IDE called Eclipse. We have two procedures of doing this. First one is as follows. Follow the steps as outlined below.
- Go to the browser and type “Eclipse download”. You should get something like this.
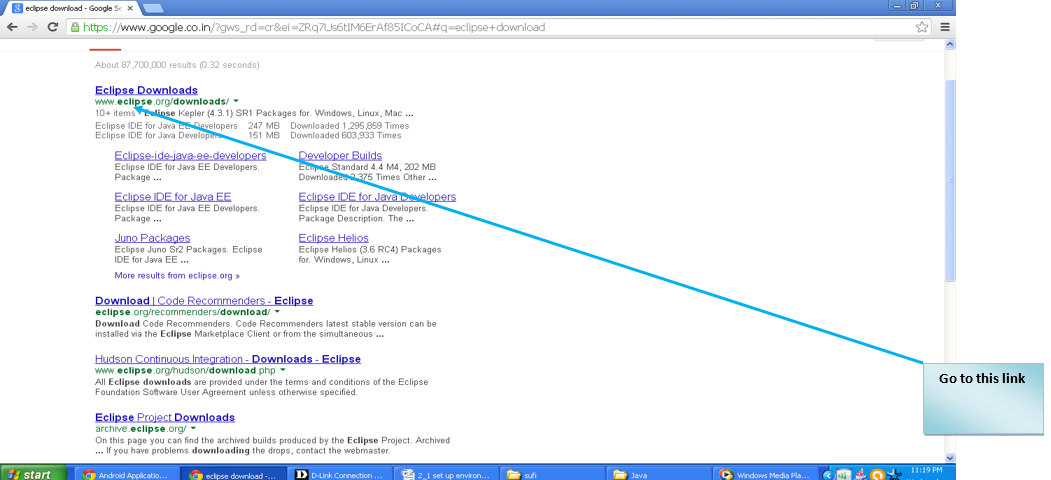
Figure - Eclipse Download link
- Open up the first link showing “Eclipse Downloads”. You would be prompted to with something like this.
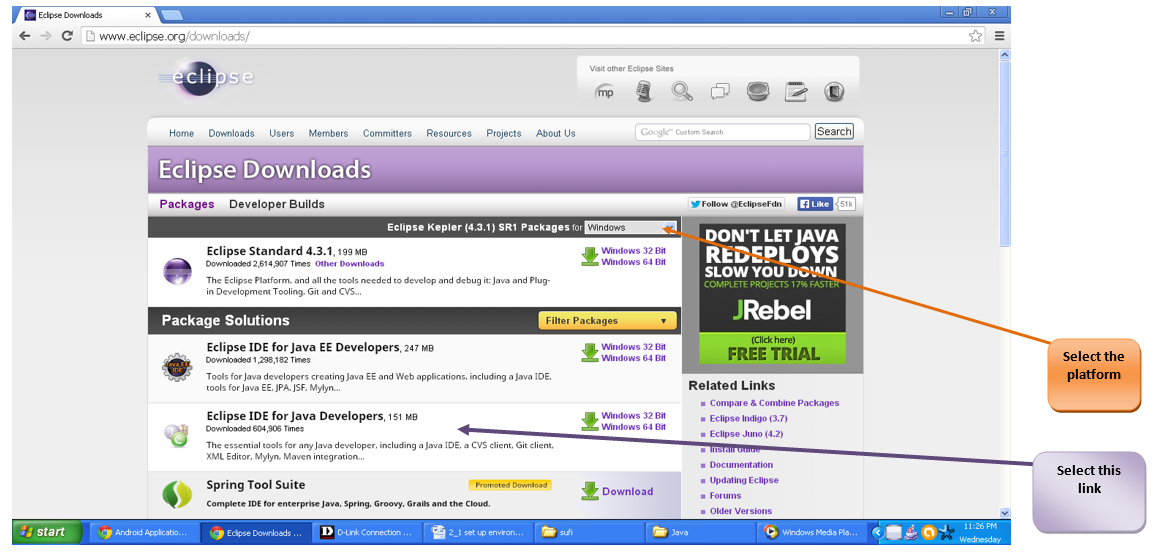
Figure – Eclipse Download Page
- Now select the option saying “Eclipse IDE for Java developers”. Select the platform like windows or Mac, etc and download it. I am using windows so screenshots will be for windows. But don’t worry; everything is same for other platforms. This software is very comprehensive and can be easily configured to other platforms by following the same procedure. So just go and get it!!
- After downloading, find your folder in downloads and move it to your hard drive. Open the folder and run the software.
- It will create a workspace for you where all of your programs will be saved which you are going to develop for android.
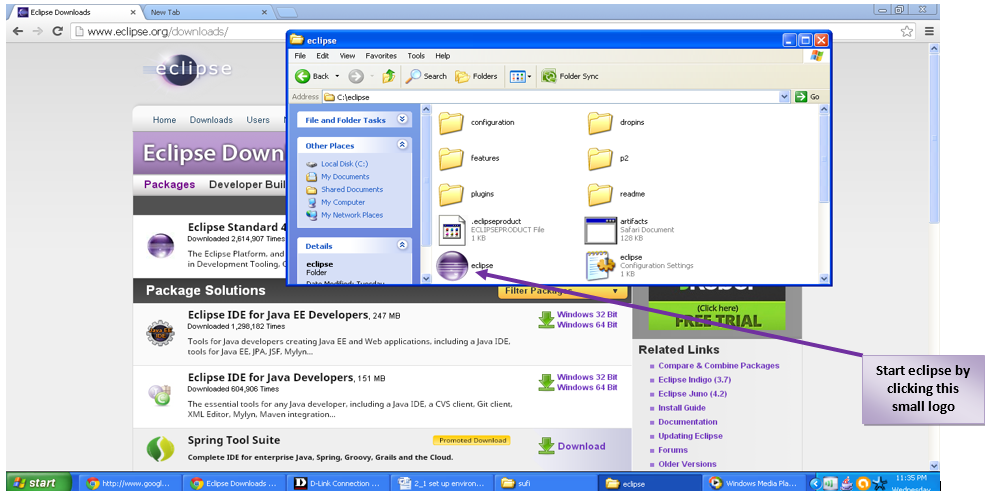
Figure - Start eclipse
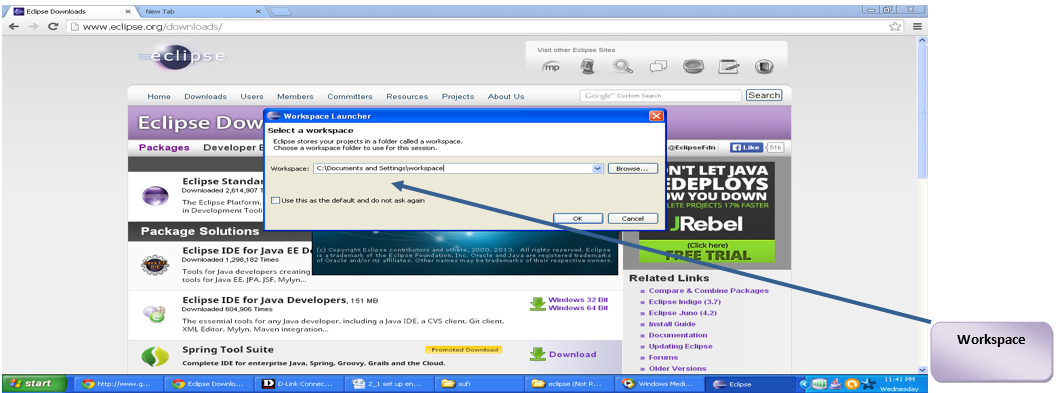
- Now just click “OK”. Hurray!! Eclipse is downloaded and installed successfully.
2.1.3 Downloading ADT Plugin
After this we are about to go to last package download for our environment i.e., android starter package.
- Go to the browser and type “android adt” and you will get the ADT plugin for eclipse to download in the official page of androiddeveloper.com. Now your system will download the package for you which is a ZIP folder.
- Not yet complete!! Yes. Little more effort is required. Unzip the folder and find SDK Manager.exe. Run it. You will need at least one SDK platform. Click android tools, platform tools and any one of the API’s for starting development.
- When you click Install packages button, everything you checked will be downloaded to SDK installation folder.
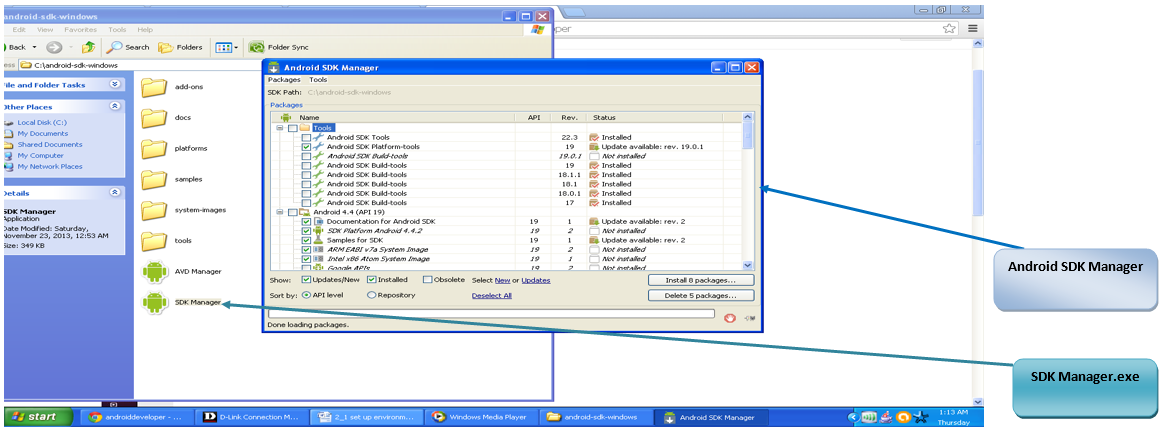
Figure - Android SDK Manager
Now it’s time for our second procedure which is a shortcut. Just go to official site of androiddeveloper.com and download the SDK. Now you have everything with this. Eclipse plus ADT. Press the blue button and enjoy coding.
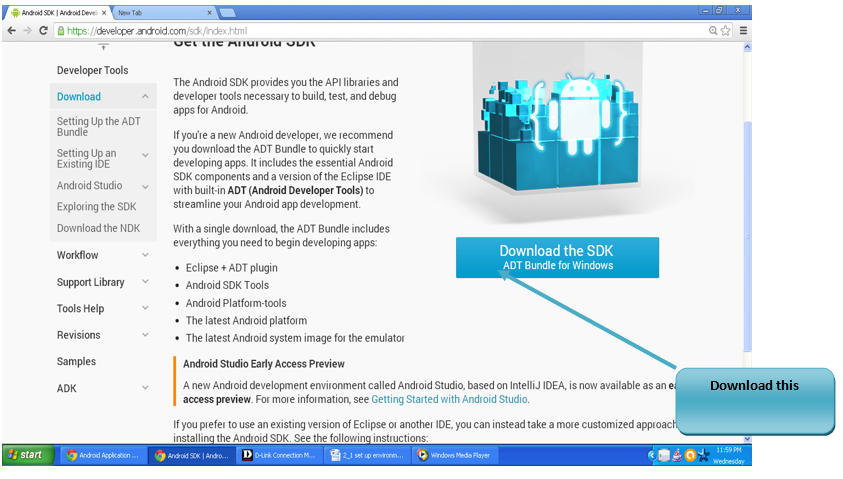
Figure - Download Android SDK
We have downloaded everything we require to start development. Configurations of plugin will be covered in the next module. See you then. According to the official developer site, this is one and all complete package. You just need to unzip it and launch eclipse and everything is done for you.
2.1.4 Installing ADT Plugin
This procedure is the continuation of the first procedure for installing eclipse where you downloaded ADT Plugin externally. Follow the following steps.
- Start Eclipse and open Help->Install New Software.
- Go to top right corner and click on Add.
- In repository dialog, add “ADT plugin” for NAME and for URL, copy the following link: https://dl-ssl.google.com/android/eclipse/.
- Click OK
- Open the Available Software dialog, now check for Developer Tools and click Next.
- List of tools will be downloaded and click Next.
- Accept the license agreement. Press Finish button.
- In case you get a security warning, don’t worry. Go and click OK
- After it is done. Restart Eclipse.
2.1.5 Set up Plugin
Now we need to set up this. After eclipse restarts, do the following:
- Go to the Use Existing SDKs
- Browse the location of android SDK directory downloaded by you.
- Select it and click Next.
You are done. Congratulations!!!