
Today we are going to talk about Android List View which is a view group that displays a list. This list can be scrolled vertically. We will use List Activity instead of Activity class in our code. Anyways, we have two types of list views and they are as follows:
- Android ListView
- Android SpinnerView
4.3.1 Android ListView
Android List view displays a list of items. List so displayed is a vertical long list. List View can be customized by users. Insertion of items is automatic. An adapter is used to squeeze data from sources like an array or database and populates the list.
Loaders can also be used to populate adapter with new cursor and list view then displays the list items.
4.3.1.1 Android List view example
Let us create an example and check out how amazing our own programming could be. Let’s get thorough about the concepts by examining them practically. Open your IDE and create a new project. Name it as you like. I am naming it as BasicViewListExample app. This time you don’t have anything to do with the xml file. We will fill the entire screen with a list programmatically. Please make sure you don’t miss any line. Code the main activity as shown in the following listing:
package com.android.tution.BasicViewList;

import android.app.ListActivity;
import android.os.Bundle;
import android.view.Menu;
import android.view.View;
import android.widget.ArrayAdapter;
import android.widget.ListView;
import android.widget.Toast;

public class MainActivity extends ListActivity {

       String[] fruits = { "Apple", "Orange", "Grapes", "Mango", "Peach",
            "Cherry", "Jackfruit", "Banana", "Guava", "Custard Apple",
            "Black berry", "Cranberry", "Pomegranate", "Pineapple", "Cherry"};

       @Override
       public void onCreate(Bundle savedInstanceState) {
              super.onCreate(savedInstanceState);
              // setContentView(R.layout.activity_main);

              ListView listView = getListView();
              listView.setChoiceMode(2);
              listView.setTextFilterEnabled(true);

              setListAdapter(new ArrayAdapter<String>(this,
                android.R.layout.simple_list_item_checked, fruits));
        }

        public void onListItemClick(ListView parent, View v, int position, long id) {

               parent.setItemChecked(position, parent.isItemChecked(position));
               Toast.makeText(this, "You have selected " + fruits[position],
                       Toast.LENGTH_SHORT).show();
        }
        @Override
        public boolean onCreateOptionsMenu(Menu menu) {
            // Inflate the menu; this adds items to the action bar if it is present.
            getMenuInflater().inflate(R.menu.main, menu);
            return true;
        }
}
Figure - Main activity file of Android Listview app
Hey you are done. Guess what, now you can check multiple times, each time you click an item a message is popped up and you can search item by typing the keywords in your keyboard. Let us check it out one-by one.
Run your app in a suitable emulator.

Figure - Toast message after Apple is selected
Now click on the items beside the checks. Each time you check an item, a message is displayed about the selection and your selection would be preserved. It might not be looking very useful to you at this moment but it will be useful when you plan to create some serious apps. I am a fruit lover and hence am making an array of fruits. You can make any array of your wish. It will work perfectly in the same way as it is with my fruits list.
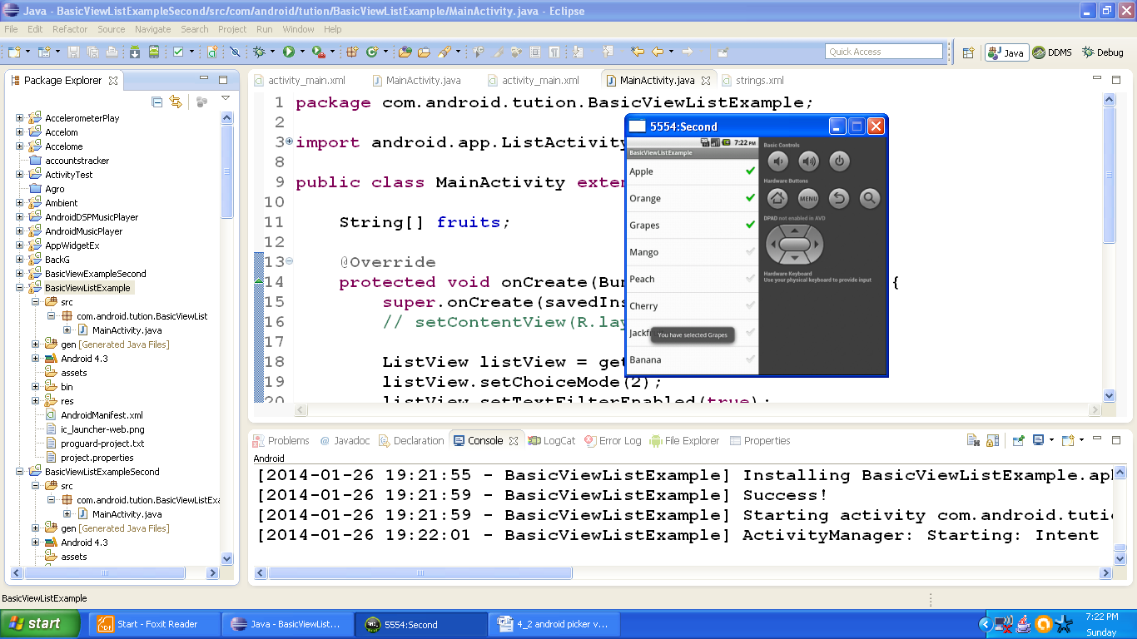
Figure - multiple items are selected
Now type keywords you intend to search for. List will be displayed in front of you. All the strings matching that keyword would be displayed on screen.
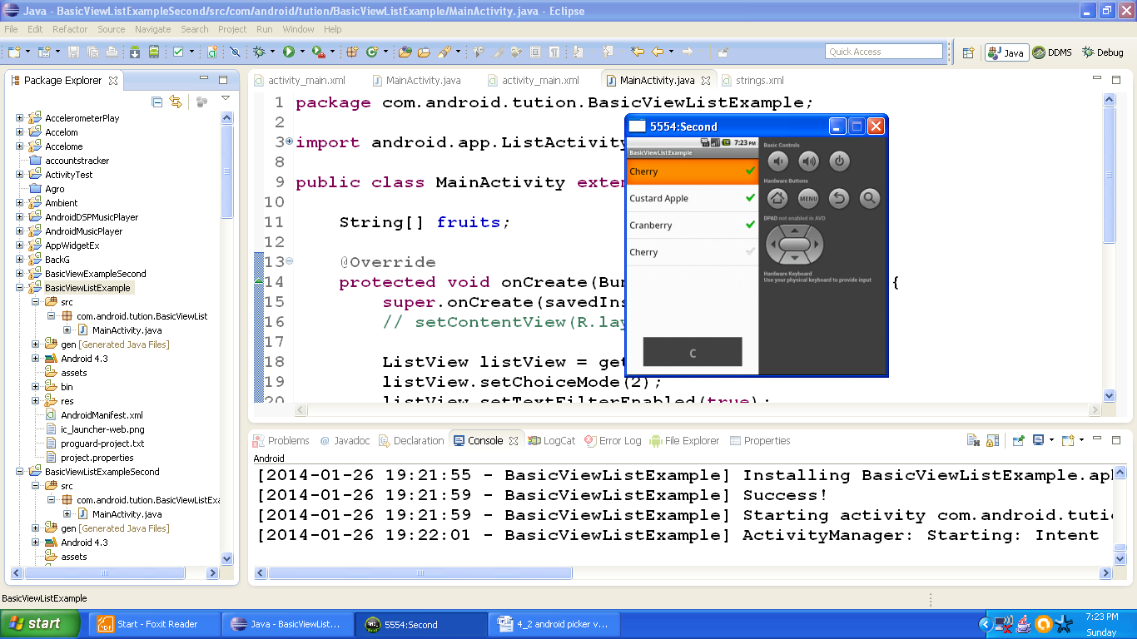
Figure - Strings matching the keyword
Just for a safer execution, cross check the manifest file of your app with the following listing:
<?xml version="1.0" encoding="utf-8"?>
<manifest xmlns:android="http://schemas.android.com/apk/res/android"
    package="com.android.tution.BasicViewList"
    android:versionCode="1"
    android:versionName="1.0" >

    <uses-sdk
        android:minSdkVersion="8"
        android:targetSdkVersion="18" />

    <application
        android:allowBackup="true"
        android:icon="@drawable/ic_launcher"
        android:label="@string/app_name"
        android:theme="@style/AppTheme" >
        <activity
            android:name="com.android.tution.BasicViewList.MainActivity"
            android:label="@string/app_name" >
            <intent-filter>
                <action android:name="android.intent.action.MAIN" />

                 <category android:name="android.intent.category.LAUNCHER" />
            </intent-filter>
        </activity>
    </application>
Figure - manifest file of Android ListView example
There is another way of populating list. In this case, you have to save the array in database or strings.xml file. We will use the strings.xml folder. Create a new project and name it as you like. I am naming it as BasicViewListExampleSecond app. Open the res folder and go to file saying strings.xml, open it and code it as shown below ;
<?xml version="1.0" encoding="utf-8"?>
<resources>
     <string name="app_name">BasicViewListExampleSecond</string>
     <string name="action_settings">Settings</string>
     <string name="hello_world">Hello world!</string>

     <string-array name="fruits_array">
        <item>Apple</item>
        <item>Orange</item>
        <item>Grapes</item>
        <item>Jackfruit</item>
        <item>Banana</item>
        <item>Cherry</item>
        <item>Pomegranate</item>
        <item>Mango</item>
        <item>Cranberry</item>
        <item>Blackberry</item>
        <item>Peach</item>
        <item>Custard Apple</item>
        <item>Guava</item>
    </string-array>

</resources>
Figure - strings.xml file
Now open your main activity file and code it as shown in the following listing:
package com.android.tution.BasicViewListExample;

import android.app.ListActivity;
import android.os.Bundle;
import android.view.Menu;
import android.widget.ArrayAdapter;
import android.widget.ListView;

public class MainActivity extends ListActivity {

        String[] fruits;

        @Override
        protected void onCreate(Bundle savedInstanceState) {
             super.onCreate(savedInstanceState);
             // setContentView(R.layout.activity_main);

             ListView listView = getListView();
             listView.setChoiceMode(2);
             listView.setTextFilterEnabled(true);

             fruits = getResources().getStringArray(R.array.fruits_array);

             setListAdapter(new ArrayAdapter<String>(this,
                   android.R.layout.simple_list_item_checked, fruits));
         }

         @Override
         public boolean onCreateOptionsMenu(Menu menu) {
               // Inflate the menu; this adds items to the action bar if it is present.
               getMenuInflater().inflate(R.menu.main, menu);
               return true;
         }
}
Figure - main activity file of second approach
Cross check the manifest file of your app for any modification with the following listing:
<?xml version="1.0" encoding="utf-8"?>
<manifest xmlns:android="http://schemas.android.com/apk/res/android"
    package="com.android.tution.BasicViewListExample"
    android:versionCode="1"
    android:versionName="1.0" >

    <uses-sdk
        android:minSdkVersion="8"
        android:targetSdkVersion="18" />

        <application
            android:allowBackup="true"
            android:icon="@drawable/ic_launcher"
            android:label="@string/app_name"
            android:theme="@style/AppTheme" >
            <activity
                android:name="com.android.tution.BasicViewListExample.MainActivity"
                android:label="@string/app_name" >
                <intent-filter>
                    <action android:name="android.intent.action.MAIN" />

                    <category android:name="android.intent.category.LAUNCHER" />
                </intent-filter>
            </activity>
       </application>
</manifest>
Figure - manifest file of second approach
Now create and or run a suitable emulator and run your application. You are done.
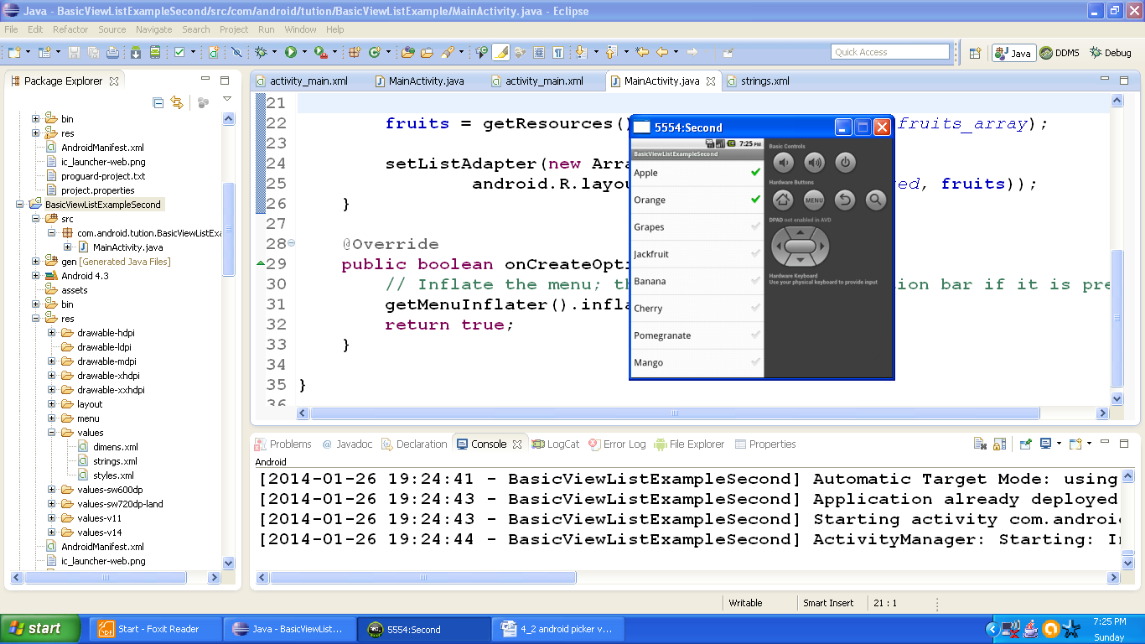
Figure - Output of second approach
4.3.2 Android Spinner View
Android Spinner view displays one item at a time from the list. Users can choose any item of his/her choice from the list. It is quick and responsive. When user touches the spinner the list of items is displayed. When user selects an item, spinner object receives the selected item and displays it.
4.3.2.1 Android Spinnerview example
Let us create a spinner and check out its working. Layout can be different according to your like and dislike. I would prefer to work with a drop down list with spinner. It looks more stylish then an simple form like display. Create a new project and name it as you like. I am naming it as SpinnerViewExample app. Open your activity_main.xml file and code it as shown in the following listing:
<RelativeLayout xmlns:android="http://schemas.android.com/apk/res/android"
       xmlns:tools="http://schemas.android.com/tools"
       android:layout_width="match_parent"
       android:layout_height="match_parent"
       android:paddingBottom="@dimen/activity_vertical_margin"
       android:paddingLeft="@dimen/activity_horizontal_margin"
       android:paddingRight="@dimen/activity_horizontal_margin"
       android:paddingTop="@dimen/activity_vertical_margin"
       tools:context=".MainActivity" >

       <TextView
          android:id="@+id/textView1"
          android:layout_width="wrap_content"
          android:layout_height="wrap_content"
          android:text="Hello Readers!! How are you doing?" />

        <Spinner
           android:id="@+id/spinnerExample"
           android:layout_width="wrap_content"
           android:layout_height="wrap_content"
           android:layout_alignLeft="@+id/textView1"
           android:layout_below="@+id/textView1"
           android:layout_marginTop="85dp" />
</RelativeLayout>
Figure - xml file of Android Spinerview example
Graphical layout should be similar to the following snapshot
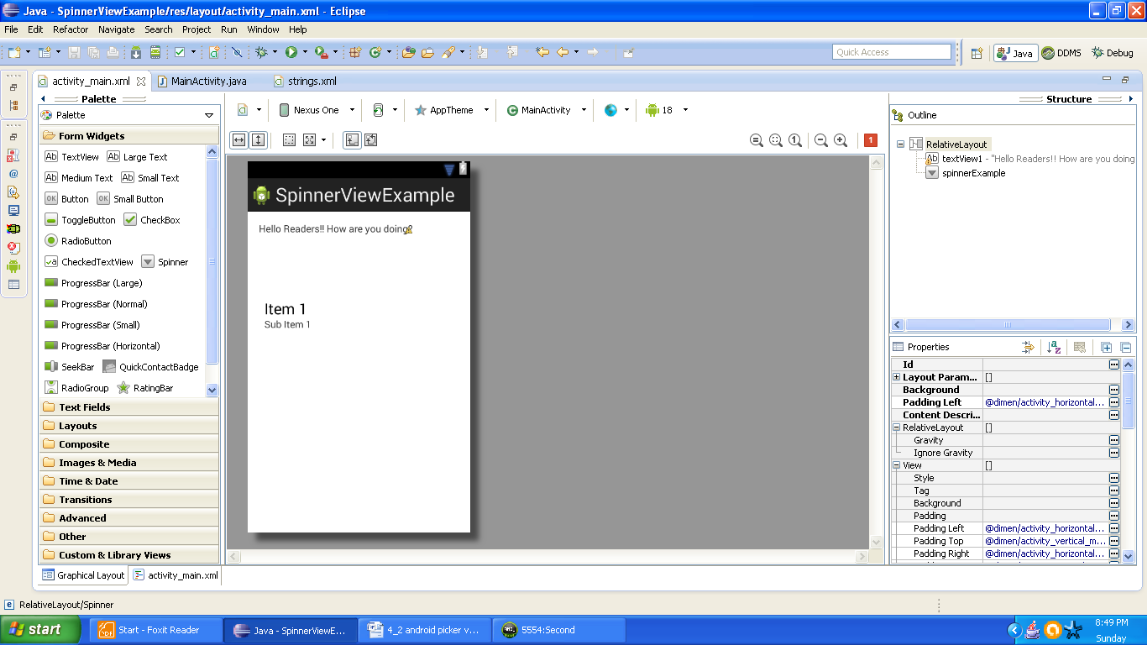
Figure - Android Spinerview example graphical layout
Open your srings.xml file and code it as shown in the following listing:
<?xml version="1.0" encoding="utf-8"?>
<resources>
    <string name="app_name">SpinnerViewExample</string>
    <string name="action_settings">Settings</string>
    <string name="hello_world">Hello world!</string>

    <string-array name="fruits_array">
         <item>Apple</item>
        <item>Orange</item>
        <item>Grapes</item>
        <item>Jackfruit</item>
        <item>Banana</item>
        <item>Cherry</item>
        <item>Pomegranate</item>
        <item>Mango</item>
        <item>Cranberry</item>
        <item>Blackberry</item>
        <item>Peach</item>
        <item>Custard Apple</item>
        <item>Guava</item>
    </string-array>
</resources>
Figure - strings.xml file for Android Spinerview example
Now last job to do is to open your main activity file and code it as shown in the following listing:
package com.android.tution.Spinner;

import android.app.Activity;
import android.os.Bundle;
import android.view.Menu;
import android.view.View;
import android.widget.AdapterView;
import android.widget.AdapterView.OnItemSelectedListener;
import android.widget.ArrayAdapter;
import android.widget.Spinner;
import android.widget.Toast;

public class MainActivity extends Activity {

    String[] fruits;
    @Override
    protected void onCreate(Bundle savedInstanceState) {
        super.onCreate(savedInstanceState);
        setContentView(R.layout.activity_main);

        fruits = getResources().getStringArray(R.array.fruits_array);
        Spinner spinner = (Spinner) findViewById(R.id.spinnerExample);

        ArrayAdapter<String> adapter = new ArrayAdapter<String>(this,
                android.R.layout.simple_spinner_dropdown_item, fruits);

        spinner.setAdapter(adapter);
        spinner.setOnItemSelectedListener(new OnItemSelectedListener() {

             @Override
            public void onItemSelected(AdapterView<?> arg0, View arg1,
                    int arg2, long arg3) {
                int index = arg0.getSelectedItemPosition();
                Toast.makeText(getBaseContext(),
                        "Selected Item :" + fruits[index], Toast.LENGTH_SHORT)
                        .show();

            }

            @Override
            public void onNothingSelected(AdapterView<?> args0) {
            }
       });
   }

  @Override
    public boolean onCreateOptionsMenu(Menu menu) {
        // Inflate the menu; this adds items to the action bar if it is present.
        getMenuInflater().inflate(R.menu.main, menu);
        return true;
    }
}
Figure - main activity file of Android Spinerview app
As I always say, cross check the manifest file of app:
<?xml version="1.0" encoding="utf-8"?>
<manifest xmlns:android="http://schemas.android.com/apk/res/android"
    package="com.android.tution.Spinner"
    android:versionCode="1"
    android:versionName="1.0" >

    <uses-sdk
        android:minSdkVersion="8"
        android:targetSdkVersion="18" />

    <application
         android:allowBackup="true"
         android:icon="@drawable/ic_launcher"
         android:label="@string/app_name"
         android:theme="@style/AppTheme" >
         <activity
            android:name="com.android.tution.Spinner.MainActivity"
            android:label="@string/app_name" >
            <intent-filter>
                <action android:name="android.intent.action.MAIN" />

                <category android:name="android.intent.category.LAUNCHER" />
            </intent-filter>
        </activity>
    </application>
Figure - manifest file of Android Spinerview app
Now create and or run an emulator and run your app. Output should be similar to the following snapshot:
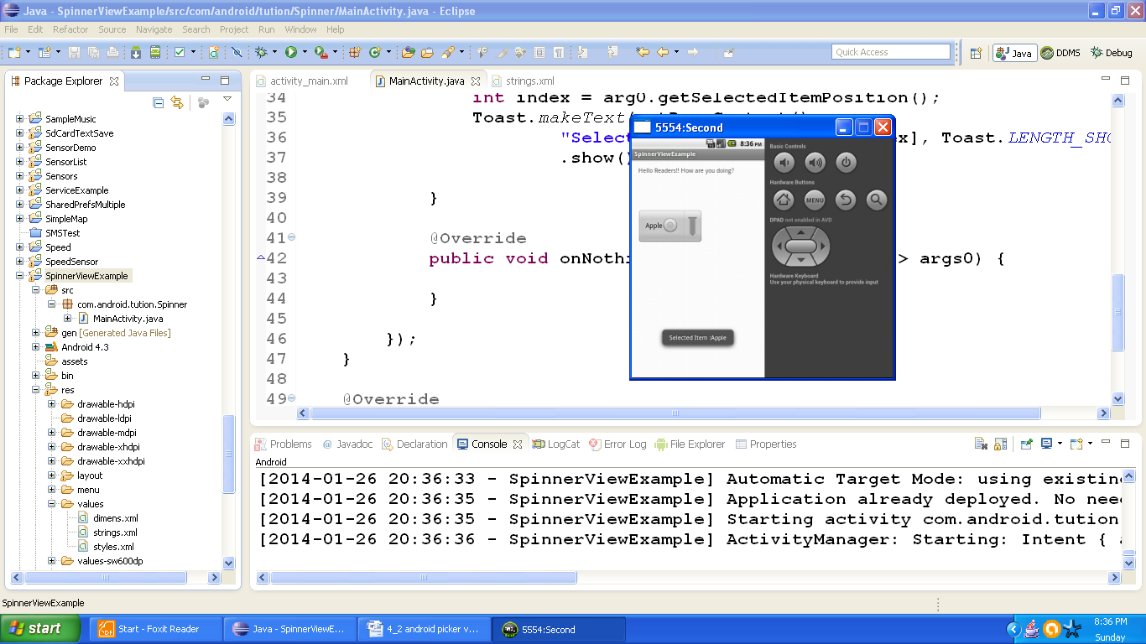
Figure - Output after running the Android Spinerview app
Now click the downward arrow sort of thing on the right corner of spinner. It is highlighted in orange color on the following snapshot:
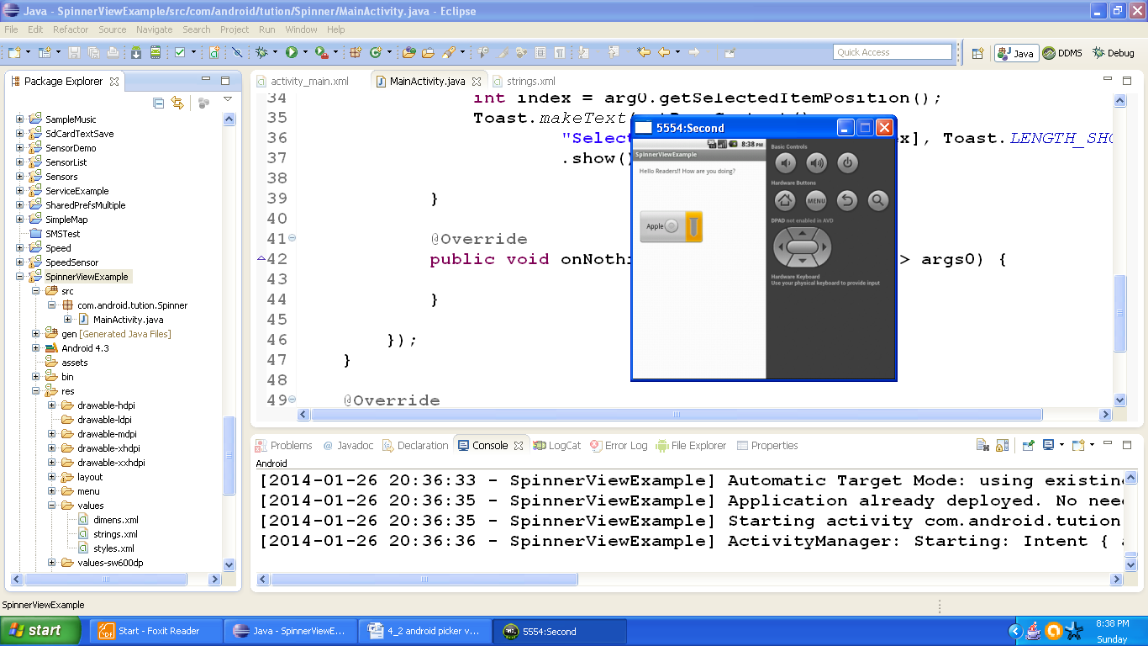
Figure - Highlighting the downward arrow
After this, a drop down list will appear on screen. It should be similar to the following snapshot:
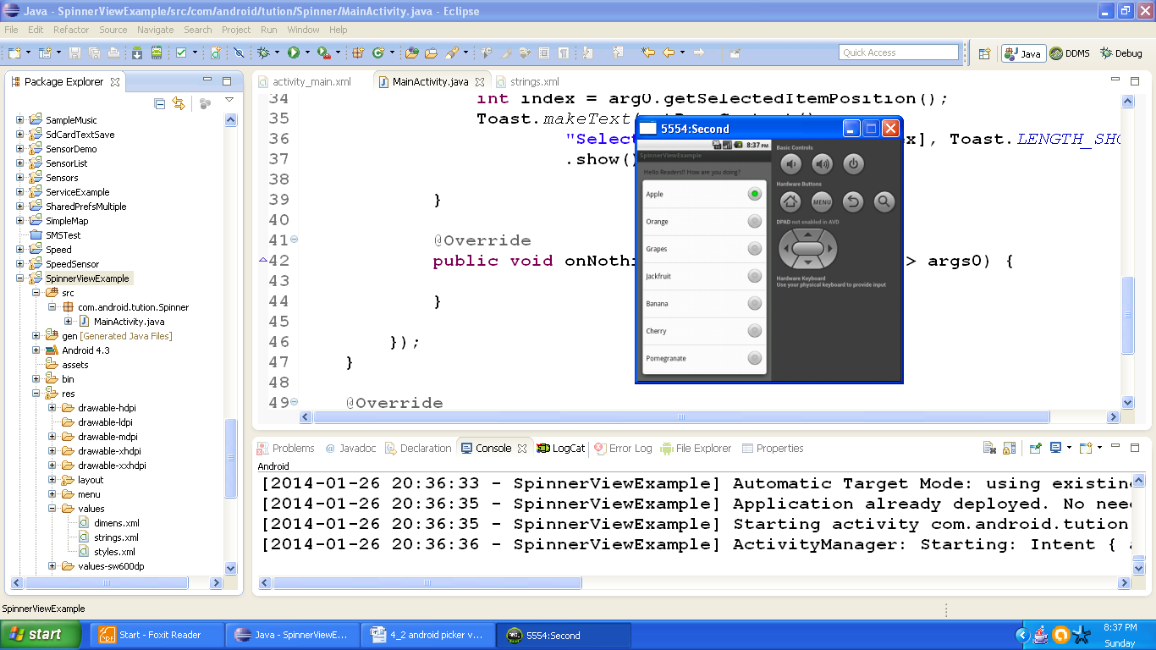
Figure - Expanded drop down list in Android Spinerview example
Now select any other item from the list and it will be set on spinner label and a toast will be displayed about your selection.

Figure - Output after selecting another item from list
Congratulations buddies!! You are done with this subsection. Hope you enjoyed this tutorial. See you in the next section. Till then keep practicing. Happy App Developing!!!