
By now we are familiar with almost all text based elements, let us learn how we can insert images into our web site.
“A picture is a poem without words” -- quoted one great man. Human life is all filled with images. One cannot imagine anything without pictures. Pictures or if we want to be technical Images convey more information to the viewer than words, because, human brain thinks in terms of pictures, not in words.
The code for adding images to your HTML page is simple.
Before we learn this, we have to do a simple task, gather all the images you want to use and place them under a directory called images in the directory where you are placing your html files. It is just a small piece of advice which you may or may not follow.
The image tag-<img>
We use this simple <img> tag to insert pictures into our web page. The syntax for <img> tag is,
<img src=”URL” alt=”some_alternate_text”>
The image tag is an empty tag, it does not contain any content or a closing tag. To just validate the code, we can add a space and a slash before the last angular bracket like this,
<img src=”URL” alt=”some_alternate_text” />
The src attribute
The src attribute specifies the source of the image, i.e., it tells the browser from where it should get that picture. The src attribute takes the URL of the image (location of the image) as its value.
The images may be available locally on our computer or may be hosted somewhere on the internet.
For local URLs, the pictures should be made available within the same directory where you have kept your .html files.
The global URLs look some what like this,
<img src=http://www.stockfreeimages.com/13731301/Tires.html alt=”Image of Tires” />
Use the global URLs when you have access to active internet connection always, otherwise download the images and mention the local URL.
The alt attribute
The alt attribute for <img> tag lets us define an alternate text, when the browser fails to load the image. The browser might not show us the image sometimes due to slow connection or error in src attribute. Web search engines use alternate text to help find web pages.
The alt attribute is read out for disabled users who use screen readers.
Setting the height and width of an image in HTML
The height and width attributes for <img> tag are used to define the height and the width of the image. These are optional attributes, if not used the actual size of the image is displayed.
The values for these attributes can be either mentioned in percentages or in pixels.
It is always a good practice to specify the height and width of the image. If these are set, the required space is reserved when the page is loaded. If these are not set, the page layout will be disturbed.
An example,
<img src=”forest.jpg” alt=”Beautiful forest” height=50px width=100px />
The output would be

The image only displays with 50 pixels height and 100 pixels width.
We can define percentages also,
<img src="forest. jpg" alt= "Beautiful forest" height=50% width=75% />
When percentages are used, we are specifying it to occupy a particular percentage of height & width of the total browser window.
When you place images on your web pages remember to,
· Maintain the height and width ratio to avoid skewing
· Scale down the larger images to make them look sharper.
Other attributes for <img> tag:
The title attribute:
We can also give title to an image, the browser displays the title when the user places the mouse over the image.
<img src="forest. jpg" alt= "Beautiful forest" title=”Forest” height=50% width=75% />
The border attribute
By default, the borders of all the images are set to “0 px” to make them invisible .To display the borders use border attribute on <img> tag.
<img src="forest. jpg" alt= "Beautiful forest" title=”Forest” height=25% width=25% border=2 />
The align attribute
The align attribute is used to align the image horizontally on the web browser’s window. The values for this attribute are left, right or center.
The valign attribute
The valign attribute is used to align the image vertically on the web browser’s window. The values for this attribute are top, bottom or center.
The hspace attribute
This attribute sets the horizontal space around the image .This will have a value like 10 or 10% etc.
The vspace attribute
This attribute sets the vertical space around the image .This will have a value like 10 or 10% etc. The hspace and vspace attributes are used when we want to keep some distance between text and image.
In addition to the above attributes, we can also use style, id and name attributes on <img> tag.
An example program:
<html>
 <head>
  <title>
   Working with images
  </title>
 </head>
 <body>
  <p>We are learning how to place images in HTML code</p>
  <p><img src="forest.jpg" alt= "Beautiful forest" title="Forest" height=25% width=25% align=right border=2 vspace=15 hspace=10  />
  <p>This paragraph is wrapped around the image</p>
  <p>Forest conservation is the practice of planting and maintaining forested areas for the benefit and sustainability of future generations. In the United States, forest conservation became popular in the late 19th and early 20th centuries. Forest conservation involves the upkeep of the natural resources within a forest that are beneficial to both humans and the ecosystem. </p>
 </body>
</html>
The output of the above program would be, 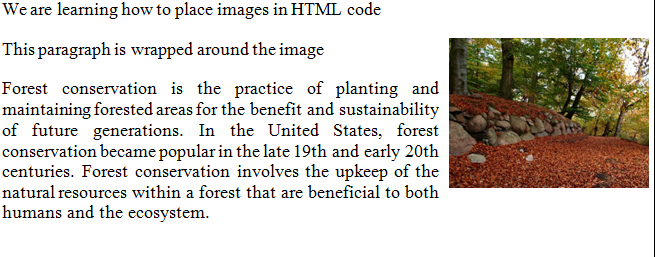
Understanding the Image formats
Images are available in 4 basic formats on the web, each is denoted as suffix like img.gif, img.jpeg, img. png and img.bmp.
GIF
GIF stands for Graphics Interchange Format. These formats have transparent backgrounds which makes it suitable for web designing. They are usually large files and less compression rate. When we want to use banners, clip arts and buttons save the images in this format. This format is limited to 256 color scheme, has slow load time & large transfer rate.
JPEG
JPEG stands for Joint Photographic Experts Group. They does not allow transparent backgrounds but has unlimited color wheel, great quality and a high compression rate. It saves lots of hard drive space. Avoid them in graphic designing .Use them for photo galleries, thumbnails and backgrounds.
PNG
PNG stands for Portable Network Graphics. They have large color wheel, high compression rate than .Gifs and a low file size .They also allow transparent backgrounds. They are best for web graphics.
BMP
BMP stands for Bitmap. It is an image which computer produces for us. Most browsers would not be able to display the .bmp image instead use .gif, .jpeg or .png.
Since you now know about the image formats, use the format which is best suitable to your need.
Sourcing the images
When you want to collect images for your web pages, there are plenty of them on web. But ask the owner’s permission before using them .Otherwise there are many web sites which offer free images which are copyright free. Use them to boost the look of your web pages.
In the next chapter, we will learn how to organize the content in lists.