
Introduction
jQuery offers a number of methods to create cool and wonderful animations and effects. Some of them are fadeIn, slideDown, hide, toggle etc. The quality of animations created using jQuery is really comparable to that of Flash based animations. The advantage of jQuery animations over Flash based animations is that jQuery uses very less computer resources compared to Flash
Different Effects
I am going to explain different effects with code samples. Before trying the sample codes, make sure that you add reference to the latest version of jQuery file correctly.
Sample Code that illustrates the First Few Examples:
<!DOCTYPE html>
 <head>
   <title>Sample Code</title>
   <style>
    div{
      height:60px;
      width:60px;
      float:left;
      margin:5px;
      }
   </style>
   <script src="jquery.js"></script>
   <script>
     //Add the code here
   </script>
  </head>
  <body>
    <div id="first" style="background:#3d9a44;">Visible</div>
    <div id="second" style="display:none;background:#7d5667;">Invisible</div><br />
    <button>Click</button>
  </body>
</html>
1. hide() and show()
The hide method hides the selected elements and the show method displays the selected elements.
Add the following lines of code inside the <script> section. Open the file using your browser after saving the changes.
$(document).ready(function() {
$("button").click(function(){
$("#first").hide("slow");
$("#second").show("slow");
});
});
Now you will get the output like this hiding the first element and displaying the second element:
2. toggle()
The toggle method displays/hides the selected elements. That is, the visible element will become hidden and the hidden element will become visible.
Clear the code inside the <script> section and add the following lines of code.
$(document).ready(function() {
$("button").click(function(){
$("#second").toggle(6000);
});
});
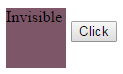
Click the button twice to see the effect. You will see the output like this at some point of time as we have specified the duration in which the effect needs to be complete. The duration needs to be specified in milliseconds (here 6000 milliseconds, that is 6 seconds).
3. fadeIn() and fadeOut()
The fadeIn method displays the selected elements by fading them to opaque and the fadeOut method hides the selected elements by fading them to transparent.
Clear the code inside the <script> section and add the following lines of code.
$(document).ready(function() {
$("button").click(function(){
$("#first").fadeOut(8000);
$("#second").fadeIn(8000);
});
});
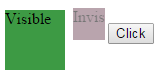
Here, the duration in milliseconds is specified to decide how long the animation will run. So, the animation will become complete in 8 seconds. After clicking the button, if you look at the screen after 3 or 4 seconds, your screen will look like this. The first div will not be hidden completely and the second div will not be visible clearly.
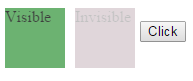
4. fadeTo()
The fadeTo method fades in or fades out the selected elements to a specified opacity.
Clear the code inside the <script> section and add the following lines of code.
$(document).ready(function() {
$("button").click(function(){
$("#first").fadeTo("slow", .4);
$("#second").fadeTo("slow", .2);
});
});
5. fadeToggle()
The fadeToggle method hides/displays the selected elements by changing their opacity the slideToggle method displays the selected elements with a sliding motion. It will display the element that is hidden and hide the element that is visible. In short, fadeToggle method toggles between the fadeIn and fadeOut methods.
Clear the code inside the <script> section and add the following lines of code.
$(document).ready(function() {
$("button").click(function(){
$("#first").fadeToggle("fast");
});
});
You will be able to understand the effect only if you click the button twice.
6. slideUp() and slideDown()
The slideUp method hides the selected elements with a sliding motion and the slideDown method displays the selected elements with a sliding motion.
Clear the code inside the <script> section and add the following lines of code.
$(document).ready(function() {
$("button").click(function(){
$("#first").slideUp(8000);
$("#second").slideDown(6000);
});
});
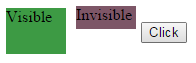
You will get this output at some point of time.
7. slideToggle()
The slideToggle method displays the selected elements with a sliding motion. In other words, slideToggle method toggles between slideUp and slideDown methods.
Clear the code inside the <script> section and add the following lines of code.
$(document).ready(function() {
$("button").click(function(){
$("#first").slideToggle("fast");
});
});
8. animate()
The animate method is used to apply custom animations. You can use CSS properties to create your own animations.
Clear the code inside the <script> section and add the following lines of code.
$(document).ready(function() {
$("button").click(function(){
$("#first").animate({height:"+=100px",width:"+=100px"});
});
});
Here is the output:
9. stop()
The stop method stops the currently running animation on the selected elements.
Clear the code inside the <script> section and add the following lines of code.
$(document).ready(function() {
$("button").html("Stop");
$("#second").toggle(6000);
$("button").click(function(){
$("#second").stop();
});
});
First, we change the value shown in the button to Stop. On the page load itself, we apply the toggle effect on the second div. On the click of the button, we stop the animation. Once you click the button just after seeing the second div, you could find that the effect stops from being running.
10. delay()
The delay method delays the execution of subsequent functions on the selected elements.
Clear the code inside the <script> section and add the following lines of code.
$(document).ready(function() {
$("#second").css("display", "inline-block");
$("button").click(function(){
$("#first").fadeToggle("slow").slideToggle("slow");
$("#second").fadeToggle("slow").delay(1000).slideToggle("slow");
});
});
You could find that both div elements initially toggles at the same speed. As a delay is introduced for the second div element, the next effect takes place slowly in case of the second element.
Summary
We have seen a number of effects that can be applied on different HTML elements. There are few more effects that can be applied. You can find the full list in the official website of jQuery. Though we have created simple effects in this tutorial, you can create really wonderful and cool animations and effects using jQuery effects.