
17.1 Overview of JSP File Uploading
We have seen several examples in this tutorial where client sends text data but we can upload text, binary, image or any other type of files on server as well. You must have seen this functionality in several website like uploading resume on job portal.
HTML provides a different type of input element with type “file”. We can use this element in a form like below
<input type="file" name="fileName">
All browser displays it slightly different. For example Chrome will display like -
This element will display “Chose File” button which can be used to select the file from client machine that needs to be uploaded (refer below figure)
![]()
On click of “Choose File” button, file selector will be opened with which a file can be selected and on selecting the file , chosen file name will be displayed instead “No file chosen”
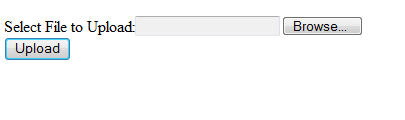
whereas Internet Explorer displays Browse button like
![]()
Whenever client needs to upload a file , there are several important points which needs to be keep in mind.
· The form method attribute must be set to POST method and GET method cannot be used. Remember with GET, data is sent as a query string so we cannot use GET type while uploading files.
· Additional form attribute (enctype) should be set to multipart/form-data. This attribute informs the server that file is uploaded.
· We need to use one <input type="file" name="fileName">tag for each file. If we need to upload multiple files uploading, we need to include more than one input tags with different values for the name attribute. The browser associates a Browse button with each of them.
17.2 Ways to Upload the file
There are two ways to upload a file to server
a) Using third party Jar File – Apache provides a convenient and powerful API to upload the files on server. This approach requires below two jar files to be added in WEB-INF/lib directory of web application.(You candownload these jar files fromhttp://commons.apache.org/fileupload/ )
· commons-fileupload.jar
· commons-io.jar
b) Servlet 3.0 API - Servlet 3.0Specification provided additional support for uploading files to server and we donot have to include any third party APIs.
Let's discuss each approach in detail
17.2.1 File Upload with Apache Commons File Upload Utility
Apache Commons file upload utility provides DiskFileItemFactory factorycalss that provides a method to parse the HttpServletRequest object and return list of FileItem class( List of file item because we can upload multiple file in a one go )
FileItem provides useful method to get the file name, field name in form, size and content type details of the file that needs to be uploaded. To write file to a directory, we can create a File object and pass it as argument to write() method of FileItem class.
Let's write an example to upload file using apache common files upload utility.
Create auploadFile.jsp file – This file will display an option to upload the file and will submit the request to processUploadedFile.jsp
<html>
  <head>
    <title>File Upload Example using Apache commons File Upload Utility </title>
  </head>
  <body>
    <form action="processUploadedFile.jsp" method="post"
        enctype="multipart/form-data">
        Select File to Upload:<input type="file" name="fileName"><br>
       <input type="submit" value="Upload">
    </form>
  </body>
</html>
Add external jar files in lib directory –Add commons-fileupload.jar and commons-io.jar file in WEB-INF/lib directory of web application.
Add context param in web.xml – Add context param in web.xml to configure the path where the file will be uploaded and with which name it will be uplaoded. We can configure the name in several ways (may be property file etc) but in this example we will configure it as a context param.
In below configuration,
- I have configured one param with the name as fileLocation and value as C\testfolder which means files will be uploaded on c drive
- One parm with name fileName with value sample.txt which means file uploaded at destination with name sample.txt
<context-param>
    <param-name>fileLocation</param-name>
    <param-value>C:\test\</param-value>
</context-param>
<context-param>
    <param-name>fileName</param-name>
    <param-value>sample.txt</param-value>
</context-param>
Create processUploadedFile.jsp file – Whole logic of uploading a file to server will be in this file. Once uploaded, message will be set as request attribute and request will be forwarded to response.jsp
<%@page import="org.apache.commons.fileupload.disk.DiskFileItemFactory"%>
<%@page import="org.apache.commons.fileupload.servlet.ServletFileUpload"%>
<html>
  <head>
    <title>Process Upload File</title>
  </head>
  <body>
    <%@page import="java.io.File"%>
    <%@page import="java.util.*,org.apache.commons.fileupload.FileItem"%>
    <%
      String fileUploadPath = application.getInitParameter("fileLocation");
      String fileName=  application.getInitParameter("fileName");
      ServletFileUpload uploader= newServletFileUpload(newDiskFileItemFactory());
      List<FileItem>fileItemsList = uploader.parseRequest(request);
      Iterator<FileItem>fileItemsIterator = fileItemsList.iterator();
      while(fileItemsIterator.hasNext())
      {
       FileItemfileItem = fileItemsIterator.next();
       longsizeInBytes= fileItem.getSize();
       File file = newFile(fileUploadPath+File.separator+fileName);
       fileItem.write(file);
       String message = fileName + "(" + sizeInBytes + " Bytes) has been uploaded at " + fileUploadPath + "successfully !!" ;
       request.setAttribute("message", message);
      }
       getServletContext().getRequestDispatcher("/response.jsp").forward(
       request, response);
     %>
  </body>
</html>
Create response.jsp file – Once the file is uploaded, this jsp will display the message set as a request attribute processUploadedFile.jsp
<html>
  <head>
    <meta http-equiv="Content-Type" content="text/html; charset=ISO-8859-1">
    <title>File Upload Result</title>
  </head>
  <body>
    <strong>
      <%=
       request.getAttribute("message")
      %>
    </strong>
  </body>
</html>
Testing
Access uploadFile.jsp using http://localhost:8080/jsp-tutorial/uploadFile.jsp
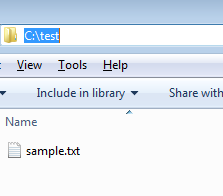
Click on Browse button to select the file. Once selected, click Upload button to upload the file . You will see below screen.

Verify that sample.txt file on C:\test location
17.2.2 Servlet 3.0 API
Servlet 3.0 specification provided additional support for uploading files to server and we do not have to include any third party APIs.
Below are the key things that need to keep in mind
MultiPart annotation OR configuration in web.xml – We need to add @MultiPart annotation on the servlet or need to add in web.xml (in corresponding jsp/ servlet). With this annotation we can configure some information like maximum size of file that can be uploaded , location etc
New methods has been added in HttpServletRequest to get all the parts in multipart/form-data request throughgetParts() method. We can get a specific part using getPart(String partName) method.
Part interface represents a part or form item that was received within a multipart/form-data POST request. We can call getInputStream() or write(String fileName) to read and write file.
Lets write an example to see how we can use Servlet 3.0 API to upload the files.
Add entry in web.xml (Highlighted context params are same which we added in above example)
<context-param>
    <param-name>fileLocation</param-name>
    <param-value>C:\test\</param-value>
</context-param>
<context-param>
    <param-name>fileName</param-name>
    <param-value>sample.txt</param-value>
</context-param>
<servlet>
    <description></description>
    <servlet-name>UploadFile</servlet-name>
    <jsp-file>/uploadFileWithServlet3API.jsp</jsp-file>
    <multipart-config>
        <max-file-size>20848820</max-file-size>
        <max-request-size>418018841</max-request-size>
        <file-size-threshold>1048576</file-size-threshold>
    </multipart-config>
</servlet>
<servlet-mapping>
    <servlet-name>UploadFile</servlet-name>
    <url-pattern>/uploadFileWithServlet3API.jsp</url-pattern>
</servlet-mapping>
Create uploadFileWithServlet3API.jsp file – Whole logic of uploading a file to server will be in this file. Once uploaded, message will be set as request attribute and request will be forwarded to response.jsp
<html>
  <head>
    <meta http-equiv="Content-Type" content="text/html; charset=ISO-8859-1">
    <title>File Upload Example using Servlet 3.0 API  </title>
  </head>
  <body>
    <form action="uploadFileWithServlet3API.jsp" method="post"
        enctype="multipart/form-data">
        Select File to Upload:<input type="file" name="fileName"><br>
        <input type="submit" value="Upload">
    </form>
  </body>
</html>
Create response.jsp file – Once the file is uploaded, this jsp will display the message set as a request attribute uploadFileWithServlet3API.jsp
<html>
  <head>
    <title>Process Upload File</title>
  </head>
  <body>
    <%@page import="java.io.File"%>
    <%
      String fileUploadPath = application.getInitParameter("fileLocation");
      String fileName=  application.getInitParameter("fileName");
      for (Part part : request.getParts()) {
        part.write(fileUploadPath + File.separator + fileName);
      }
      request.setAttribute("message", fileName + " uploaded at "+ fileUploadPath + " successfully!");
      getServletContext().getRequestDispatcher("/response.jsp").forward(
      request, response);
    %>
  </body>
</html>
Testing
Access fileUpload.jsp using http://localhost:8080/jsp-tutorial/fileUpload.jsp
Click on Browse button to select the file. Once selected, click Upload button to upload the file. You will see below screen.

Verify that sample.txt file on C:\test location
Note: In real world scenario, alwaysrun a virus scan on the file which is being uploaded from client machine because someone may upload the infected file intentionally or un-intentionally.