
Introduction
If you are a smart phone user, you might have used mobile apps that help you track the location details while travelling. Geolocation is the technique used here to find out the geographical location of the mobile device. Geolocation uses one of the three receivers available on the device to find the geographical location. Using GPS receiver is the most accurate option. Another option is getting the location details with the help of IP address of Internet connection on the device. The last method is using 3G triangulation where the location of the device is triangulated by finding three cell towers that are closest to the device.
The Geolocation API provides access to the GPS sensor of the device. You can get location information including latitude, longitude, altitude, direction of travel, speed etc. If you want to get the position details for a specific point of time, then you can use the getCurrentPosition method of geolocation object. On the other hand, if you want to track the location over a period of time, then you can use the watchPosition method. You should clear the watch using the clearWatch method once you are done.
About Our App
Let us create an app that will display the geographical location details as soon as the app is loaded. For example, if you are at 123 Street, California (just an imaginary address), you will see a message “You are near 123 Street, California”. We will stop tracking the location on the click of a button. Now how will we get the location details? The geolocation object returns the latitude and longitude, not the address details. So, we will get the latitude and longitude using geolocation API and then pass these values to a web service which will return the address for the corresponding latitude and longitude. The web service is available at “http://maps.googleapis.com/maps/api/geocode/json?latlng=latVal,longVal&sensor=false” where latVal and longVal will replace the actual latitude and longitude values. The output of this web service is a JSON object and we will parse it and get the address in the required format.
Create an App
Create an Android mobile app named AndroidTrackLocation on the desktop. Once the project is created on the desktop, bring the project into the Android Development Environment (Eclipse). Open the index.html file in the assets/www folder using your text editor and clean it up. Change the title to “Track Location”.
We will start tracking the location as soon as the app loads. But, we need a button on the click of which we will stop tracking. We are using the <output> element to display the location information. We will also display some additional details such as altitude, speed, direction of travel etc in a table format. To display the additional information, we need a <div> element.
Now add the following lines of code inside the <body> section.
<button id="stopTrack">Stop Tracking Location</button><br />
<output id="address"></output><br/>
<div id="extra"></div>
Add the following lines of code inside the <head> section to check whether the device is ready. Once the device is ready, we will add the event listener to the button for its click event.
<script>
window.onload = function()
       {
             document.addEventListener("deviceready", init, false);
        }

function init()
        {
             document.getElementById('stopTrack').addEventListener('click', stopTracking, false);
        }
</script>
We next need to write the code to start tracking the location. PhoneGap's geolocation object has watchPosition method that will watch the position of the device. The first parameter of this method is a call back function that is called when position is received successfully, second parameter is a call back function that is called in case of an error and the third parameter is a JSON object that sets optional parameters to customize the retrieval. Inside the third parameter, you can set the value of enableHighFrequency to true if you want to get the best possible results, value of timeout in milliseconds to decide maximum time the app needs to wait for the result from GPS and value of maximumAge in milliseconds to accept a cached position if the result is not obtained in time.
We need to have a variable to set the id returned by watchPosition method and later to pass to the clearWatch method once we are done. So, declare a variable named watchVariable just below the opening <script> tag.>
var watchVariable;
Add the following line of code inside the init function.
watchVariable = navigator.geolocation.watchPosition(callbackSuccess, callbackError, {
                                                                                        maximumAge: 5000,
                                                                                        timeout: 6000,
                                                                                        enableHighAccuracy: true  });
Here we have set the value of maximumAge to 5 seconds and timeout to 6 seconds. Next we need to write the callbackSuccess and callbackError functions.
We are going to use AJAX technique to contact the web service at “http://maps.googleapis.com/maps/api/geocode/json?latlng=latVal,longVal&sensor=false”. We are not making the request asynchronous as the apps will take some time to get the information from GPS receiver and also we are setting a time out value. This web service returns the result as a JSON object. We will collect the output using responseText method of XMLHttpRequest object and then use the JavaScript eval function to convert JSON text to JavaScript object.
Let us see how to get the address details we need in the required format. Just try to pass value of latitude as 38.897676 and longitude as -77.03653 (this is the address of White House, USA) to the web service. The following is the part of the output you get.
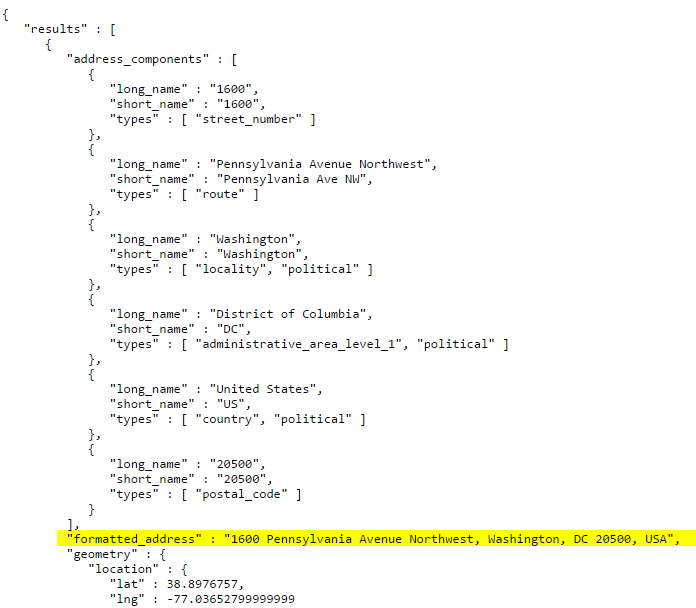
The section highlighted in yellow gives us the full address. You need to know a bit of JSON to process this output. After parsing this JSON object to JavaScript object, we can get the formatted_address from the first array. Add the following lines of code after the init function.
    function callbackSuccess(position)
    {
                var xmlhttp = new XMLHttpRequest();
                var lati = position.coords.latitude;
                var longi = position.coords.longitude;
                var url = "http://maps.googleapis.com/maps/api/geocode/json?latlng=" + lati + "," + longi + "&sensor=false";
                xmlhttp.open("GET", url, false);
                xmlhttp.send();
               if(xmlhttp.readyState == 4 && xmlhttp.status == 200)
               {
                          var jsonOutput = xmlhttp.responseText;
                           jsonOutput = eval("(" + jsonOutput + ")");
                           var country = jsonOutput.results[0].formatted_address;
                           document.getElementById('address').innerHTML = "You are now near " + country + ".";
                           document.getElementById('extra').innerHTML = "<table border='1px'><tr><th colspan='2'>More Information</th></tr>" +
                            "<tr><td>Accuracy</td><td>" + position.coords.accuracy + "</td></tr>" +
                            "<tr><td>Altitude</td><td>" + position.coords.altitude + "</td></tr>" +
                            "<tr><td>Speed</td><td>" + position.coords.speed + "</td></tr>" +
                            "<tr><td>Direction</td><td>" + position.coords.heading + "</td></tr></table";
              }
     }

    function callbackError(error)
     {
                alert("Error Code: " + error.code + " Message: " + error.message);
     }
We have created an HTML table with proper rows and columns to show the accuracy, altitude, speed and direction of travel. In case of error, we are displaying the error code and corresponding error message.
Next, we need to write the stopTracking function to stop the watch, that is to stop tracking the location, on the click of stopTrack button. The id returned by the watchPosition method should be passed to the clearWatch method. Add the following lines of code.
window.onload = function()
    {
        document.addEventListener("deviceready", init, false);
    }
function init()
    {
        document.getElementById('stopTrack').addEventListener('click', stopTracking, false);
                        watchVariable = navigator.geolocation.watchPosition(callbackSuccess, callbackError, {
                             maximumAge: 5000,
                             timeout: 6000,
                             enableHighAccuracy: true  });
    }
function callbackSuccess(position)
    {
        var xmlhttp = new XMLHttpRequest();
        var lati = position.coords.latitude;
        var longi = position.coords.longitude;
        var url = "http://maps.googleapis.com/maps/api/geocode/json?latlng=" + lati + "," + longi + "&sensor=false";
        xmlhttp.open("GET", url, false);
        xmlhttp.send();
        if(xmlhttp.readyState == 4 && xmlhttp.status == 200)
                {
                    var jsonOutput = xmlhttp.responseText;
                jsonOutput = eval("(" + jsonOutput + ")");
                        var location = jsonOutput.results[0].formatted_address;
                        document.getElementById('address').innerHTML = "You are now near " + location + ".";
                           document.getElementById('extra').innerHTML = "<table border='1px'><tr><th colspan='2'>More Information</th></tr>" +
                            "<tr><td>Accuracy</td><td>" + position.coords.accuracy + "</td></tr>" +
                            "<tr><td>Altitude</td><td>" + position.coords.altitude + "</td></tr>" +
                            "<tr><td>Speed</td><td>" + position.coords.speed + "</td></tr>" +
                            "<tr><td>Direction</td><td>" + position.coords.heading + "</td></tr></table";
        }
    }
function callbackError(error)
    {
        alert("Error Code: " + error.code + " Message: " + error.message);
    }
function stopTracking()
    {
        navigator.geolocation.clearWatch(watchVariable);
    }
</script>
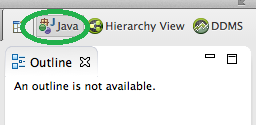
Now save the index.html file. If you test this project on an Android device, you will get accurate result. If we test this project on an emulator, how can we get GPS information? It is not actually possible. But for testing purposes, we can send the latitude and longitude values from DDMS view. How to do it? Run your project from XCode environment as usual. Then, on the right-hand side, you will see the option Java is clicked by default (circled in the following image).
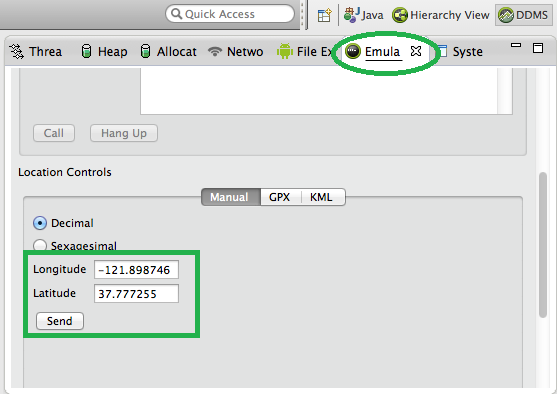
In the same window, you are seeing an option DDMS. Click on it and you will get a new window. Click on the Emulator Control tab and below you can find two textboxes with latitude and longitude values. Change the values as you want. If you do not know valid latitude and longitude values, you can get it from either Google Maps or the site http://itouchmap.com/latlong.html. Click the Send button.
Now see the app screen and you will get output like this: (make sure that your system is connected to the Internet)
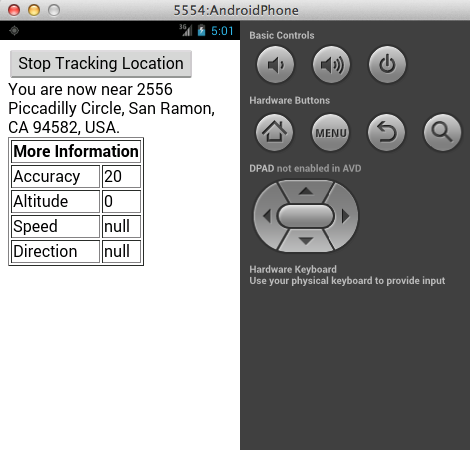
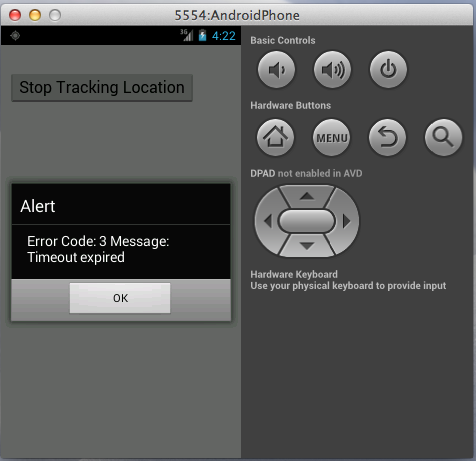
The details in the More Information table are not that accurate as we are testing it on an emulator, not on a real device. If the app could not receive the information in time (in 6 seconds as the value of timeout is set to 6000), we will get a screen like this:
When you test this app on a real device, you will find that the details get changed as you move from one place to another. Once you click the Stop Tracking Location button, tracking will be stopped.
Summary
In this tutorial, we have created an app that tracks the location of the user using Geolocation API. You can even develop an app that displays the map (something like Google Maps) when the user types in the address of the location he wants to see the map of. You can use the Google Maps API service and get the map by sending the latitude and longitude values.