
PHP can be installed and configured on many platforms including Linux, windows, Mac etc.
Before we can install PHP on any platform, we need:
- A server with enough RAM.
- A machine with any OS installed (Unix, Mac or Windows).
- A working, dedicated internet connection.
There are two ways of installation of PHP on web-server. The first way is using PHP's direct module interface, called SAPI. It can be used for almost all the web-servers which currently exist for eg. (Apache, Microsoft IIS etc) The second way is to implement PHP as an CGI processor, which means that we must set up the server to use the command line execution of PHP. It can process the PHP file requests on the server. |
Installation on windows
Web developers prefer to run Apache and PHP on their system, so that can easily test their scripts and programs before deploying on web server.
Step 1: Download and install Apache 2.2 web server on your machine.
Apache is a web server and can be installed in the following manner:
- Go to http://www.apache.org/dyn/closer.cgi and click on the HTTP server link

- Click on “Download from a mirror” to choose FTP site for download.
- Click on the Win 32 Binary (MSI installer) link to download.
- Click the MSI file to initiate the installation wizard for the Apache software.
Step 2: Download and install PHP 5
- Extract the binary archive file to C:\PHP location.
- Remove any old PHP.INI file from your windows directory, if available.
- Configure your PHP.INI file. For this either we should move the PHP.INI to our windows directory i.e. ”C:\WINDOWS” or we can configure PATH environment variable to include “C:\php”. In case of Apache earlier versions we have to do this.
- Enable short open Tags
In PHP.INI file search line:
Short_open_tag=off
It is mandatory to enable this tag to on otherwise PHP tags “<?php will not be recognized
- We have to enable magic_quotes_gpc=on, so that special characters like (\, ‘) can be acceptable in web forms.
- If there is requirement of automatically declaration of global variables, we have to enable register_globals=on in PHP.ini file.
- Display Errors settings: If we want PHP to display error messages in browser window, we have to set display_errors=on
- Session path setting: In php if we want to save session files, there is a folder session.save_path setting which can be set in windows at “C:\tmp” location like as
Session.save_path=”c:\tmp”
Step 3: Configure Apache to run PHP
For the configuration of apache, we need httpd.conf file. This file is present in apache installation directory under the conf folder. Open this file and add the lines after the LoadModule statements:
LoadModule php5_module “c:/php/php5apache2_2.dll”
Add the following line after the AddType line:
AddType application/x-httpd-php.php
Add PHP location:
PHPIniDir “c:/php”
After adding above lines, we have to restart the Apache server.
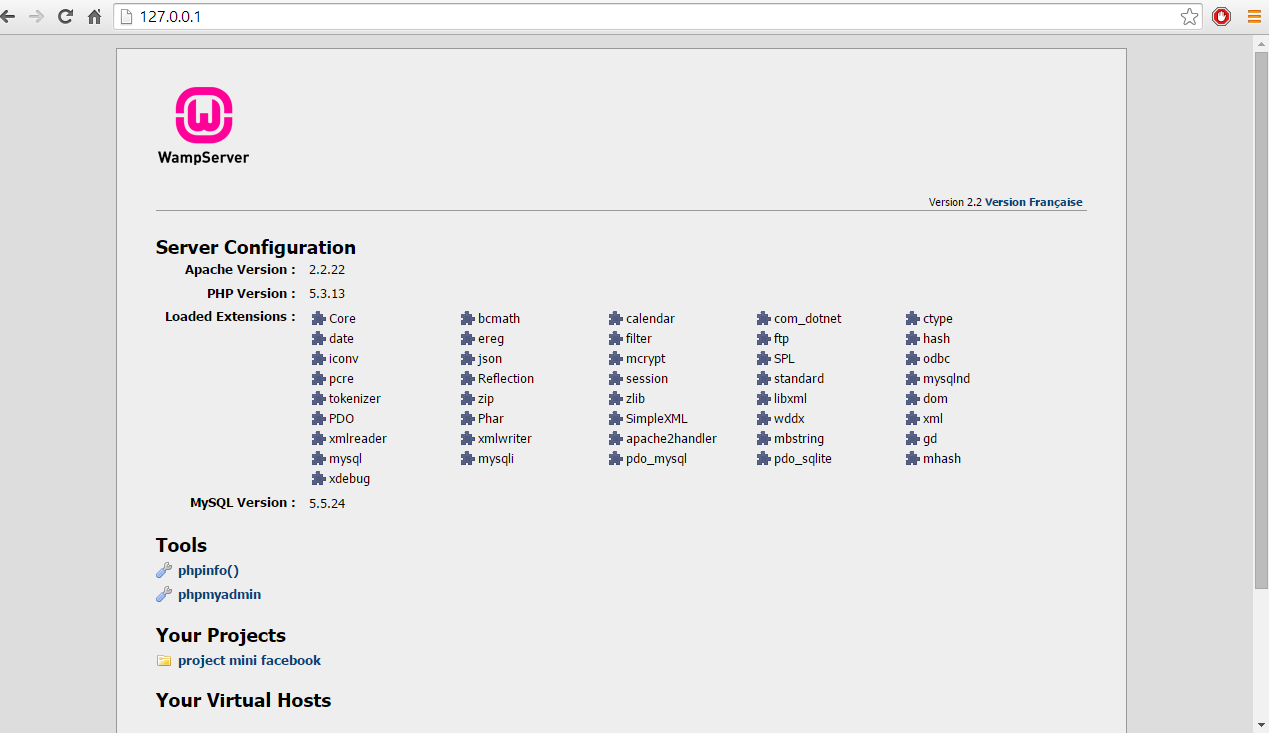
Packages available in one pack included Apache, PHP, MySQL are XAMPP (Mac version) that includes MySQL, PHP and Perl, WAMP Server (Windows version)
We can download these packages from the following links:
For XAMPP
http://xampp.en.softonic.com/
For WAMP
http://www.wampserver.com/en/
PHP installation on Windows
PHP is the most widely used server side scripting language in web development. PHP go well with Mysql, apache and linux platform. We can install PHP on our local system to create web applications.
Nowadays PHP can be used in many of the packages implicitly like: XAMPP, WampServer and Web Developer. In these packages all the features are automatically configured which can be changed also according to our requirements.
Manual installation and configuration is recommended for deeply understanding of system.
Manual Installation of PHP
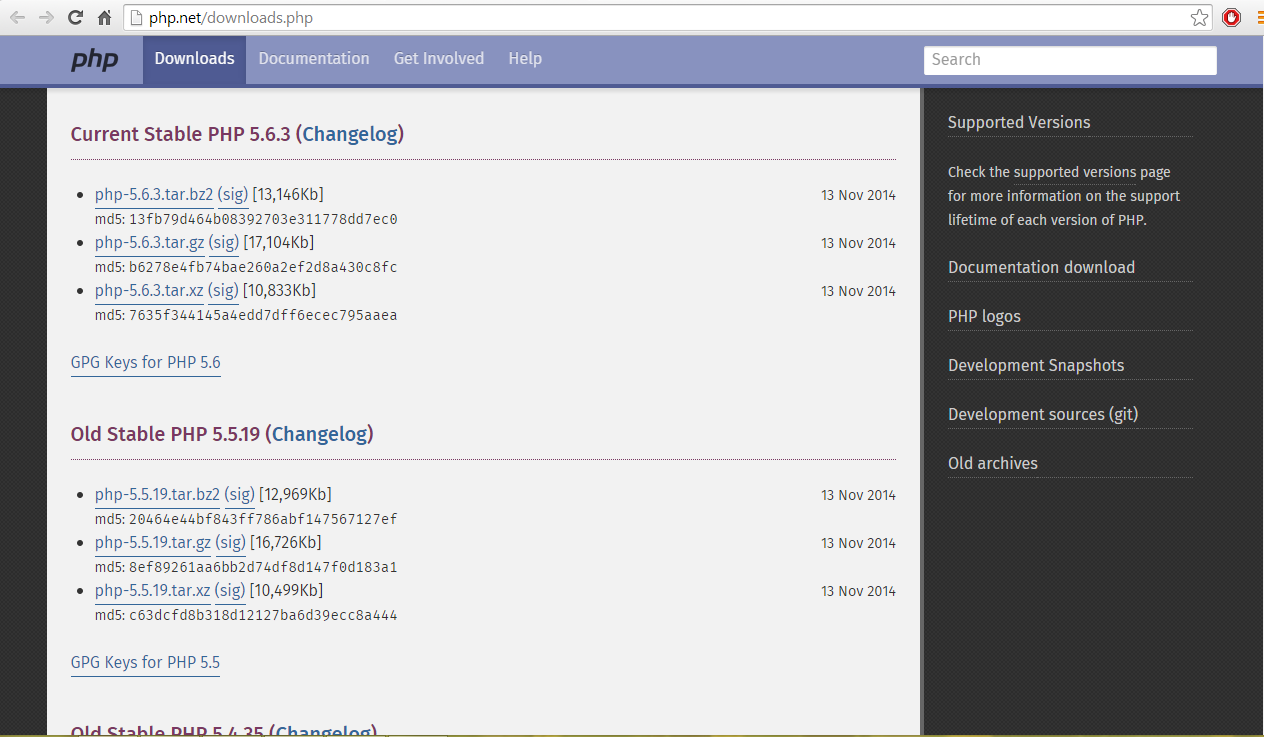
- Download the installation files
First of all, we should download the latest version of PHP 5 package from the link below:
- We have to install PHP to C:/php, so firstly we create a folder named php and extract files into this folder.
- After installation, we must configure php according to the requirements. For the configuration, we use php.ini file. We can open this file using any text editor.
Major configuration those are normally done:
extension_dir= “C:phpext”
extension=php_curl.dll
extension=php_gd2.dll
extension=php_mdstring.dll
extension=php_mysql.dll
extension=php_mysqli.dll
extension=php_pdo.dll
extension=php_pdo_mysql.dll
extension=php_xmlrpc.dll
If we want to use email feature in our websites, we can use mail() function, we should configure SMTP server as:
[mail function]
; for Win32 only
SMTP=mail.myisp.com
smtp_port=25
; For Win32 only
Sendmail_from=abc@gmail.com
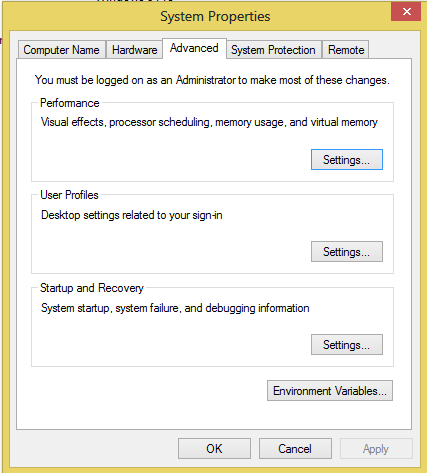
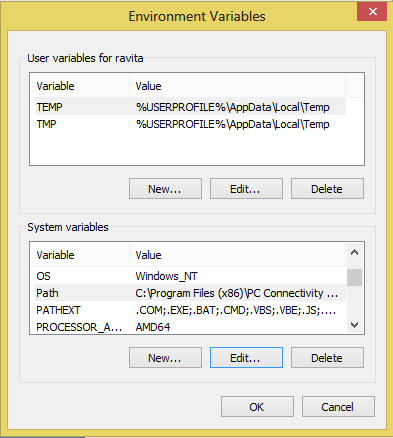
- Edit path environment variable
Now we must set the path environment variable. For this we should follow steps:
Go to control panel
Select system-> Advanced system settings-> Environment variables
Select Path option and click on Edit button
Enter ;C:php at the end of line
Click OK

- PHP and Apache setting
Open configuration file httpd.conf of Apache
Then set
DirectoryIndex index.php index.html
Add following lines at the end of the file
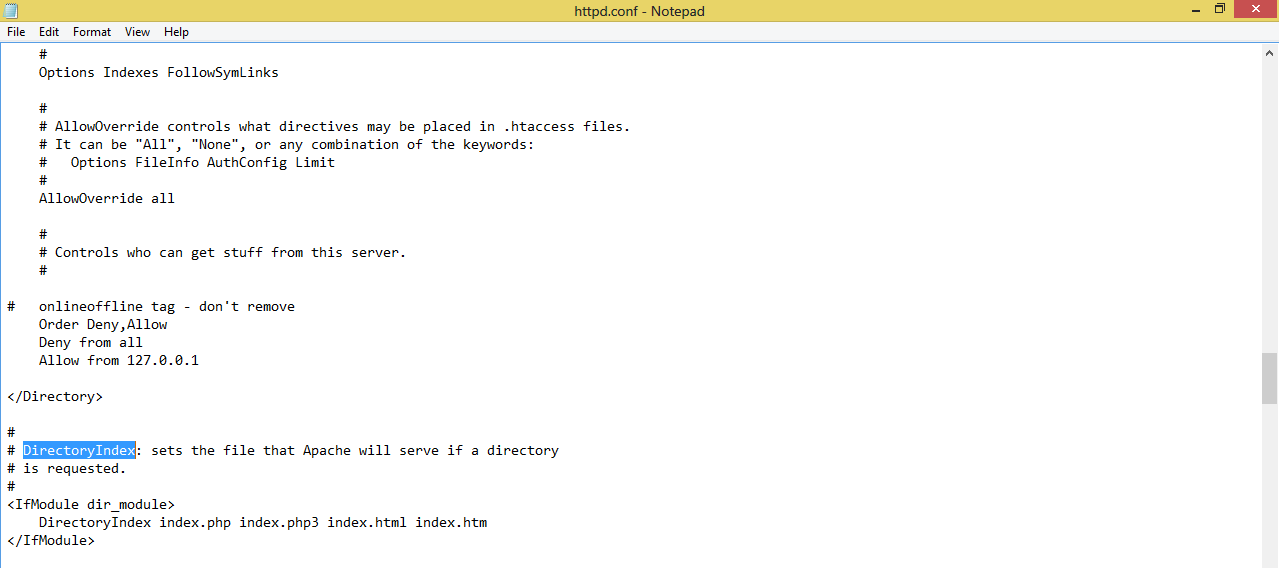
#PHP5 module
LoadModule php5_module “C:/php/php5apache2_2.dll”
AddType application/x-httpd-php.php
PHPIniDir “C:/php”
Save file and restart apache

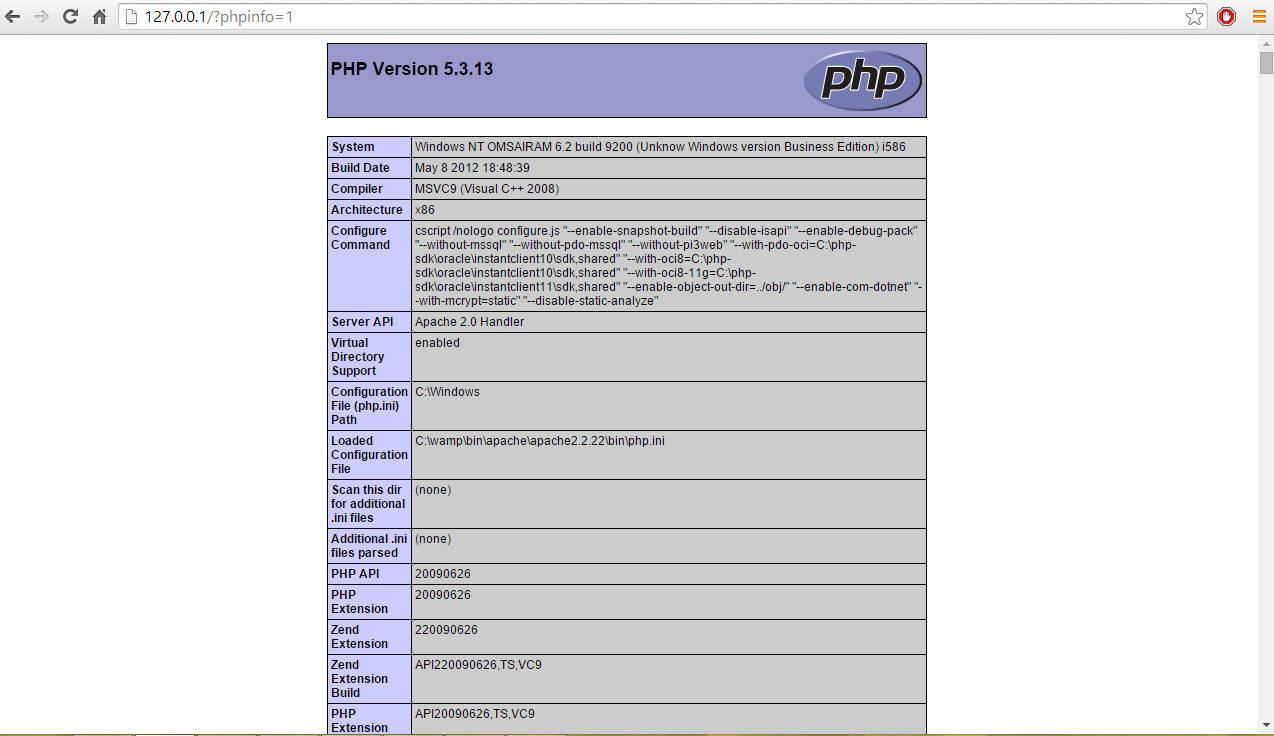
If everything is fine, we can test PHP file
For this create a file named index.php in Apache root page (htdocs) and add a line in this file:
<?php phpinfo(); ?>
Open browser and type http://localhost/ in URL.
If everything is configured correctly then PHP version page will be displayed that will show all the configuration settings of PHP.
PHP installation on Linux
When we use LAMP following steps required:
Install Apache
Open terminal by selecting Application -> Accessories ->Terminal
Type line sudo apt-get install apache2 on terminal and press enter.
Enter your password and press Enter.
After successful installation of Apache we should test it
For this open any browser and enter following URL http://localhost/
And it will display a message “It Works!”
Install PHP
Open Terminal window and type following line:
sudo apt-get install php5 libapache2-mod-php5 and press enter
Then restart apache using following command
sudo /etc/init.d/apache2 restart
Testing PHP
Type following command on terminal window
sudo gedit /var/www/testphp.php
this command will open a file testphp.php
type following line in that file
<? php phpinfo(); ?>
Now open any browser and type following URL
http://localhost/testphp.php
It will show the page where complete information about php will be displayed.
Install MySql
Open terminal and type following line:
sudo apt-get install mysql-server
We should change the bind address as: 127.0.0.1
Type command mysql –u root
It will open mysql prompt and then type command
mysql> set password for ‘root@localhost’ = password (‘<any_password>’);
type following line on terminal
sudo apt-get install libapache2-mod-auth-mysql php5-mysql phpmyadmin
open php.ini file and type following line:
gksudo gedit /etc/php5/apache2/php.ini
uncomment the following line
; extension=mysql.so as extension=mysql.so
Restart apache using following command
sudo /etc/init.d/apache2 restart
open apache2.conf file and add the following line at the bottom of the file
include /etc/phpmyadmin/apache.conf
restart apache
sudo /etc/init.d/apache2 restart