
3.3 Apache Tomcat web server.
We would need a stable and open source web server that we can use to develop and run Spring Framework based applications. There are several options available but in this tutorial we will use Apache Tomcat.
Tomcat is actually composed of a number of components and containers including a Tomcat JSP engine, servlet Container and a variety of different connectors, but its core component is called Catalina. One important thing to be noted is Tomcat is a web server and not an application server.
Tomcat is freely available and can be downloaded from http://tomcat.apache.org/download-70.cgi
Note – There are several versions of tomcat and java are available so make sure you download compatible versions.
Steps to download and configure Tomcat
- Once tomcat web server is downloaded, unzip it to the location of your choice. I use the top level of the D drive, resulting in D:\apache-tomcat-7.0.41 . By default tomcat is configured to run on port 8080 so it will be accessed by http://localhost:8080
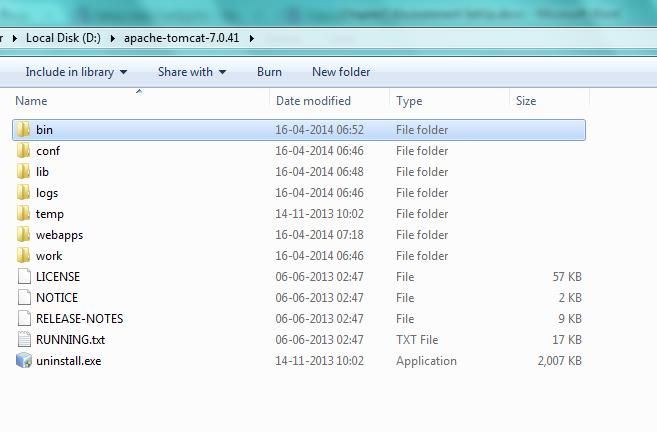
- Create a new environment variable CATALINA_HOME and set its value to the apache tomcat installation directory. In my case it will be D:\apache-tomcat-7.0.41
- To start and stop the server, you need to use the batch files available in %CATALINA_HOME%/bin
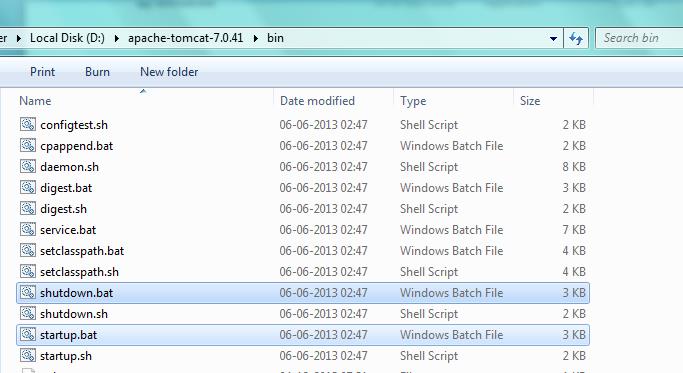
- startup.bat to start the server
- shutdown.bat to stop the server
If you hit an error while starting server a saying “java_home /jre_home” is not set means you have not configured JAVA_HOME as described in section 3.2
Verification
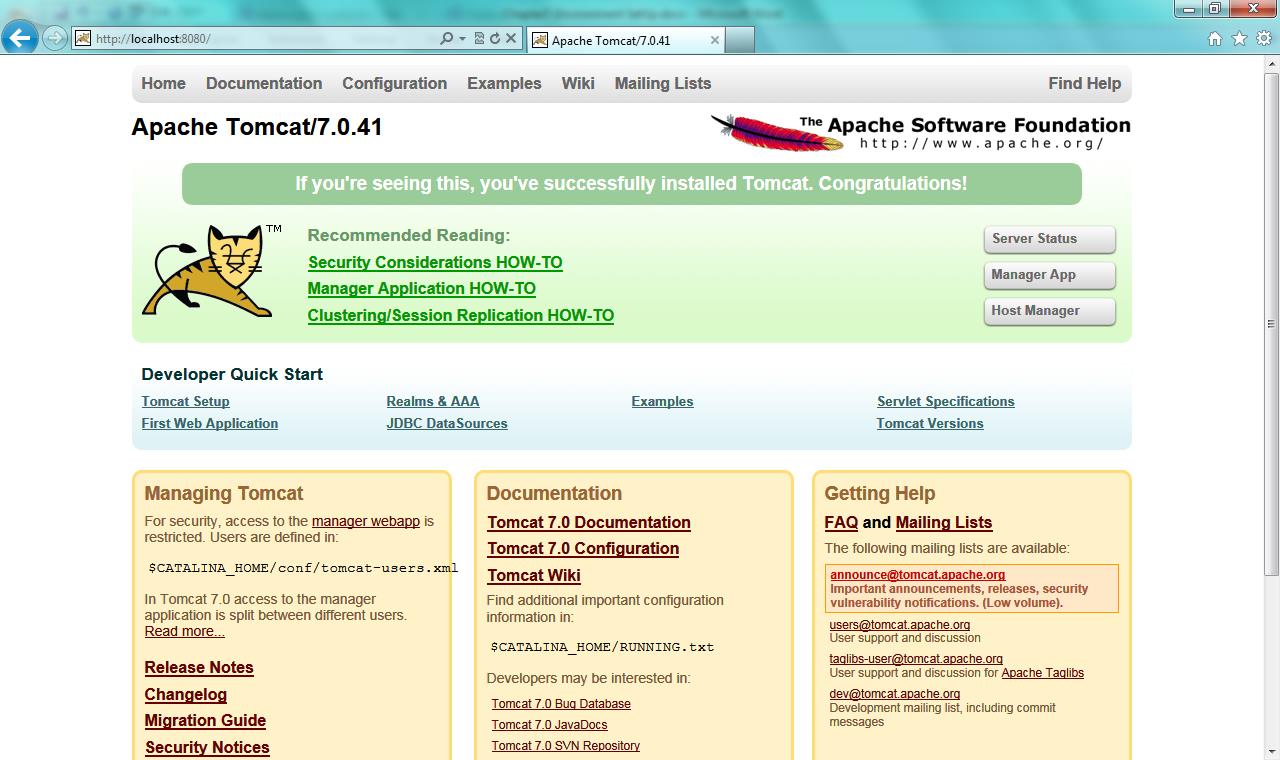
Start the server using D:\apache-tomcat-7.0.41/bin/startup.bat and hit http://localhost:8080 in the browser. You should see page like below.
3.4 Eclipse - Integrated Development Environment
We can write java programs using any text editor but several IDE are freely available. I would encourage use of IDE because IDE provides us several features like -
- we can manage the Tomcat,
- develop programs and web application
- need not to remember the exact methods and their signatures
- compilation errors are clearly highlighted
There are several IDEs available like NetBeans, Eclipse etc. We will use Eclipse in this tutorial.
Download the latest eclipse version (Eclipse Kepler) from http://www.eclipse.org/downloads/packages/release/Kepler/SR2 and unzip it in directory of your choice . You need to download Eclipse IDE for Java EE Developers and not Eclipse Standard
I normally unzip into the top level of the D drive, resulting in D:\ eclipse-standard-kepler-SR2-win64
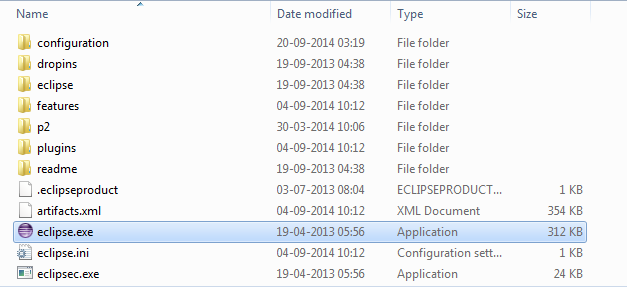
Start Eclipse – Start eclipse by clicking eclipse.exe available in eclipse installation directory.
Once eclipse starts it will ask for a workspace. You can create one folder of your own choice and give the path of that folder. Workspace is basically a folder where eclipse will create all of your projects.
3.5 Tomcat Integration with Eclipse
As I mentioned earlier, tomcat can be managed with eclipse IDE and in this section we will discuss how to integrate tomcat with eclipse.
To do so
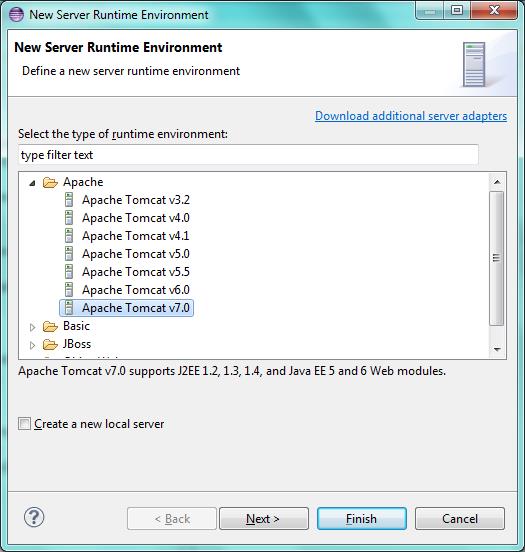
- Go to Windows àPreferencesàServersàRuntime Environments àAdd in eclipse.
- On click of Add , a new window will be opened (refer below). From the list of Tomcat servers, select “Apache Tomcat v7.0” and click Next
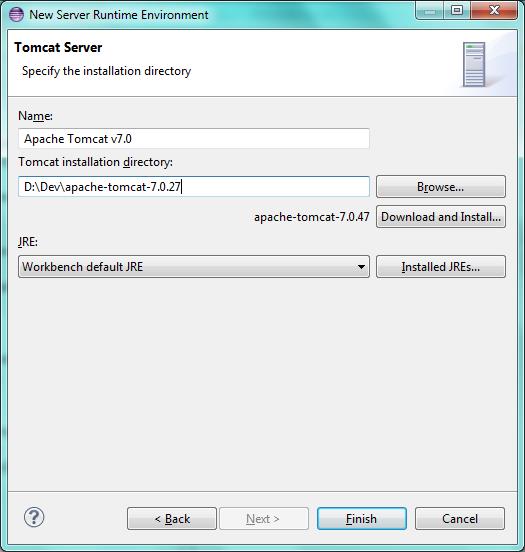
- Select the path of Tomcat installation directory
Start and Stop Tomcat server from Eclipse
Click on Servers tab at bottom. Click on Green Arrow icon to start the server and Red square icon to stop.
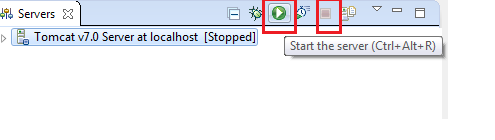
Server console log can be seen in eclipse console. Once server is started, verify it by hitting http://localhost:8080 in browser.