21.1 Overview
MVC stands for Model, View and Controller and it is a design pattern. This pattern divides the application into three components to separate the internal representation of information from the way it is being presented to the user. The three components are:
- Model (M): Models responsibility is to manage application's data, business logic and business rules.
- View (V): A view is an output representation of information, such as displaying information or reports to the user either as a text form or as charts.
- Controller(C): Controller responsibility is to invoke Models to perform business logic and then update the view based on the model’s output.
21.2 Spring MVC Architecture and Flow
The main component of Spring MVC is Dispatcher Servlet. Refer below diagram to understand the Spring MVC architecture
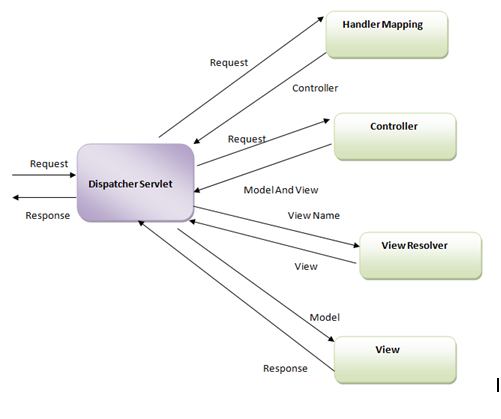
- Dispatcher Servlet is configured in web.xml of the application and all the Request mapped to this servlet will be handled by Dispatcher servlet. Dispatcher Servlet delegates the request to the controller (class annotated with @Controller annotation)
- The controller class invokes appropriate handler method based on @RequestMapping annotation. The handler method returns the logical name of the view and the model.
- Dispatcher servlets resolve the actual view name using View Resolver (configured in the beans configuration file) and gets the actual view name.
- Passes the model object to view so can be used by view to display the result to the user.
21.3 MVC Configuration
a) Configure Dispatcher Servlet
To configure the dispatcher servlet we need to add below configuration in web.xml of our application
 <web-app id="WebApp_ID" version="2.4"
      xmlns="http://java.sun.com/xml/ns/j2ee"
      xmlns:xsi="http://www.w3.org/2001/XMLSchema-instance"
      xsi:schemaLocation="http://java.sun.com/xml/ns/j2ee
      http://java.sun.com/xml/ns/j2ee/web-app_2_4.xsd">

      <servlet>
         <servlet-name>SpringWebMVC</servlet-name>
         <servlet-class>
             org.springframework.web.servlet.DispatcherServlet
         </servlet-class>
         <load-on-startup>1</load-on-startup>
      </servlet>

      <servlet-mapping>
         <servlet-name>SpringWebMVC</servlet-name>
         <url-pattern>/</url-pattern>
      </servlet-mapping>
</web-app>
Above servlet configuration is similar to configuring custom servlets.
b) Application context files
By default Dispatcher Servlets loads the application context from file [servlet-name]-servlet.xml from WEB-INF directory where [servlet-name] is the name of servlet with which dispatcher servlet is configured. For above configuration, dispatcher servlet will load SpringWebMVC-servlet. Xml file from WEB-INF. This application context will be specific to dispatcher servlet only.
c) Configure additional Application Context
Spring MVC allows us to configure additional application context files using ContextLoaderListener and a context param with name contextConfigLocation in web.xml file Configuring just ContextLoaderListener by default loads file name applicationContext.xml from WEB-INF directory.
For example
<context-param>
    <param-name>contextConfigLocation</param-name>
    <param-value>/WEB-INF/applicationcontext1.xml</param-value>
</context-param>
<listener>
    <listener-class>
        org.springframework.web.context.ContextLoaderListener
    </listener-class>
</listener>
Above configuration will load /WEB-INF/applocationcontext1.xml file along with applicationConetxt.xml.
Files loaded by ContextLoaderListener are loaded at a Root level so available to all Dispatcher Servlets
Note : ContextLoaderListener loads the specified beans configuration files in Root application context hence available to all the dispatcher servlets where as the file loaded by dispatcher servlets is specific to Dispatcher servlet and will refer the ones as parent loaded by context loader listener. Files loaded by Dispatcher servlets will not shared across dispatcher servlets. Files loaded by Context Loader Listener
We can use <import> tag to import external configuration
21.4 Activate Spring MVC Annotation scanning
We need to activate Spring MVC annotation scanning in web application so that classes marked with annotations gets scanned. To do so we need to add below statement in the beans configuration file.
<context:component-scan base-package="com.spring.mvc.tutorial" />
Base-package attribute specifies the source package that will be scanned
21.5 Configure View Resolver
There are several implementations of view resolver available which actually maps the view names to actual view. Some of the implementations are InternalResourceViewResolver, XmlViewResolver, ResourceBundleViewResolver etc.
The InternalResourceViewResolver maps the jsp and html files in the WebContent/WEB-INF/ folder. We can configure prefix or suffix attributes to the view name to generate the final view page URL
To configure InternalResourceViewResolver, add the following to the beans configuration file
<bean class="org.springframework.web.servlet.view.InternalResourceViewResolver">
      <property name="prefix" value="/WEB-INF/jsp/" />
      <property name="suffix" value=".jsp" />
</bean>
21.6 MVC Annotations
a) @Controller -
This annotation is used to define controllers. Any class annotated with @Controller annotation becomes controller and gets registered automatically once auto scan is enabled.
b) @Request Mapping -
This annotation is used to map the Request URLl to the handler methods and can be applied at a class level or at a method level.
Defining @RequestMapping at a class level will map the URL pattern to controller class and can be defined to map different URLs to handler methods.
@RequestMapping annotation allows to map the URL based on request method types as well. For example, below snippet will map the POST request coming for /indexed Url
@RequestMapping(value = "/index", method = RequestMethod.POST)
Default value of method attribute is GET.
c) @ModelAttribute –
Model attribute annotation is used
At a method argument level to grab submitted data in
public void handle(@ModelAttribute(“/data” Student)
{
}
At method level to provide reference data to the form
21.7 Spring Web Application Set up
In this section we will discuss how to create a web application using eclipse. We can create it manually as well
21.7.1 To create a new project go to .
File -> New -> Project -> Web -> Dynamic Web Project ->Next (refer below)
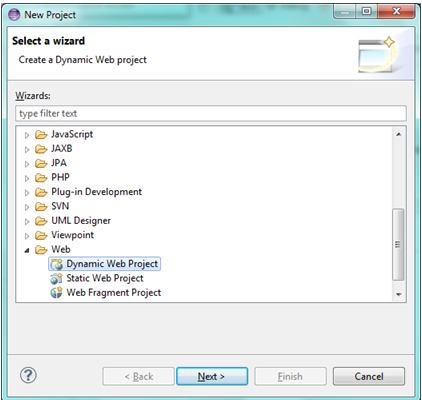
Once you click Next, new window will open (refer below)
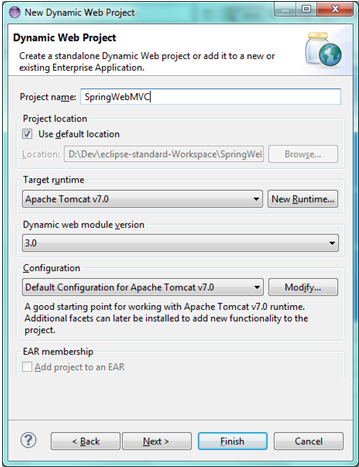
- Project Name –Give it a name. This will be the name of your web application. In above figure, web application with name “SpringWebMVC” will be created
- "Target Runtime", choose "Apache Tomcat v7.0"
- Leave rest all as default values .Click Finish
Once done , a new project with name “SpringWebMVC” will be created (refer below figure)
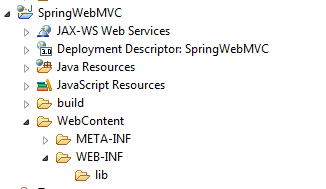
Details-
- All java code including comtrollers will be created under src folder
- All static contents and jsp will be created under WebContent
To create a War file, Right Click on Project -> Export -> War File
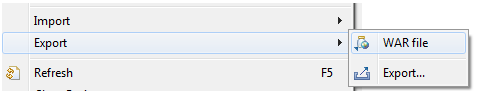
Clicking on War file, a new window will be opened (refer below). Choose a Destination as the webapps folder of your tomcat installation directory.
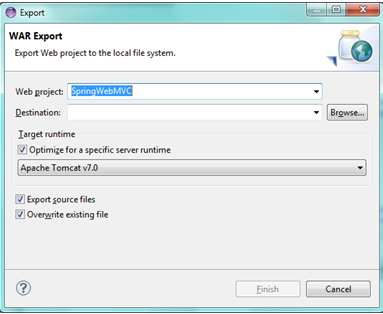
Note- You can select any destination folder and eclipse will create a SpringWebMVC.war file at the selected location. However, each server has its own directory from where it deploys the war file.
In case of tomcat “webapps” directory is the deployment directory and for any web application to be deployed on tomcat, it has to be placed in webapps.
21.7.2 Add Spring Jar files in build path.
Now is the time to add the jar files of Spring and commons-logging we downloaded in Chapter 3 (section 3.6) in the java project.
Copy the below jar files and paste in WebContent\WEB-INF\lib folder
- commons-logging-1.2.jar
- spring-beans-4.1.1.RELEASE.jar
- spring-context-4.1.1.RELEASE.jar
- spring-context-support-4.1.1.RELEASE.jar
- spring-core-4.1.1.RELEASE.jar
- spring-expression-4.1.1.RELEASE.jar
- spring-web-4.1.1.RELEASE.jar
- spring-webmvc-4.1.1.RELEASE.jar
- spring-aop-4.1.1.RELEASE.jar

21.7.3 – Create web.xml
<?xml version="1.0" encoding="UTF-8"?>
     <web-app xmlns:xsi="http://www.w3.org/2001/XMLSchema-instance"
              xmlns="http://java.sun.com/xml/ns/javaee"
              xsi:schemaLocation="http://java.sun.com/xml/ns/javaee
              http://java.sun.com/xml/ns/javaee/web-app_3_0.xsd" version="3.0">
              <display-name>Spring Web MVC Tutorial</display-name>
             <servlet>
                <servlet-name>SpringWebMVC</servlet-name>
                <servlet-class>
                      org.springframework.web.servlet.DispatcherServlet
                </servlet-class>
                    <load-on-startup>1</load-on-startup>
            </servlet>

           <servlet-mapping>
                 <servlet-name>SpringWebMVC</servlet-name>
                 <url-pattern>/</url-pattern>
           </servlet-mapping>
    </web-app>
21.7.4 Create SpringWebMVC-servlet.xml to configure view resolver and activate auto scan .
Create a SpringWebMVC.xml with below content in WEB-INF directory. Below configuration will look for jsp files from WEB-INF/jsp directory
<beans xmlns="http://www.springframework.org/schema/beans"
      xmlns:xsi="ttp://www.w3.org/2001/XMLSchema-instance"
      xmlns:context="http://www.springframework.org/schema/context"
      xsi:schemaLocation="http://www.springframework.org/schema/beans
      http://www.springframework.org/schema/beans/spring-beans-3.0.xsd
      http://www.springframework.org/schema/context
      http://www.springframework.org/schema/context/spring-context-3.0.xsd">

      <context:component-scan base-package="com.spring.web.mvc.tutorial" />

      <bean    class="org.springframework.web.servlet.view.InternalResourceViewResolver">
          <property name="prefix" value="/WEB-INF/jsp/" />
         <property name="suffix" value=".jsp" />
      </bean>
</beans>
21.8 Display Welcome Message MVC Example
Let's create our first MVC application which will display different Greeting message for different URL
Use the application created in section 21.7 ( refer Web application , web.xml and SpringWebMVC-servlet.xml))
a) Create HelloWorldController.java file annotated with @Controller annotation which will define two handler methods. sayHello() method will be mapped to /hello URL and
sayHi() method will be mapped to /greeting URL.
b) @RequestMapping annotation does not have any method attribute defined so these method will be executed for GET requests only
c) Model argument is an optional argument and is required if we want to send some data back to JSP. Model class defines one addAttribute() method which takes key value pair
and can be used to send data to JSP
d) Method return type can be String or void. In case the return type is String , a logical view name will be returned which will be resolved using InternalResourceViewResolver configured in springWebMvC-servlet.xml file.
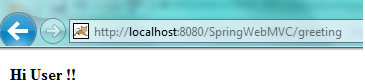
e) If return type is void then URL will be considered as the logical view name. so if we mapped sayHi() method with “/greeting” URL and return type is void then it will consider “greeting” as logical name
f) InternalResourveViewResolver defines prefix as WEB-INF/jsp and suffix as .jsp which means prefix and suffix will be applied to the logical view name to get actual view name . “welcome” logical view name will be resolved as “WEB-INF/jsp/welcome.jsp”
g) Returned data can be displayed on jsp using {<<model-key>>}
package com.spring.web.mvc.tutorial;
import org.springframework.stereotype.Controller;
import org.springframework.ui.Model;
import org.springframework.web.bind.annotation.RequestMapping;
@Controller
public class HelloWorldController {
@RequestMapping("/hello")
public String sayHello(Model model)
{
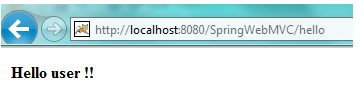
model.addAttribute("welcomeMessage", "Hello user !!");
return "welcome";
}
@RequestMapping("/greeting")
public void sayHi(Model model)
{
model.addAttribute("welcomeMessage", "Hi User !!");
}
}
h. Create welcome.jsp
<html>
 <head>
    <meta http-equiv="Content-Type" content="text/html; charset=ISO-8859-1">
    <title> </title>
 </head>
 <body>
   <strong>
      ${welcomeMessage}
   </strong>
 </body>
</html>
i. Create greeting.jsp
<html>
  <head>
     <meta http-equiv="Content-Type" content="text/html; charset=ISO-8859-1">
     <title> </title>
  </head>
  <body>
    <strong>
      ${welcomeMessage}
    </strong>
  </body>
</html>
j. Hit the Url http://localhost:8080/SpringWebMVC/hello
k. Create greeting.jsp
21.9 Form Processing
Form processing is used in almost every web application. In this section we will discuss how to develop a form based application with the help of a user registration example.
Use the application created in section 21.7 ( refer Web application , web.xml and SpringWebMVC-servlet.xml)
a) Reference data may be needed to display the form . For example, in a user registration from we need to display the list of countries in the dropdown. To do so we can create a list of countries and set in model object and send it back to the input form jsp file. This is similar to what we did in section 21.8. b) We would need to create a model object (User class) in our case and send it back to jsp using model attribute c) Define a method to handle the Post request using @RequestMapping(method= RequestMethod.POST). To grab the input data, define an argument @ModelAttributr of type User .Also to display the data on confirmation screen, we will use the same approach and will set the data in model so we will add another argument of type Model
d) User.java
package com.spring.web.mvc.tutorial;

public class User {

       private String name;
       private String contactNumber;
       private String  country;
       public String getName() {
            return name;
       }
       public void setName(String name){
        this.name = name;
       }
       public String getContactNumber(){
        return contactNumber;
       }
       public void setContactNumber(String contactNumber){
           this.contactNumber = contactNumber;
       }
       public String getCountry(){
           return country;
       }
       public void setCountry(String country){
           this.country = country;
       }
}
e. UserRegistrationController.java
package com.spring.web.mvc.tutorial;

import java.util.HashMap;
import java.util.Map;

import org.springframework.stereotype.Controller;
import org.springframework.ui.Model;
import org.springframework.web.bind.annotation.ModelAttribute;
import org.springframework.web.bind.annotation.RequestMapping;
import org.springframework.web.bind.annotation.RequestMethod;

@Controller
public class UserRegistrationController {
   @RequestMapping("/register")
    public String setForm(Model model)
    {
        Map<String,String> country = new HashMap<String,String>();
        country.put("India","India");
        country.put("United States","United States");
        country.put("United Kingdom","United Kingdom");

        model.addAttribute("country", country);

        User user = new User();
        model.addAttribute("user", user);
        return "inputForm";
    }

    @RequestMapping(value = "/register" ,method = RequestMethod.POST)
    public String submit(@ModelAttribute("user") User user , Model model)
    {

         String name = user.getName();
         String contactNumber = user.getContactNumber();
         String country = user.getCountry();

         model.addAttribute("name",name);
         model.addAttribute("contactNumber",contactNumber);

         model.addAttribute("country",country);

        return "confirmationScreen";
    }
}
f. inputForm.jsp
<%@taglib uri="http://www.springframework.org/tags/form" prefix="form"%>
<html>
<head>
    <title>Form Handling</title>
</head>
 <body>
     <h2>Enter Your Information</h2>
   <form:form method="POST" action="register" modelAttribute="user">
     <table>
       <tr>
          <td><form:label path="name">Name</form:label></td>
          <td><form:input path="name" /></td>
       </tr>
       <tr>
          <td><form:label path="contactNumber">Contact Number</form:label></td>
          <td><form:input path="contactNumber" /></td>
       </tr>
       <tr>
          <td><form:label path="name">Name</form:label></td>
          <td><form:select path = "country" items="${country}" /></td>
        </tr>
        <tr>
           <td colspan="2">
              <input type="submit" value="Submit"/>
           </td>
        </tr>
     </table>
  </form:form>
 </body>
</html>
g. confrmationScreen.jsp
<html>
<head>
<title> Form Handling</title>
</head>
<body>
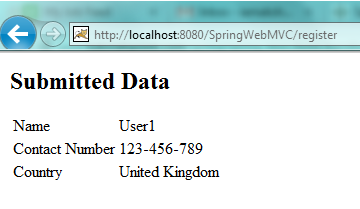
<h2>Submitted Data </h2>
<table>
<tr>
<td>Name</td>
<td>${name}</td>
</tr>
<tr>
<td>Contact Number</td>
<td>${contactNumber}</td>
</tr>
<tr>
<td>Country</td>
<td>${country}</td>
</tr>
</table>
</body>
</html>
h. Access Application using http://localhost:8080/SpringWebMVC/register
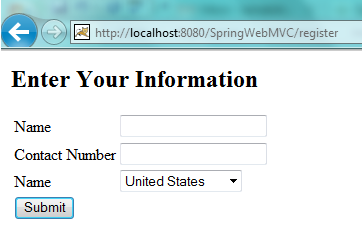
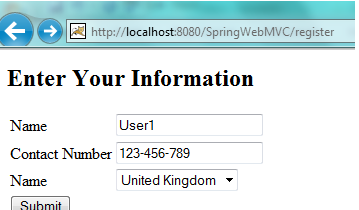
Enter data and submit
21.10 Interceptors
In this section we will discuss how to intercept the request using Spring Interceptor. Spring provides a interface “HandleInterceptor’ with three methods
a) preHandle() – this method gets executed before the request is handled by handler method.
b) postHandle() - this method gets executed after the request is handled by handler method.
c) afterCompletion() – this method getes executed after the view has been rendered.
We need to configure the Interceptor implementation in beans configuration file and need to enable it the list of interceptors of
org.springframework.web.servlet.mvc.annotation.DefaultAnnotationHandlerMapping
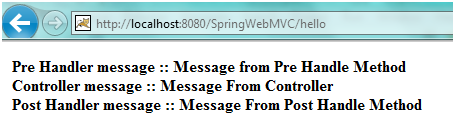
In this application we will add message in preHandle() method ,postHandle() method and in controller and will display all three at the jsp.
Use the application created in section 21.7 ( refer Web application and web.xml)
a) SayHelloController.java
package com.spring.web.mvc.tutorial;

import javax.servlet.http.HttpServletRequest;

import org.springframework.stereotype.Controller;
import org.springframework.ui.Model;
import org.springframework.web.bind.annotation.RequestMapping;

@Controller
public class SayHelloController {
     @RequestMapping("/hello")
     public String sayHello(HttpServletRequest requst , Model model)
     {
        String messageFromInterceptor= (String)requst.getAttribute("preHandleMessage");

        model.addAttribute("preHandleMessage", messageFromInterceptor);
        model.addAttribute("controllerMessage", "Message From Controller");

        return "welcome";
     }
}
b) MessageInterceptor.java
package com.spring.web.mvc.tutorial;

import javax.servlet.http.HttpServletRequest;
import javax.servlet.http.HttpServletResponse;

import org.springframework.web.servlet.HandlerInterceptor;
import org.springframework.web.servlet.ModelAndView;

public class MessageInterceptor implements HandlerInterceptor {

      @Override
      public void afterCompletion(HttpServletRequest request,
            HttpServletResponse response , Object handler, Exception exception )
            throws Exception {
      }
      @Override
      public void postHandle(HttpServletRequest request, HttpServletResponse response,
         Object handler, ModelAndView modelAndView) throws Exception
      {
        modelAndView.addObject("postHandleMessage", "Message From Post Handle Method");
      }
      @Override
      public boolean preHandle(HttpServletRequest request, HttpServletResponse response,Object handler)
                throws Exception
      {
           String message = "Message from Pre Handle Method";
           request.setAttribute("preHandleMessage", message);
           return true;
      }
}
c. SpringWebMVC-servlet.xml
<beans xmlns="http://www.springframework.org/schema/beans"
    xmlns:xsi="http://www.w3.org/2001/XMLSchema-instance" xmlns:context="http://www.springframework.org/schema/context"
    xsi:schemaLocation="http://www.springframework.org/schema/beans
    http://www.springframework.org/schema/beans/spring-beans-3.0.xsd
    http://www.springframework.org/schema/context
    http://www.springframework.org/schema/context/spring-context-3.0.xsd">

    <context:component-scan base-package="com.spring.web.mvc.tutorial" />
    <bean id="messageInterceptor"
        class="com.spring.web.mvc.tutorial.MessageInterceptor" />
        <bean
           class="org.springframework.web.servlet.view.InternalResourceViewResolver">
           <property name="prefix" value="/WEB-INF/jsp/" />
           <property name="suffix" value=".jsp" />
        </bean>
        <bean
            class="org.springframework.web.servlet.mvc.annotation.DefaultAnnotationHandlerMapping">
            <property name="order" value="1"/>
               <property name="interceptors">
              <list>
                <ref bean="messageInterceptor" />
              </list>
           </property>
       </bean>
   </beans>
d) welcome.jsp
<html>
  <head>
    <meta http-equiv="Content-Type" content="text/html; charset=ISO-8859-1">
    <title> </title>
  </head>
  <body>
    <strong>
        Pre Handler message :: ${preHandleMessage}
       <br/>
       <strong>
           Controller message :: ${controllerMessage}
       </strong>
       <br/>
       <strong>
         Post Handler message :: ${postHandleMessage}
        </strong>
     </strong>
  </body>
</html>
e. Access URL with http://localhost:8080/SpringWebMVC/hello
21.11 SpringExceptionResolver - Mapping Exception to Views
Whenever we get an exception in our application we usually gets stack trace and it gets displayed to the end users as well which is actually a very bad experience for the users using our application.
To overcome this , Spring comes with SpringExceptionResolver mechanism which provides a way to configure the pages which get displayed based on the type of exceptions
We need to define the SpringExceptionResolver in beans configuration file similar to below snippet.
<bean class="org.springframework.web.servlet.handler. SimpleMappingExceptionResolver"> <property name="exceptionMappings"> <props> <prop key= "NoDataException"> dataNotAvailable </prop> </props> </property> <property name="defaultErrorView" value="error"/> </bean>
We can define multiple error pages configuration as a key value pair where the qualified class path of exception is the key and value is the page name which will be resolved by ViewResolver.
In the above example, when NoDataException occurs, dataNotAvailable view will be displayed. For all other exceptions, view with name “error” will be displayed.
We will can get the exception details using {exception} tag as it gets populated by Spring
Use the application created in section 21.7 ( refer Web application , web.xml )
Let's create an example.
a) NoDataException.java
package com.spring.web.mvc.tutorial;
public class NoDataException extends RuntimeException {

    private String message;

    public String getMessage() {
        return message;
    }
    public void setMessage(String message) {
        this.message = message;
    }
}
b. GetDataController
package com.spring.web.mvc.tutorial;
import javax.servlet.http.HttpServletRequest;
import org.springframework.stereotype.Controller;
import org.springframework.ui.Model;
import org.springframework.web.bind.annotation.RequestMapping;
@Controller
public class GetDataController {
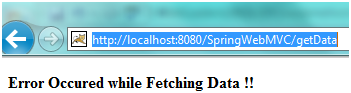
@RequestMapping("/getData")
public String getData(HttpServletRequest requst , Model model)
{
NoDataException exception = new NoDataException();
exception.setMessage("Error Occured while Fetching Data !!");
throw exception;
}
}
c. SpringWebMVC-servlet.xml
<beans xmlns="http://www.springframework.org/schema/beans"
    xmlns:xsi="http://www.w3.org/2001/XMLSchema-instance" xmlns:context="http://www.springframework.org/schema/context"
    xsi:schemaLocation="http://www.springframework.org/schema/beans
    http://www.springframework.org/schema/beans/spring-beans-3.0.xsd
    http://www.springframework.org/schema/context
    http://www.springframework.org/schema/context/spring-context-3.0.xsd">

    <context:component-scan base-package="com.spring.web.mvc.tutorial" />

    <bean
        class="org.springframework.web.servlet.view.InternalResourceViewResolver">
        <property name="prefix" value="/WEB-INF/jsp/" />
        <property name="suffix" value=".jsp" />
    </bean>
    <bean class="org.springframework.web.servlet.handler.SimpleMappingExceptionResolver">
           <property name="exceptionMappings">
              <props>
                 <prop key="com.spring.web.mvc.tutorial.NoDataException">
                     dataNotAvailable
                  </prop>
              </props>
          </property>
          <property name="defaultErrorView" value="error"/>
        </bean>
</beans>
d. dataNotAvailable.jsp
<html>
  <head>
    <meta http-equiv="Content-Type" content="text/html; charset=ISO-8859-1">
      <title> </title>
   </head>
  <body>
    <strong>
      ${exception.message}
    </strong>
  </body>
</html>
e. Access application using http://localhost:8080/SpringWebMVC/getData