
Introduction:
- The chapter will explain the interceptor “fileUpload” in Struts 2 with example program.
fileUpload Interceptor:
- Create a folder “jsp” under source packages in NetBeans and create first.jsp.
// first.jsp

<%--
    Document   : first
    Created on : Nov 20, 2014, 12:34:17 PM
    Author     : Admin
--%>

<%@page contentType = "text/html" pageEncoding = "UTF-8"%>
<%@taglib prefix = "s" uri = "/struts-tags" %>
<!DOCTYPE html>
<html>
    <head>
        <meta http-equiv = "Content-Type" content = "text/html; charset = UTF-8">
        <title> File Upload Application </title>
    </head>
    <body>
       <s:form action = "click" enctype = "multipart/form-data">
          <s:label value = "Select a file.."/>
          <s:file name = "uploadFile"  />
          <br/>
           <s:submit value = "submit"  />
       </s:form>
   </body>
</html>
- The enctype = “multipart/form-data” is mandatory for file upload. The reason is that, the file user uploads may be of different size. A large file may need to be break up in small chunks and then should be uploaded. If the enctype attribute is not mentioned and the web server has limited or restricted size of accepting the files, proper file upload will not take place.
- After the file gets uploaded successfully, the next page will show the details of file, such as:
- Name of file that is uploaded
- Location of file on web server
- Size of file in bytes or kilo-bytes
- Type of file (content type)
- These details are to coded in next.jsp as follows:
//next.jsp
<%--
    Document   : next
    Created on : Nov 20, 2014, 12:50:20 PM
    Author     : Admin
--%>

<%@page contentType = "text/html" pageEncoding = "UTF-8"%>
<%@taglib prefix = "s" uri = "/struts-tags" %>
<!DOCTYPE html>
<html>
    <head>
        <meta http-equiv = "Content-Type" content = "text/html; charset = UTF-8">
        <title> File Upload - Details </title>
    </head>
    <body>
       <h1> File upload successful  </h1>
       <h1> Details of uploaded file are: </h1>
       <h4>    File Name : <s:property value="uploadFileFileName"/>  </h4>
       <h4>   File Content Type : <s:property value="uploadFileContentType"/>  </h4>
       <h4>  Uploaded Path of File : <s:property value="uploadFile"/> </h4>
    </body>
</html>
- User will see following when your first.jsp is ready and on click of submit button, error page will displayed because you have not yet given your action page.
Figure - 1

- Now on click of “submit” button, the selected file should get uploaded to the server. The code for this should be written in “action” class. So create a package “action_class” under source packages directory and create a Java source file “myaction.java” inside “action_class” package.
- Now things to remember about uploading files in web server are:
- The file to be created in the action class should have the same name as the name of the file attribute in <s:file> element. For example, the file element is: <s:file name = "uploadFile" />. The name of the file here is “uploadFile”. The file to be declared in action class should have the same name. That is, File uploadFile;
- The name of the file to be retrieved should be also named as [filename] FileName in action class. That is,
String [filename]FileName;
In our example: String uploadFileFileName;
- The content type of the file can be also specified by syntax: [filename]ContentType.
In our example: String uploadFileContentType.
//myaction.java

/*
 * To change this license header, choose License Headers in Project Properties.
 * To change this template file, choose Tools | Templates
 * and open the template in the editor.
 */
package action_class;
import com.opensymphony.xwork2.ActionSupport;
import java.io.*;
import javax.servlet.http.HttpServletRequest;
import org.apache.commons.io.FileUtils;
import org.apache.struts2.interceptor.ServletRequestAware;
/**
 *
 * @author Admin
 */
public class myaction extends ActionSupport
{
    private File uploadFile;
    private String uploadFileContentType;
    private String uploadFileFileName;

    public String getUploadFileContentType() {
        return uploadFileContentType;
    }
    public void setUploadFileContentType(String uploadFileContentType) {
        this.uploadFileContentType = uploadFileContentType;
    }
    public String getUploadFileFileName() {
        return uploadFileFileName;
    }
    public void setUploadFileFileName(String uploadFileFileName) {
        this. uploadFileFileName = uploadFileFileName;
    }
    public File getUploadFile () {
        return uploadFile;
    }
    public void setUploadFile (File uploadFile) {
        this. uploadFile = uploadFile;
    }
    public String execute()
           {
             return “success”;
           }
}
- Now to combine our JSP’s with action class, we need to configure our struts.xml.
//struts.xml

<!DOCTYPE struts PUBLIC
"-//Apache Software Foundation//DTD Struts Configuration 2.0//EN"
"http://struts.apache.org/dtds/struts-2.0.dtd">
<struts>
    <package name = "default" namespace = "/" extends = "struts-default">
      <action name = "fileUploadAction" class = "action_class.myaction" method = "execute">
      <action name = "click" class = "action_class.myaction">
         <interceptor-ref name = "fileUpload">
                   <param name = "allowedTypes"> image/jpeg, image/jpg </param>
                   <param name = "maximumSize"> 3000000 </param>
         </interceptor-ref>

         <interceptor-ref name = "params">
               <param name = "excludeParams"> ^struts\..* </param>
         </interceptor-ref>

         <result name = "success"> jsp/next.jsp </result>
      </action>
   </package>
</struts>
- In struts.xml the interceptor is used by <interceptor-ref> element. As we already have discussed before, there are two types of interceptors: pre-processing and post-processing.
- In this example, we are using both of them. First interceptor is used for file upload (pre-processing) and the second is used to retrieve the location where the file is saved in web server (post-processing).
- The interceptor used for file upload is “fileUpload”. So the element is given as:
<interceptor-ref name = "fileUpload">
- Also, as discussed before, we can apply restrictions for size of file to be uploaded or even the file types. These characteristics can be provided by using <param> tags inside <interceptor-ref> element as follows:
<interceptor-ref name = “name of interceptor”>
  <param name1 = “name of parameter”> values1 </param>
  <param name2 = “name of parameter”> values2 </param>
<interceptor-ref>
- Parameters of fileUpload interceptor are:
- allowedTypes : used to specify which content type is allowed for file upload. For example: image/jpeg, image/gif, text/plain, text/html etc.
- maximumSize : used to specify byte size of the file to be uploaded.
- So to provide limitations (like size and content type) for file upload in our application, we have used param tag as:
<interceptor-ref name = "fileUpload">
    <param name = "allowedTypes"> image/jpeg, image/jpg </param>
    <param name = "maximumSize"> 3000000 </param>
</interceptor-ref>
- So, before file upload these parameters are validated.
- Another interceptor tag used here is “params” tag. That is,
<interceptor-ref name = “params”>
          <! -- parameters -- >
</interceptor-ref>
- This is explained in further chapters but for an introduction it used to retrieve the destination file path on web server.
- And web.xml can be given as:
//web.xml
<?xml version = "1.0" encoding = "UTF-8"?>
<web-app version = "3.1" xmlns = "http://xmlns.jcp.org/xml/ns/javaee" xmlns:xsi = "http://www.w3.org/2001/XMLSchema-instance" xsi:schemaLocation = "http://xmlns.jcp.org/xml/ns/javaee http://xmlns.jcp.org/xml/ns/javaee/web-app_3_1.xsd">
    <filter>
       <filter-name> struts2 </filter-name>
        <filter-class> org.apache.struts2.dispatcher.FilterDispatcher </filter-class>
    </filter>
    <filter-mapping>
        <filter-name> struts2 </filter-name>
        <url-pattern> /* </url-pattern>
    </filter-mapping>
    <session-config>
        <session-timeout>
            30
        </session-timeout>
   </session-config>
    <welcome-file-list>
        <welcome-file> jsp/first.jsp </welcome-file>
    </welcome-file-list>
</web-app>
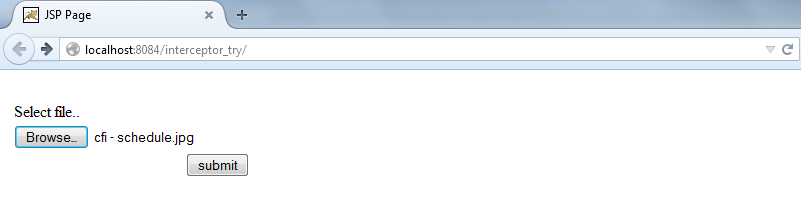
- So the application will run as follows:
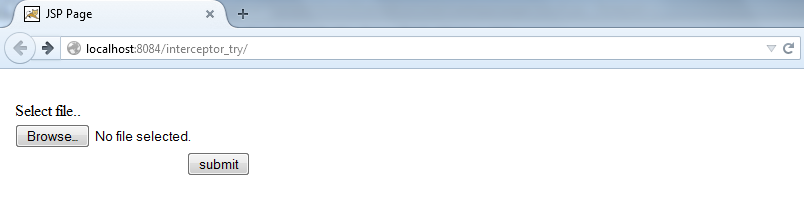
Figure : first page of application

- Here you can see a separate folder is created for the files to be uploaded. And this folder is maintained date wise.