
Introduction – Stack:
- Stack is a data structure which is used to storing variables values or even objects for a program. The arrangement in which the concerned elements are kept is “Last In First Out” (LIFO) order.
- So the element which is placed lastly is removed at first. The structure will be like:
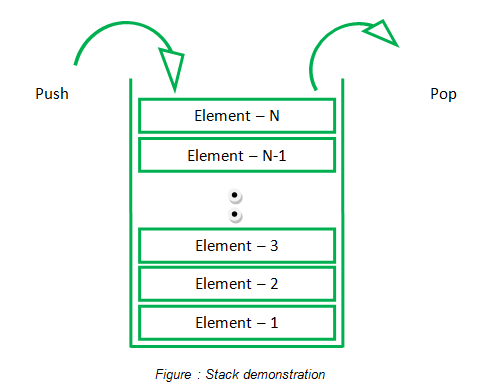
- As it can be seen from above, the same LIFO structure is followed in variables and web objects of Struts 2. Such structure is only used for fast and easy access of data members of web application.
- The operations related to stack are:
- Push
- Pop
- Peek
- Search
- Update
- All these operations are related to ValueStack in Struts 2 which will be explained in detail in this chapter.
ValueStack:
- ValueStack is a virtual stack in Struts 2 which keeps the details of all the related variables and objects of a web application. The elements are stored in LIFO order and this kind of arrangement of objects makes the variables access easily with less time consumption.
- The objects stored on ValueStack have operations like push, pop, peep, find the values of objects, find the name of object, find the class to which the object belongs, set the size of stack, also retrieve the size of stack and the number of elements stored in it.
- The objects are stored in a specific sequence and are accessed in the same manner. The sequence of arrangement is as follows:
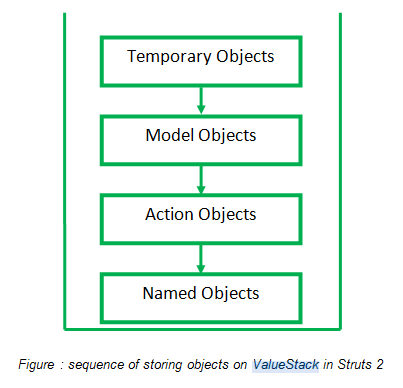
- The objects are:
- Temporary Objects: the temporary objects are the objects that are created at run-time (dynamically), specifically created during the execution of JSP pages of a web application. The scope of such objects or variables is only in the currently executing JSP page or even in the currently executing loop or method or class. They get automatically destroyed (pop in ValueStack) when no longer required.
- Model Object : Model Objects refer to the java bean class (.java files -> classes that extend AcitonSupport class for providing actions) which contains getter and setter methods of the variables declared in the action classes of web application. As these variables are to be further used for action purposes, the Model Object is always placed above the Action Object. The Model Object is created on stack when the action class implements ModelDriven interface.
- Action Object : The Action Object refers to the currently executing Action classes’ object.
- Named Object : The named objects are of two types:
- Inbuilt objects: Inbuilt named objects are automatically created when the web application is launched.
The inbuilt objects are accessed by using “#” (hash) symbol in web page. For example: #application, #session, #request and so on and so forth. The example for same will be explained further in the same chapter.
They include:
- Application – the scope of application object is for the whole web application
- Session – the scope of session objects is only for the current session (till the user is logged in the system)
- Request – the request object is only accessible in the existing user’s request.
- Attribute – attribute is used as “attr” in named objects. The attribute object returns the first occurrence of attribute in page, request, and session or application scope.
- Parameters – Parameter object refers to the request parameters provided by user.
- Programmer created objects: they refer to the objects created by developer during web application development. A programmer can create as many objects as needed for a web page in .java (action class) file.
- The objects of ValueStack can be accessed by certain methods which involve general stack methods like push and pop elements, peek or search any element, display elements, count the number of elements in stack etc. The methods for ValueStack as follows.
Methods of ValueStack:
- public int size() : The method returns the integral value representing the size of the stack. If the numbers of elements in stack are 5, the size of stack is integral 5.
- public void push(Object obj) : the method pushes a value to stack. Normally the values are added one above another. So if the lastly placed object is at location 5, the next element will be pushed at location 6. The Object which is passed as argument can be of any data type. That is, the element to be pushed can be an integer, float, double, character, string etc.
- public Object pop() : the pop method will delete the element from the top of the stack. The return type of pop method is Object because the elements can be of any data type.
- public Object findValue(String name) : The findValue method is used to find the value of an element by passing the name of that element as argument of function. The method returns the complete object (with name and value).
- public Object findValue(String name, Class c) : The findValue method is used to find the value of an element by passing the name of that element as well as the class to which it belong as arguments of function (unlike previous method). The method returns the complete object (with name and value).
- public String findString(String name) : The findValue method is used to find the value of an element by passing the name of that element as argument of function. But unlike the previous method, this method only returns the name of element and not its value.
- public void set(String name, Object obj) : set method is used to set the object on stack with the String name.
- public void setValue(String name, Object value) : setValue method sets the object on the stack with the given name (same as previous method). We can use findValue() method to find the value of the currently set object.
public Object peek() : the peek method (as the name suggest) is used to retrieve the name and value of the top element of stack without changing the stack.
- In the example program, the actual use of ValueStack will be explained. In our web application we will be using “debug” tag from struts tag libraries. The debug tag will help us look up for all the objects specified as above in the ValueStack like application, request, attribute etc.
- To use debug tag, the syntax is:
<s:debug> </s:debug>
- Our web application only submits a form and on submission of action, displays the “debug link”. On click of debug link (<s:debug/> tag) all the stack elements (objects) with their values are displayed in tabular format.
- So, the first.jsp will only have a submit button as follows:
// first.jsp
<%--
    Document   : first
    Created on : Nov 20, 2014, 12:34:17 PM
    Author     : Admin
--%>

<%@page contentType = "text/html" pageEncoding = "UTF-8"%>
<%@taglib prefix = "s" uri = "/struts-tags" %>
<!DOCTYPE html>
<html>
    <head>
        <meta http-equiv = "Content-Type" content = "text/html; charset = UTF-8">
        <title> Struts 2 Debug Example using Value Stack  </title>
    </head>
    <body>
        <h1>
            Struts 2 Debug Example using Value Stack
        </h1>
        <hr/>
        <s:form action = "click">
              <s:submit/>
        </s:form>
    </body>
</html>
The next.jsp
<%--
    Document   : next
    Created on : Dec 3, 2014, 3:30:59 PM
    Author     : Admin
--%>

<%@page contentType = "text/html" pageEncoding = "UTF-8"%>
<%@taglib prefix = "s" uri = "/struts-tags" %>
<!DOCTYPE html>
<html>
    <head>
      </head>
    <body>
        <h1>
          To view the Value Stack click on Debug Link below:
        </h1>
        <hr/>
      <s:debug/>
    </body>
</html>
- The action class “myclass.java” will have only getter and setter methods (java bean class) and the execute method that returns success (which is optional).
// myclass.java

/*
 * To change this license header, choose License Headers in Project Properties.
 * To change this template file, choose Tools | Templates
 * and open the template in the editor.
 */

package action_class;

import com.opensymphony.xwork2.ActionSupport;

/**
 *
 * @author Admin
 */
public class myclass extends ActionSupport{

    private String name;

    public String getName() {
      return name;
     }

    public void setName(String name) {
      this.name = name;
    }

    public String execute() {
      return SUCCESS;
    }
}
- Now to combine our JSP’s with action class, we need to configure our struts.xml. It can be coded as:
// struts.xml

<!DOCTYPE struts PUBLIC
"-//Apache Software Foundation//DTD Struts Configuration 2.0//EN"
"http://struts.apache.org/dtds/struts-2.0.dtd">

<struts>

     <package name = "default" extends = "struts-default">
            <action name = "click" class = "action_class.myclass">
                        <result name = "success"> next.jsp </result>
           </action>
     </package>
</struts>
- The web.xml can be written as follows:
// web.xml
<?xml version = "1.0" encoding = "UTF-8"?>
<web-app version = "3.1" xmlns = "http://xmlns.jcp.org/xml/ns/javaee" xmlns:xsi = "http://www.w3.org/2001/XMLSchema-instance" xsi:schemaLocation = "http://xmlns.jcp.org/xml/ns/javaee http://xmlns.jcp.org/xml/ns/javaee/web-app_3_1.xsd">
    <filter>
        <filter-name> struts2 </filter-name>
        <filter-class> org.apache.struts2.dispatcher.FilterDispatcher </filter-class>
    </filter>
    <filter-mapping>
        <filter-name> struts2 </filter-name>
        <url-pattern> /* </url-pattern>
    </filter-mapping>
    <session-config>
        <session-timeout>
            30
        </session-timeout>
    </session-config>
    <welcome-file-list>
        <welcome-file> jsp/first.jsp </welcome-file>
    </welcome-file-list>
</web-app>
- Our application will run as follows:
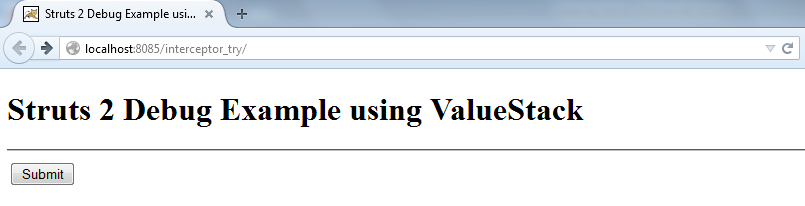
Figure: First run of our application
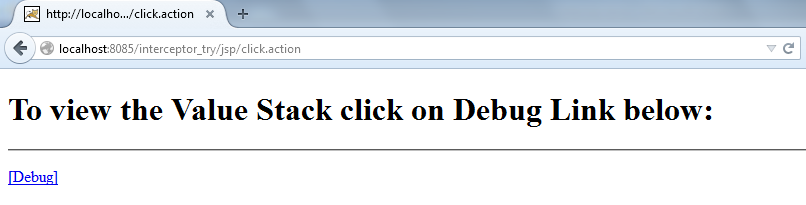
Figure: after clicking on submit button the next page (next.jsp) is displayed with debug option in form of link.
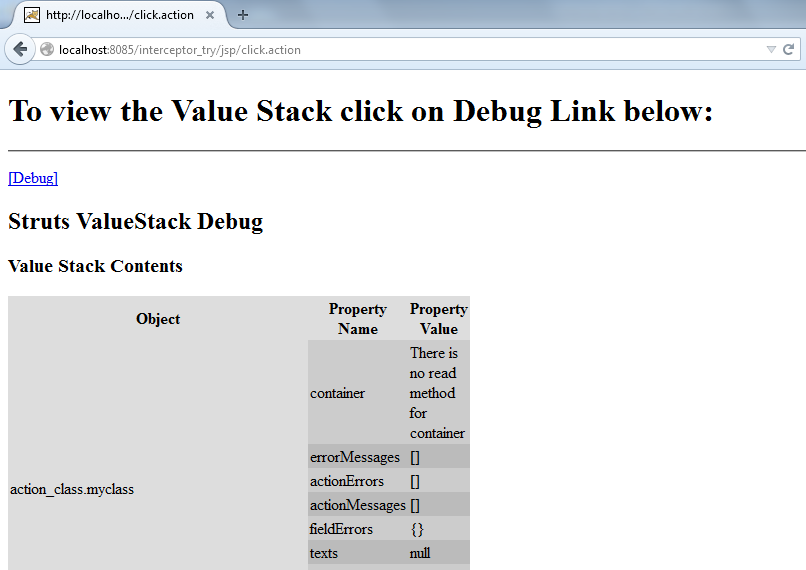
Figure: On click of debug link, the actual ValueStack contents are displayed where object and its values are mapped accordingly
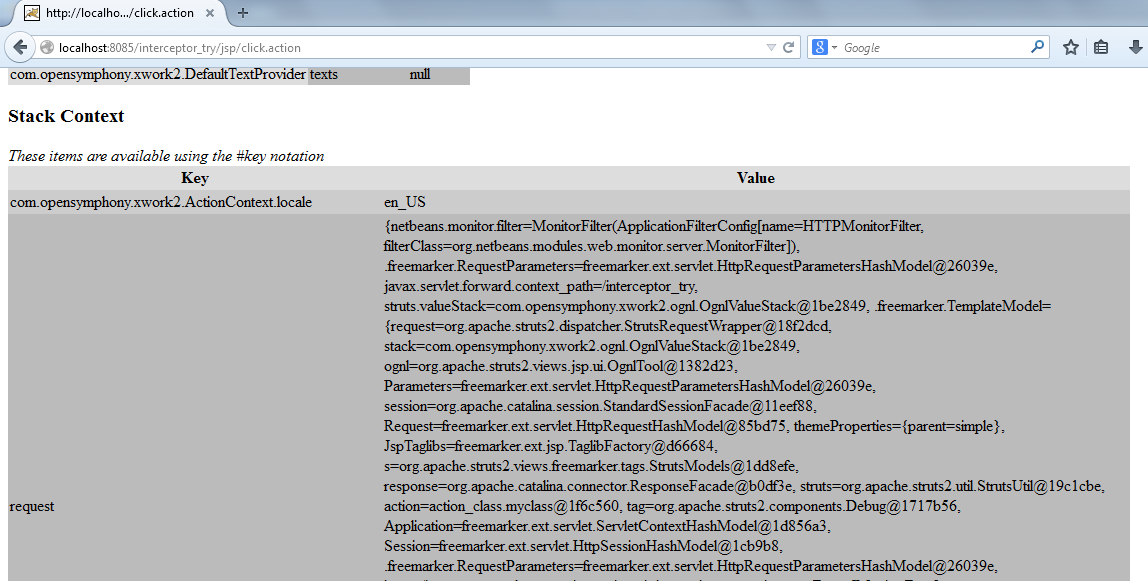
Figure: The object “request” can be seen with its values. Same is displayed accordingly for attribute, response, parameter object etc.