
After completing New plug-in Project wizard following directory structure will be created (Figure 1-12).
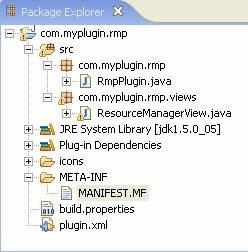
Figure 1-12
Four important files to look for are:
- RmpPlugin.java – This is the main plug-in class. When plug-in is activated, startup method of this class is called. This class can be used to initialize plugin specific resources.
- ResourceManagerView.java – This is the View class which gets generated. This class contributes to the UI of our example Resource manager plug-in.
- MANIFEST.MF – defines runtime information of the plugin
- Plugin.xml – defines the extension information of the plug-in.
In order to open up plug-in manifest editor double click on MANIFEST.MF or plugin.xml file. Browse through the tabs shown at the bottom of editor. Don’t worry if you are unable to understand all of the content in this editor, it will be discussed during course of this tutorial.
Manifest Editor - Dependencies Tab
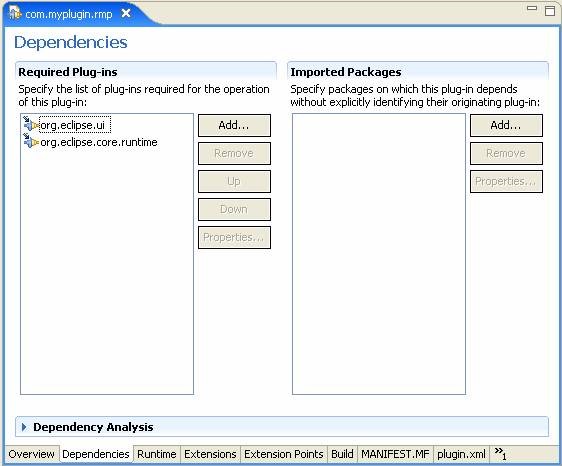
Figure 1-13
In This section a plug-in must list all the dependent plug-ins which are required so that our plug-in compiles. As you know that we build our plug-ins on top of other plug-ins, so this section essentially declares all those dependencies.
It must be noted that all above plug-in dependencies must be met before plug-in is resolved. It is always good to scan your dependencies from time to time and remove unused dependencies. In order to know unused dependencies use Dependency Analysis section.
Manifest Editor – Runtime Tab
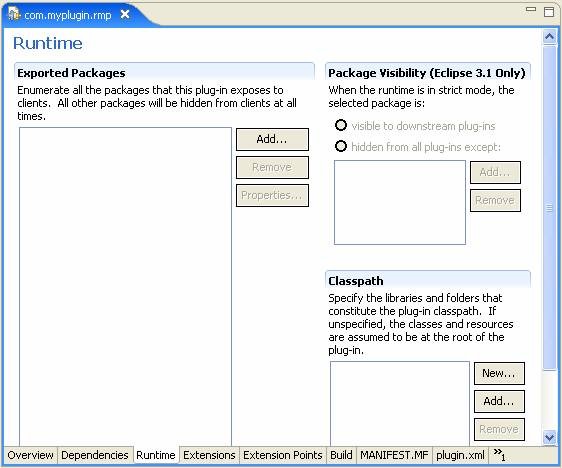
Figure 1-14
On this page plug-in declares what all it exposes to the outside world. Let's understand this concept with an example. Say you are building Plug-in A. Now if plug-in B wants to extend plug-in A or wants to use plug-in A in any way it will be required that Plug-in A exposes its API’s. It is here that Plug-in A would declare all the packages which it wants to expose to outside world. You can use Add... button to see all your plug-in packages and then select all Packages which you would like to export.
Another important section on this page is the Classpath. If your plug-in is using some external jars then it is important to add such jars to runtime classpath. Note that simply adding such jars to project classpath will only help you in compiling your source code. In order to make these jars available to runtime environment use Classpath section.
Manifest Editor – Extensions Page

Figure 1-15
Extensions page is a viewer on top of plugin.xml. This is one of the most frequently used page in plug-in development. This page makes it easy to create extensions as this page is aware of all the extension points. Eclipse provides around 213 extension points where clients can contribute functionality. Extension points are available for virtually everything for ex: builders, editors, preferences, help contents, markers, views, perspective and so on. Basically we select some extension point and then use these to build our own extensions.
Manifest Editor – Extension Points
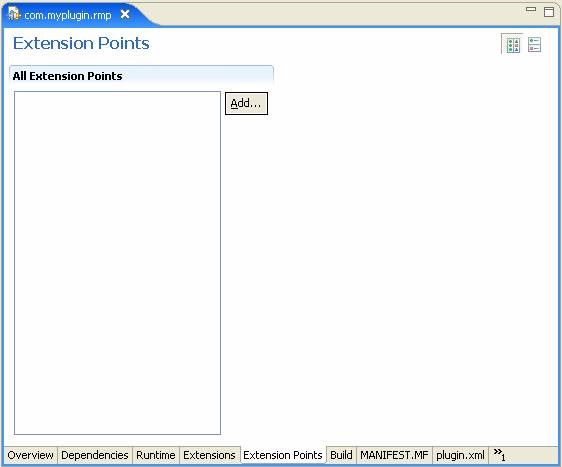
Figure 1-16
This page is also a viewer on top of plugin.xml. This page is used to define our own extension points. Such extension points define a contract which other plug-ins may agree to abide by and extend plug-ins functionality in some way.
Test New Plug-in
There are two ways to test this plug-in. First, we can build a product which will essentially create a plugin bundle, this bundle is then dumped into plug-in folder of eclipse installation. Second, launching new plug-in from within Overview tab of manifest editor. At this time we will take second approach to test this plug-in. This is also the preferable choice when we are developing eclipse plug-ins and need to test them from time to time. In order to test this plug-in click on Overview tab followed by clicking on link Launch an Eclipse Application. See figure 1-17
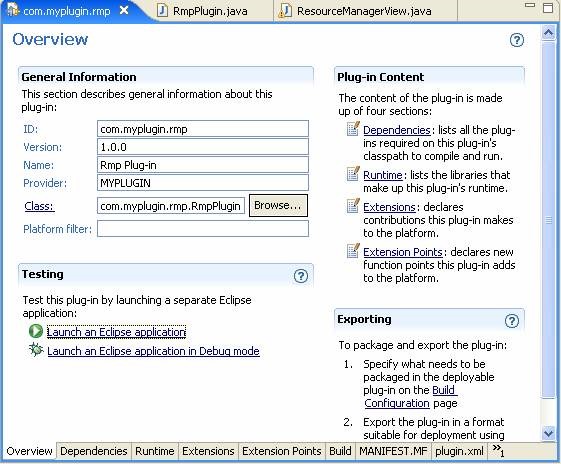
Figure 1-17
This will launch another instance of eclipse application. However, this new instance will have our plug-in registered with it, So we will be able to see resource manager view. After New Eclipse has started, from the Window menu, select Show View > Other... to open the Show View dialog (see Figure 1-18). In the dialog, expand the Resource Manager Category, select Resource Manager View, and then click the OK button. This causes the Resource Manager view to open (see figure 1-19).
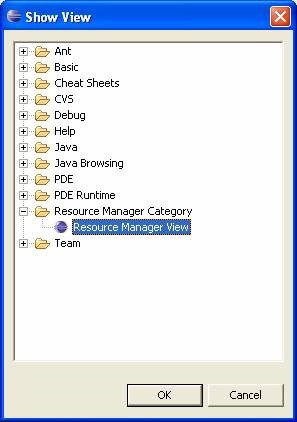
Figure 1-18
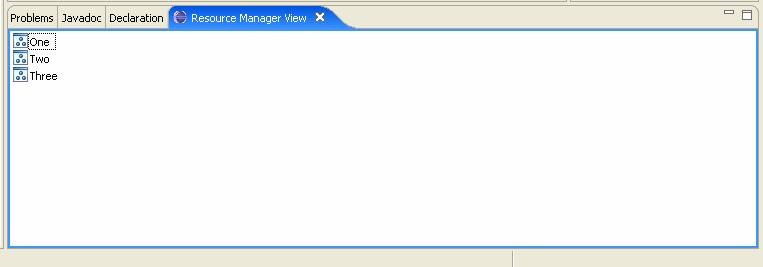
Figure 1-19