
Introduction
HTML5 <canvas> is a magical element used to draw graphics on a webpage using JavaScript. The <canvas> element can be considered as a container for graphics which becomes useful only with JavaScript. The <canvas> element can be used to draw graphics, create animations and even to develop gaming applications.
More About Canvas
A canvas is just a rectangular area on a webpage that has no border and no content by default. In order to make use of HTML5 canvas, we have to add the <canvas> element in the HTML document, access it with JavaScript (using document.getElementById), create a context (using getContext) and then draw graphics using different properties and methods. Difference between the canvas element and canvas context is that canvas element is the DOM node embedded in the HTML page whereas canvas context is an object with methods and properties to draw graphics inside the canvas element. The context can be either 2d or 3d (webgl).
Similar to any other HTML element, you should add the <canvas> tag wherever you want to display the canvas. You can add a fallback content between the opening and closing <canvas> tags so that the particular text will appear if the viewer’s browser does not support the HTML5 <canvas>. You can set the height and width of your canvas using height and width attributes. You can use JavaScript to render the content inside the canvas and use CSS to style your canvas.
Sample Code:
<!DOCTYPE html>
<html>
 <head>
  <title>Canvas</title>
   <style>
    #firstCanvas{
    border:2px solid purple;
    background-color:pink;
    }
   </style>
   <script>
    var myCanvas, myContext;
    window.onload = function()
    {
     myCanvas = document.getElementById('firstCanvas');
     myContext = myCanvas.getContext('2d');
    }
    function changeSize()
    {
      myCanvas.height = 400;
      myCanvas.width = 400;
    }
    function writeText()
    {
     myContext.font = 'italic 30pt Calibri';
     myContext.fillStyle = "purple";
     myContext.fillText('Welcome!!!', 5, 50);
    }
   </script>
 </head>
 <body>
   <p>Below is the canvas!!!</p>
   <canvas id="firstCanvas" height="200" width="200">
     Your browser does not support canvas element!!!
   </canvas><br />
   <button id="btnChange" onclick="changeSize();">Change Size</button>
   <button id="btnWrite" onclick="writeText();">Write Text</button>
 </body>
</html>
Output:
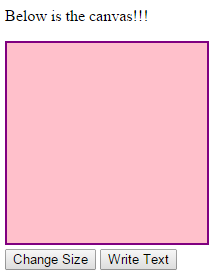
Try clicking the buttons and you could see changes in the canvas.
Paths
Most of the shapes in canvas are drawn using the path concepts. You can connect multiple sub paths to create a path. You can use the beginPath() method to start a new path, moveTo() method to position the cursor at a point and lineTo(), arcTo(), quadraticCurveTo(), and bezierCurveTo() methods to create paths of different shapes.
The lineTo() method is used to construct a straight line, arcTo() method is to construct an arc defined by a center point, radius, starting angle and ending angle, quadraticCurveTo() to construct a quadratic curve defined by a context point, control point and an ending point and the bezierCurveTo() method is used to construct a Bezier curve defined by a context point two control points and an ending point.
But just using the lineTo(), arcTo(), quadraticCurveTo() or bezierCurveTo() methods will not make the path visible; you need to use the stroke() or fill() methods to make the path visible. You can use the closePath() method if you want to close the path at the starting point.
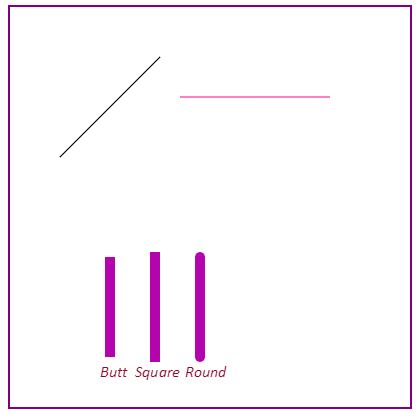
Draw Lines
We draw lines using the concept of path explained above. We are going to use the beginPath(), moveTo(), lineTo() and stroke() methods to draw lines of different lengths. The syntax of moveTo() method is moveTo(x, y) where x and y are coordinates of the point to be moved. The syntax of lineTo() method is lineTo(x,y) where x and y are coordinates of the point where to line is to be drawn.
By default, the stroke color is black. You can use the strokeStyle property of the context to change the color of your line and the lineWidth property to set the width of your line. You can also use the lineCap property to add a cap to your line. The three possible values are butt, round or square. The default value of lineCap property is butt.
Sample Code:
<!DOCTYPE html>
<html>
 <head>
  <title>Lines</title>
  <style>
    #firstCanvas{
    border:2px solid purple;
    }
  </style>
  <script>
    var myCanvas, myContext;
    window.onload = function()
    {
     myCanvas = document.getElementById('firstCanvas');
     myContext = myCanvas.getContext('2d');
     myContext.beginPath();
     myContext.moveTo(50, 150);
     myContext.lineTo(150, 50);
     myContext.stroke();
     myContext.beginPath();
     myContext.moveTo(170, 90);
     myContext.lineTo(320, 90);
     myContext.strokeStyle = "#FF0088";
     myContext.stroke();
     myContext.beginPath();
     myContext.strokeStyle = "#B404AE";
     myContext.lineWidth = 10;
     myContext.font = 'italic 12pt Calibri';
     myContext.fillStyle = "#8A0829";
     myContext.lineCap = "butt";
     myContext.moveTo(100, 250);
     myContext.lineTo(100, 350);
     myContext.fillText('Butt', 90, 370);
     myContext.stroke();
     myContext.beginPath();
     myContext.lineCap = "square";
     myContext.moveTo(145, 250);
     myContext.lineTo(145, 350);
     myContext.fillText('Square', 125, 370);
     myContext.stroke();
     myContext.beginPath();
     myContext.lineCap = "round";
     myContext.moveTo(190, 250);
     myContext.lineTo(190, 350);
     myContext.fillText('Round', 175, 370);
     myContext.stroke();
    }
  </script>
 </head>
 <body>
  <canvas id="firstCanvas" height="400" width="400">
  Your browser does not support canvas element!!!
  </canvas><br />
 </body>
</html>
Output:
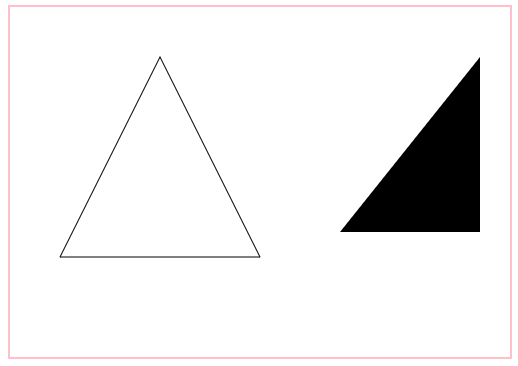
Draw Triangles
We draw triangles using the concept of path explained above. We are going to use the beginPath(), moveTo(), lineTo(), fill() and closePath() methods to draw triangles of different shapes and sizes. Like strokeStyle, you can use the fillStyle property to change the fill color.
Sample Code:
<!DOCTYPE html>
<html>
 <head>
  <title>Triangles</title>
   <style>
    #firstCanvas{
    border:2px solid pink;
    }
   </style>
   <script>
     window.onload = function()
     {
      var myCanvas = document.getElementById('firstCanvas');
      var myContext = myCanvas.getContext('2d');
      myContext.beginPath();
      myContext.moveTo(330, 225);
      myContext.lineTo(470, 50);
      myContext.lineTo(470, 225);
      myContext.closePath();
      myContext.fill();
      myContext.beginPath();
      myContext.moveTo(150, 50);
      myContext.lineTo(50, 250);
      myContext.lineTo(250, 250);
      myContext.closePath();
      myContext.stroke();
     }
   </script>
 </head>
 <body>
   <canvas id="firstCanvas" height="350" width="500">
   Your browser does not support canvas element!!!
   </canvas><br />
 </body>
</html>
Output:
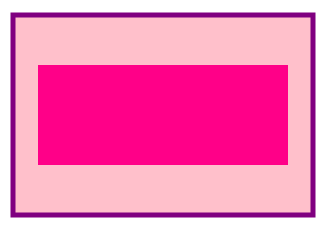
Draw Rectangles
We can use the rect() method to draw a rectangle. The syntax of rect() method is rect(x, y, width, height) where x and y are the coordinates of the top left point of the rectangle.
Sample Code:
<!DOCTYPE html>
<html>
 <head>
  <title>Rectangles</title>
  <script>
    window.onload = function()
    {
     var myCanvas = document.getElementById('firstCanvas');
     var myContext = myCanvas.getContext('2d');
     myContext.beginPath();
     myContext.rect(50, 50, 300, 200);
     myContext.fillStyle = 'pink';
     myContext.fill();
     myContext.lineWidth = 5;
     myContext.strokeStyle = 'purple';
     myContext.stroke();
     myContext.beginPath();
     myContext.rect(75, 100, 250, 100);
     myContext.fillStyle = #FF0088;
     myContext.fill();
    }
  </script>
 </head>
 <body>
   <canvas id="firstCanvas" height="500" width="500">
     Your browser does not support canvas element!!!
   </canvas><br />
 </body>
</html>
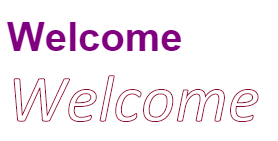
Write Text
We can use the fillText() method to write text into canvas. The syntax of fillText method is fillText(content, x, y) where content is the text to be displayed and x and y are the coordinates where the text should appear. You can use the font property to set the font style, size and family of the text. You can use the textAlign property to horizontally align the text and the possible values are start, end, left, center and right. You can use the textBaseline property to vertically align the text and the possible values are top, hanging, middle, alphabetic, ideographic and bottom.
Sample Code:
<!DOCTYPE html>
<html>
 <head>
  <title>Text</title>
  <script>
   window.onload = function()
   {
   var myCanvas = document.getElementById('firstCanvas');
   var myContext = myCanvas.getContext('2d');
   myContext.font = 'bold 30pt Arial';
   myContext.fillStyle = "purple";
   myContext.fillText('Welcome', 5, 50);
   myContext.font = 'italic 50pt Calibri';
   myContext.strokeStyle = "#8A0829";
   myContext.strokeText('Welcome', 5, 120);
   }
  </script>
 </head>
 <body>
  <canvas id="firstCanvas" height="500" width="500">
   Your browser does not support canvas element!!!
  </canvas><br />
 </body>
</html>
Output:
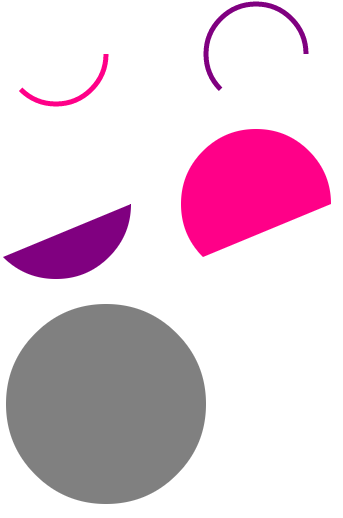
Draw Arcs and Circles
We draw arcs using the beginPath(), arc() and stroke() methods to draw arcs of different types. The syntax of arc() method is arc(x, y, radius, startAngle, endAngle, counterclockwise) where x and y are the x and y coordinates of the center point, radius is the radius of the arc, startAngle and endAngle are the starting and ending angles and counterclockwise specifies the direction of the arc. The startAngle and endAngle needs to be defined in radians and not in degrees. By default, an arc is drawn in clockwise direction.
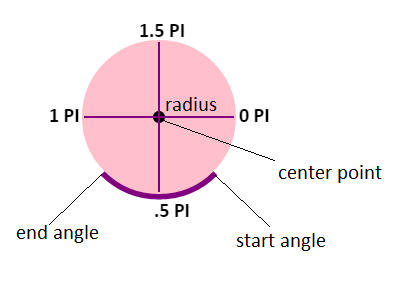
You can style the arcs using strokeStyle, lineWidth and lineCap properties. If you specify the start angle as 0 PI and end angle as 2 PI, then you will get a full circle.
Sample Code:
<!DOCTYPE html>
 <html>
  <head>
   <title>Arcs and Circles</title>
   <script>
    window.onload = function()
    {
     var myCanvas = document.getElementById('firstCanvas');
     var myContext = myCanvas.getContext('2d');
     var x = 150;
     var y = 100;
     var radius = 50;
     var startAngle = 0 * Math.PI;
     var endAngle = .75 * Math.PI;
     myContext.beginPath();
     myContext.lineWidth = 5;
     myContext.arc(x, y, radius, startAngle, endAngle, false);
     myContext.strokeStyle = '#FF0088';
     myContext.stroke();
     myContext.beginPath();
     myContext.arc(350, y, radius, startAngle, endAngle, true);
     myContext.strokeStyle = 'purple';
     myContext.stroke();
     var y = 250;
     var radius = 75;
     myContext.beginPath();
     myContext.arc(x, y, radius, startAngle, endAngle, false);
     myContext.fillStyle = 'purple';
     myContext.fill();
     myContext.beginPath();
     myContext.arc(350, y, radius, startAngle, endAngle, true);
     myContext.fillStyle = '#FF0088';
     myContext.fill();
     myContext.beginPath();
     myContext.arc(200, 450, 100, 0*Math.PI, 2*Math.PI, true);
     myContext.fillStyle = 'gray';
     myContext.fill();
    }
  </script>
  </head>
  <body>
    <canvas id="firstCanvas" height="600" width="600">
     Your browser does not support canvas element!!!
    </canvas><br />
  </body>
</html>
Output:
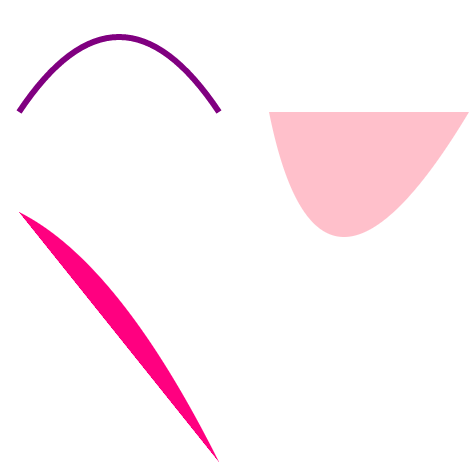
Draw Quadratic Curves and Bezier Curves
To draw a quadratic curve, we need to reach the context point using the moveTo() method and specify the control point and ending point using quadraticCurveTo() method. The syntax of quadraticCurveTo() method is quadraticCurveTo(x1, y1, x2, y2) where x1 and y1 are coordinates of control point and x2 and y2 are coordinates of end point.
To draw a bezier curve, we need to reach the context point using the moveTo() method and specify two control points and ending point using bezierCurveTo() method. The syntax of bezierCurveTo() method is bezierCurveTo(x1, y1, x2, y2, x3, y3) where x1, y1 and x2, y2 are coordinates of two control points and x3 and y3 are coordinates of end point.
Sample Code:
<!DOCTYPE html>
<html>
 <head>
  <title>Quadratic and Bezier Curves</title>
  <script>
    window.onload = function()
    {
     var myCanvas = document.getElementById('firstCanvas');
     var myContext = myCanvas.getContext('2d');
     myContext.beginPath();
     myContext.moveTo(50, 150);
     myContext.quadraticCurveTo(150, 0, 250, 150);
     myContext.lineWidth = 6;
     myContext.strokeStyle = 'purple';
     myContext.stroke();
     myContext.beginPath();
     myContext.moveTo(300, 150);
     myContext.quadraticCurveTo(350, 400, 500, 150);
     myContext.lineWidth = 6;
     myContext.fillStyle = 'pink';
     myContext.fill();
     myContext.beginPath();
     myContext.moveTo(50, 250);
     myContext.quadraticCurveTo(150, 300, 250, 500, 350, 450);
     myContext.fillStyle = '#FF0080';
     myContext.fill();
    }
  </script>
 </head>
 <body>
  <canvas id="firstCanvas" height="600" width="600">
    Your browser does not support canvas element!!!
  </canvas><br />
 </body>
</html>
Output:
Summary
In this section, we have seen how to draw different shapes like rectangle, circle, curves, arcs etc using <canvas> element. We can also use <canvas> element to draw graphics, create animations and even to develop gaming applications.