
4.4.1 Android Gallery and ImageVIews
We always love to surf our gallery to pick our best images. What if you can make your own gallery and surf only the images that we want to. Great isn’t it. We will use Android Gallery and ImageView to create a fun app to make a gallery. But before that we should be introduced to these new guys. Let’s find out and shake hands with these new terms
4.4.1.1 Android Gallery
Android Gallery is a widget. Unfortunately, this is deprecated in API 16. This view shows items in a horizontal, centrally locked pattern. By default, Theme_galleryItemBackground is used as background for each view which is given to the gallery via Adapter. You will understand this when you will code the example. Don’t worry. Just go ahead.
Gallery should use LayoutParams as type of layout parameters supplied to the views. LayoutParams of views tell the parent view about their placing or position in respective views.
4.4.1.2 Android ImageView
Android ImageView is a class. This class can load images from various sources. It displays an image as icon.
4.4.1.3 Android Gallery Example
It is better to practically implement and understand the concepts. We don’t have great deal of explanation for this topic. Gallery will be used to display a horizontal sequence of images. When we choose any one of the image, ImageView will display that selected image.
Open your IDE and create a project. Name it as you like. I am naming it as DisplayPictureExample App. An ImageAdapter class will be implemented which will extend the BaseAdapter class. It will bind to Gallery view by a series of ImageView views. So let us do this without wasting our energy. Open the xml file of your app and code it as shown in the following listing:
<RelativeLayout xmlns:android="http://schemas.android.com/apk/res/android"
xmlns:tools="http://schemas.android.com/tools"
android:layout_width="match_parent"
android:layout_height="match_parent"
android:paddingBottom="@dimen/activity_vertical_margin"
android:paddingLeft="@dimen/activity_horizontal_margin"
android:paddingRight="@dimen/activity_horizontal_margin"
android:paddingTop="@dimen/activity_vertical_margin"
tools:context=".MainActivity" >
<TextView
android:id="@+id/textView1"
android:layout_width="wrap_content"
android:layout_height="wrap_content"
android:text="Hello Readers!! That's cartoon gallery" />
<Gallery
android:id="@+id/galleryExample"
android:layout_width="fill_parent"
android:layout_height="wrap_content" />
<ImageView
android:id="@+id/imageViewExample"
android:layout_width="320px"
android:layout_height="200px"
android:layout_alignParentBottom="true"
android:layout_alignRight="@+id/textView1"
android:layout_marginBottom="87dp"
android:scaleType="fitXY"
android:src="@drawable/ic_launcher" />
</RelativeLayout>
Figure - activity_main.xml file of Android gallery exanple
Graphical layout should be similar to the following snapshot:
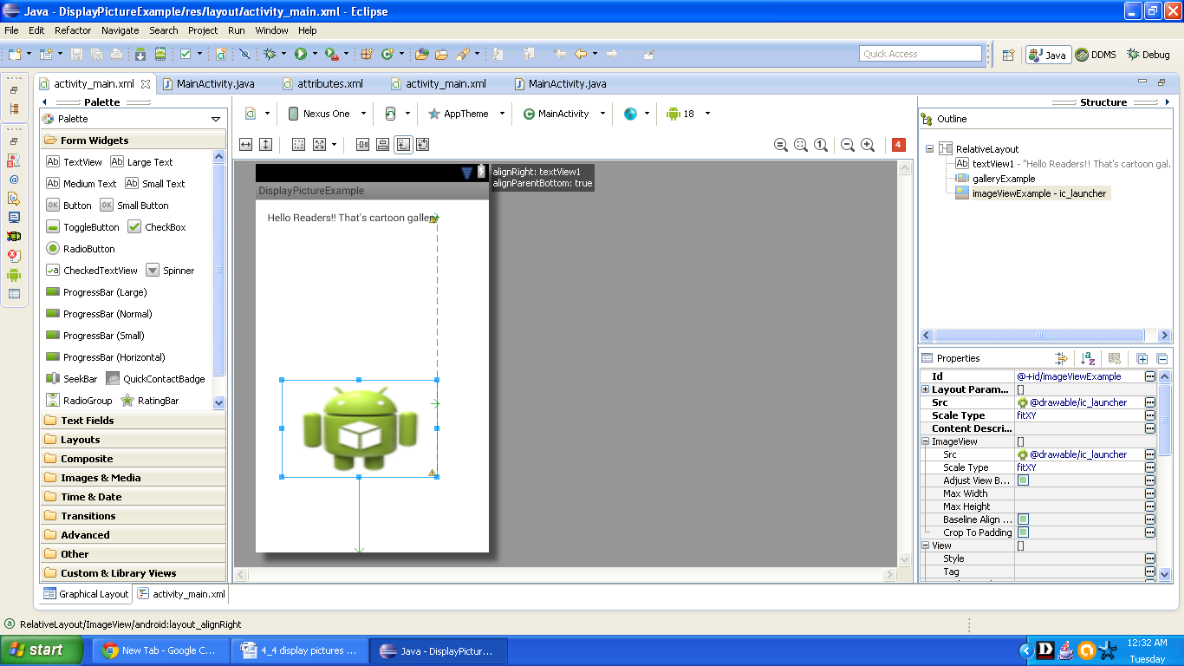
Figure Graphical layout of Android gallery exanple
Now go to res/values/ folder and create a new xml file by the same procedure you used to create a new file. Just you have to choose an xml file. Name it attributes.xml or anything of your choice. Actually, name doesn’t matter. Open this file and code it as sown in the following listing:
<?xml version="1.0" encoding="utf-8"?>
<resources>
    <declare-styleable name="Gallery">
        <attr name="android:galleryItemBackground" />
    </declare-styleable>
</resources>
Figure - attributes.xml file
Now copy some images in the res/drawable folder of app and name them. Remember them as we will reference them in our code which will be displayed in our own gallery. Now open the main activity file of app and add the code as shown in the following listing:
package com.android.tution.Picture;

import android.app.Activity;
import android.content.Context;
import android.content.res.TypedArray;
import android.os.Bundle;
import android.view.View;
import android.view.ViewGroup;
import android.widget.AdapterView;
import android.widget.AdapterView.OnItemClickListener;
import android.widget.BaseAdapter;
import android.widget.Gallery;
import android.widget.ImageView;
import android.widget.Toast;

public class MainActivity extends Activity {

       Integer[] ImageIDs = { R.drawable.picture, R.drawable.picturea,
            R.drawable.pictureb, R.drawable.picturec, R.drawable.pictured,
            R.drawable.picturee, R.drawable.picturef, R.drawable.pictureg,
            R.drawable.picturej, R.drawable.ic_launcher };
       @Override
       protected void onCreate(Bundle savedInstanceState) {
            super.onCreate(savedInstanceState);
            setContentView(R.layout.activity_main);

            Gallery gallery = (Gallery) findViewById(R.id.galleryExample);
            gallery.setAdapter(new ImageAdapter(this));
            gallery.setOnItemClickListener(new OnItemClickListener() {
               public void onItemClick(AdapterView<?> parent, View view,
                       int position, long id) {
                   Toast.makeText(getBaseContext(),
                        "picture" + (position + 1) + " selected",
                        Toast.LENGTH_SHORT).show();

                   ImageView imageView = (ImageView) findViewById(R.id.imageViewExample);
                   imageView.setImageResource(ImageIDs[position]);
                }
            });

}
Figure - First Half of main activity
Now we shall code for ImageAdapter class. Continue in the same activity file with the following code:
public class ImageAdapter extends BaseAdapter {
             private Context context;
             private int itemBackground;

             public ImageAdapter(Context c) {
                   context = c;
                   TypedArray a = obtainStyledAttributes(R.styleable.Gallery);
                   itemBackground = a.getResourceId(
                       R.styleable.Gallery_android_galleryItemBackground, 0);
                  a.recycle();
            }
            @Override
            public int getCount() {
              // TODO Auto-generated method stub
               return ImageIDs.length;
            }

            @Override
            public Object getItem(int arg0) {
                // TODO Auto-generated method stub
                return arg0;
            }

            @Override
            public long getItemId(int position) {
              // TODO Auto-generated method stub
              return position;
            }

            @Override
            public View getView(int position, View convertView, ViewGroup parent) {
                       // TODO Auto-generated method stub
                       ImageView imageView = new ImageView(context);
                       imageView.setImageResource(ImageIDs[position]);
                       imageView.setScaleType(ImageView.ScaleType.FIT_XY);
                       imageView.setLayoutParams(new Gallery.LayoutParams(150, 120));
                       imageView.setBackgroundResource(itemBackground);

                       return imageView;

        }
    }
}
Figure - Second half of the code
We have customized our ImageView and ImageAdapter class is implemented successfully.
Open your manifest file and as I always say, cross-check everything before running your app otherwise you may face terrible errors while debugging.
<?xml version="1.0" encoding="utf-8"?>
<manifest xmlns:android="http://schemas.android.com/apk/res/android"
    package="com.android.tution.Picture"
    android:versionCode="1"
    android:versionName="1.0" >
    <uses-sdk
        android:minSdkVersion="8"
        android:targetSdkVersion="18" />
    <application
        android:allowBackup="true"
        android:icon="@drawable/ic_launcher"
        android:label="@string/app_name"
        android:theme="@style/AppTheme" >
        <activity
            android:name="com.android.tution.Picture.MainActivity"
            android:label="@string/app_name" >
            <intent-filter>
                <action android:name="android.intent.action.MAIN" />
                <category android:name="android.intent.category.LAUNCHER" />
            </intent-filter>
        </activity>
    </application>
</manifest>
Figure - manifest file of Android gallery exanple
Everything is cooked now it is the time to eat the dish. Run a suitable emulator and run the application. Apart from what are your images choose by you, everything should be same. I have created a gallery of cartoon characters it seemed the best choice to me. Anyways your output should be similar to the following snapshot:
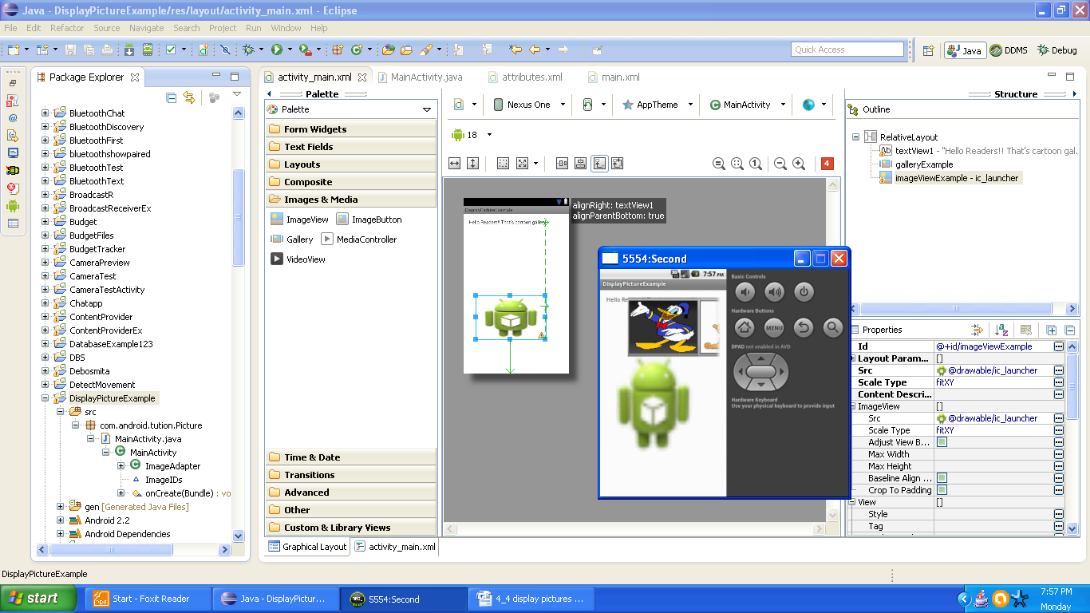
Figure - Output of Android gallery app after first run
You can see a horizontal list. Scrolling your gallery will scroll the images from their position. But your ImageVIew will have a static display until you click on any one of the image displayed on gallery. For example I have selected Donald duck to be the ImageView display and i am scrolling the gallery to Winnie the Pooh which is a bear. Scrolling towards Winnie is not going to change the ImageView. For a visual proof you can see the following snapshot:
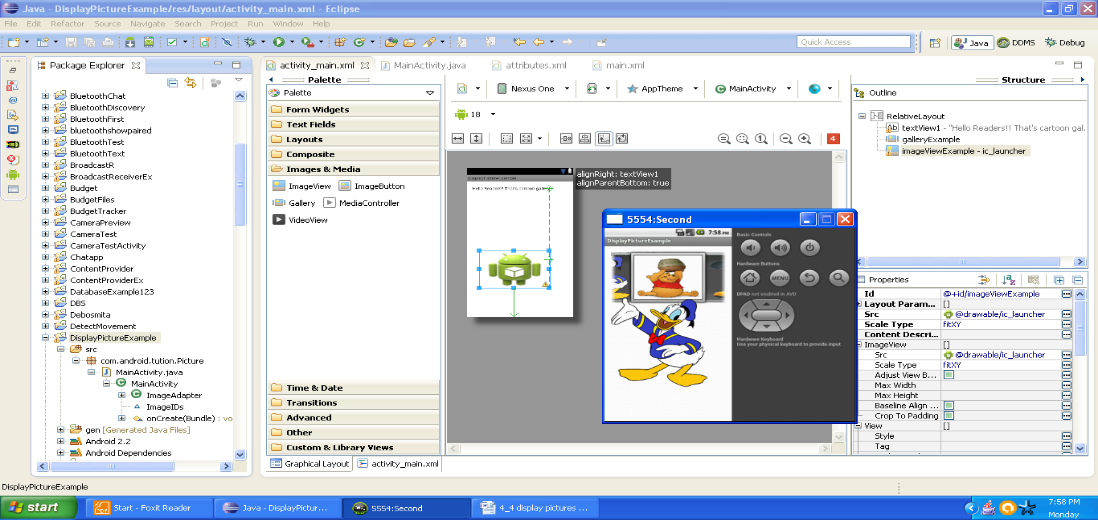
Figure - Scrolling the Gallery horizontally doesn’t changes the ImageView’s view
To change the ImageView’s view, we have to select a particular image on gallery. For instance I have selected daisy duck from gallery and her image is displayed on ImaGevIew and you will be alerted with a toast message about your selection. Following snapshot is a visual proof of what is explained in these two lines.
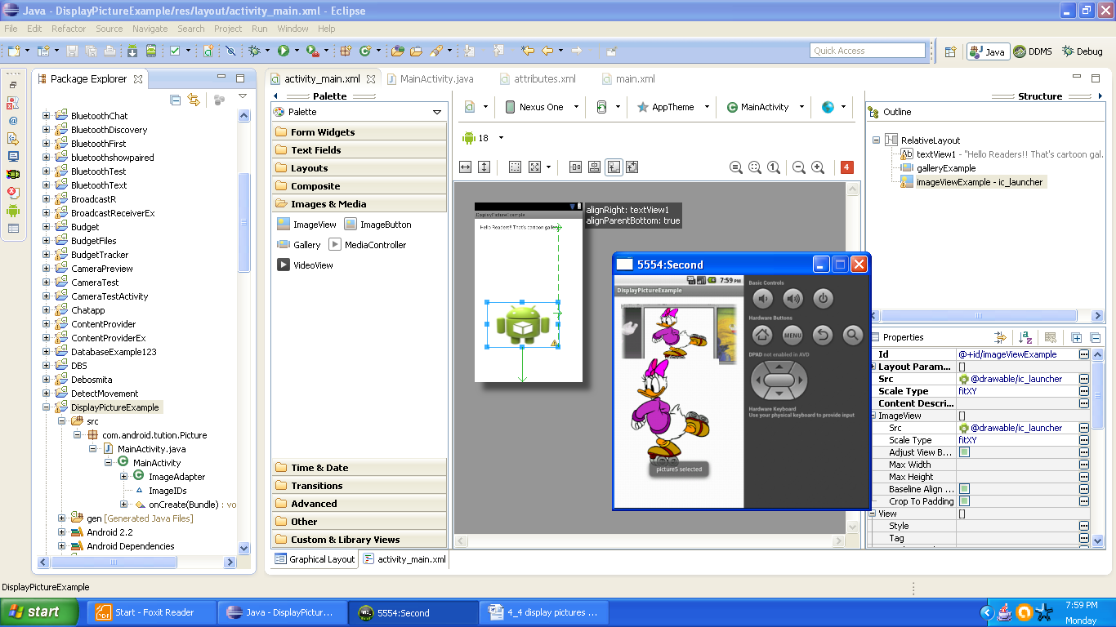
Figure - selecting image on Gallery will change ImageView’s view
So buddies, time to congratulate you for the first half. Good to go and let us start the second approach of displaying images.
4.4.2 GridView
GridView is a viewgroup. It displays items in two-dimensional scrollable grid. These items are pulled into the grids automatically. Generally ListAdapters are used for this purpose.
|
|
|
|
|
|
|
|
|
|
|
|
|
|
|
|
|
|
|
|
|
|
|
|
|
Figure - Example of Android grid layout
4.4.2.1 Android Gridview Example
Let us create an example and find the usefulness of GridView in this display picture target of ours’. Create a new project and name it as you like and I am naming it GridViewExample app. You have to copy some images in the res/drawable folder. We will have to refer them in our code as done in previous project.
An ImageAdapter class is implemented which is bind to GridView. When image is selected a toast message is displayed.
Open your xml file and code it as shown in the following listing:
<RelativeLayout xmlns:android="http://schemas.android.com/apk/res/android"
    xmlns:tools="http://schemas.android.com/tools"
    android:layout_width="match_parent"
    android:layout_height="match_parent"
    android:paddingBottom="@dimen/activity_vertical_margin"
    android:paddingLeft="@dimen/activity_horizontal_margin"
    android:paddingRight="@dimen/activity_horizontal_margin"
    android:paddingTop="@dimen/activity_vertical_margin"
    tools:context=".MainActivity" >
    <TextView
        android:id="@+id/textView1"
        android:layout_width="wrap_content"
        android:layout_height="wrap_content"
        android:text="Hello readers!!" />
    <GridView
        android:id="@+id/gridViewExample"
        android:layout_width="fill_parent"
        android:layout_height="fill_parent"
        android:layout_alignLeft="@+id/textView1"
        android:layout_below="@+id/textView1"
        android:layout_marginTop="26dp"
        android:columnWidth="90dp"
        android:gravity="center"
        android:horizontalSpacing="10dp"
        android:numColumns="auto_fit"
        android:stretchMode="columnWidth"
        android:verticalSpacing="10dp" >
    </GridView>
</RelativeLayout>
Figure - xml file of Android gridview example
Graphical layout of app should be similar to the following snapshot:
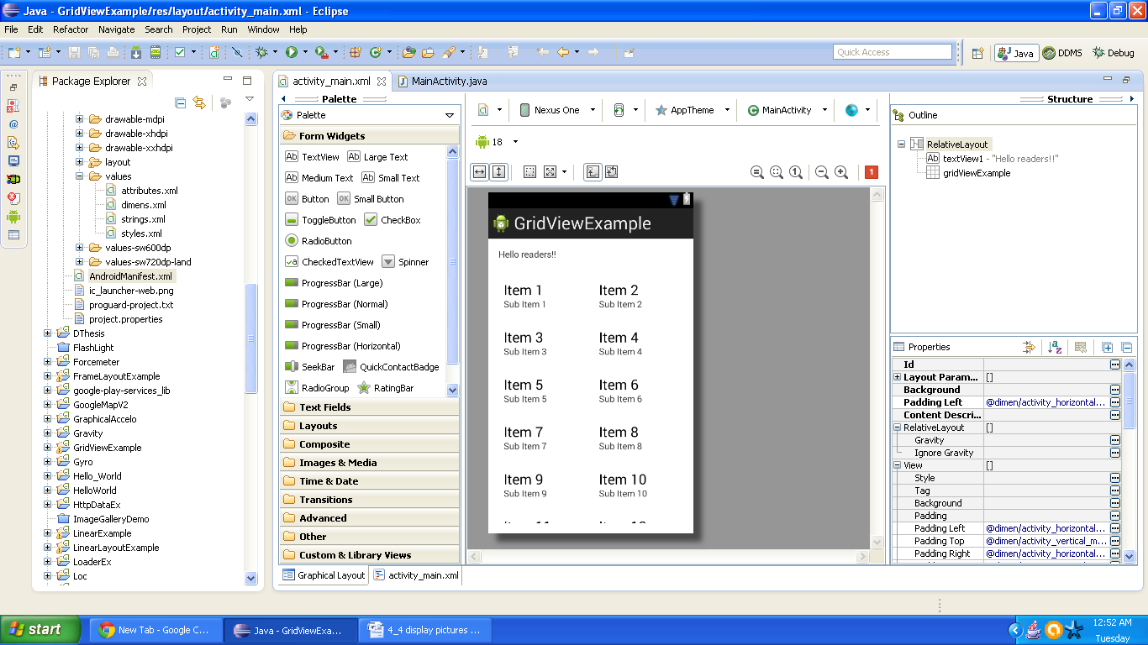
Figure - Graphical layout Android gridview example
Open your main activity file and code it as shown in the following listing:
package com.android.tution.Grid;
import android.app.Activity;
import android.content.Context;
import android.os.Bundle;
import android.view.Menu;
import android.view.View;
import android.view.ViewGroup;
import android.widget.AdapterView;
import android.widget.AdapterView.OnItemClickListener;
import android.widget.BaseAdapter;
import android.widget.GridView;
import android.widget.ImageView;
import android.widget.Toast;
public class MainActivity extends Activity {
    Integer[] imageIds = { R.drawable.ic_launcher, R.drawable.picture,
            R.drawable.picturea, R.drawable.pictureb, R.drawable.picturec,
            R.drawable.pictured, R.drawable.picturee, R.drawable.picturef,
            R.drawable.pictureg, R.drawable.picturej
    };
    @Override
    protected void onCreate(Bundle savedInstanceState) {
        super.onCreate(savedInstanceState);
        setContentView(R.layout.activity_main);
        GridView gridView = (GridView) findViewById(R.id.gridViewExample);
        gridView.setAdapter(new ImageAdapter(this));
        gridView.setOnItemClickListener(new OnItemClickListener() {
            @Override
            public void onItemClick(AdapterView<?> arg0, View arg1, int arg2,
                    long arg3) {
                // TODO Auto-generated method stub
                Toast.makeText(getBaseContext(),
                        "picture" + (arg2 + 1) + " selected",
                        Toast.LENGTH_SHORT).show();
            }
        });
    }
            }
            imageView.setImageResource(imageIds[arg0]);
            return imageView;
        }
    }
Figure - First Half of Android gridview example code
Now we shall implement the ImageAdapter class like the previous project. Continue in the same the activity with following code:
public class ImageAdapter extends BaseAdapter {
        private Context context;
        public ImageAdapter(Context c) {
            context = c;
        }
        @Override
        public int getCount() {
            // TODO Auto-generated method stub
            return imageIds.length;
        }
        @Override
        public Object getItem(int arg0) {
            // TODO Auto-generated method stub
            return arg0;
        }
        @Override
        public long getItemId(int arg0) {
            // TODO Auto-generated method stub
            return arg0;
        }
        @Override
        public View getView(int arg0, View arg1, ViewGroup arg2) {
            // TODO Auto-generated method stub
            ImageView imageView;
            if (arg1 == null) {
                imageView = new ImageView(context);
                imageView.setLayoutParams(new GridView.LayoutParams(85, 85));
                imageView.setScaleType(ImageView.ScaleType.CENTER_CROP);
                imageView.setPadding(5, 5, 5, 5);
            } else {
                imageView = (ImageView) arg1;
            }
            imageView.setImageResource(imageIds[arg0]);
            return imageView;
        }
    }
    @Override
    public boolean onCreateOptionsMenu(Menu menu) {
        // Inflate the menu; this adds items to the action bar if it is present.
        getMenuInflater().inflate(R.menu.main, menu);
        return true;
    }
}
Figure - Second Half of Android gridview example code
Now cross check your manifest file with the following listing:
<?xml version="1.0" encoding="utf-8"?>
<manifest xmlns:android="http://schemas.android.com/apk/res/android"
    package="com.android.tution.Grid"
    android:versionCode="1"
    android:versionName="1.0" >
    <uses-sdk
        android:minSdkVersion="8"
        android:targetSdkVersion="18" />
    <application
        android:allowBackup="true"
        android:icon="@drawable/ic_launcher"
        android:label="@string/app_name"
        android:theme="@style/AppTheme" >
        <activity
            android:name="com.android.tution.Grid.MainActivity"
            android:label="@string/app_name" >
            <intent-filter>
                <action android:name="android.intent.action.MAIN" />
                <category android:name="android.intent.category.LAUNCHER" />
            </intent-filter>
        </activity>
    </application>
</manifest>
Figure - manifest file of Android gridview example
Everything is done. You are ready for the execution of app. create a suitable emulator and run your app. According to your images the display will vary only in images and not in the pattern of output so output should be similar to the following snapshot:
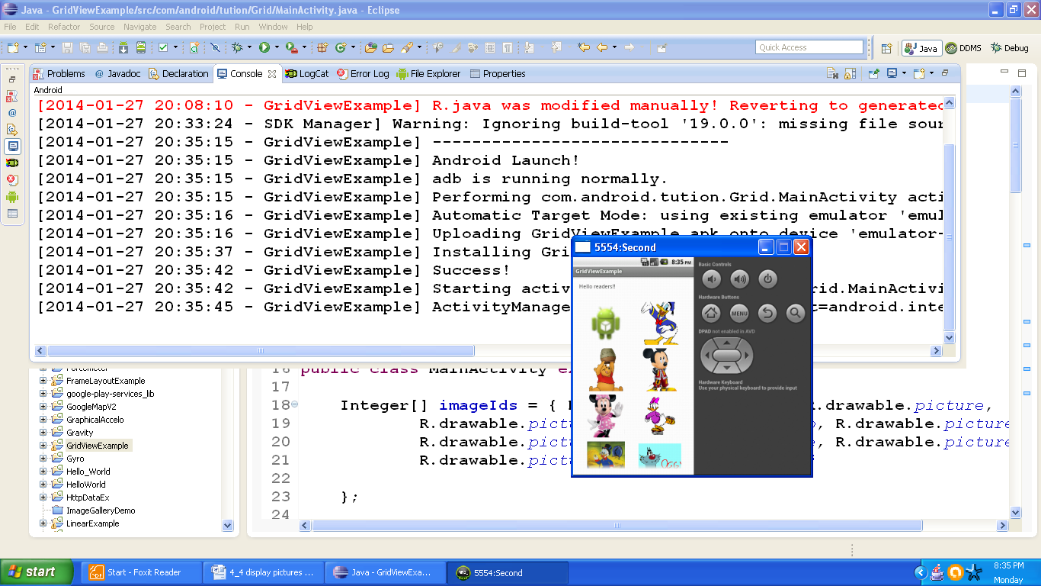
Figure - Output of Android GridViewExample app
Thanks everyone for your patience and I must congratulate you on your success. Congratulations!! See you in the next section with something new. Till then keep practicing and enjoy coding. Happy App Developing!!