
Hello readers!!! Hope you are doing well. We hope you enjoyed our last tutorial section. Today we shall learn the opposite of geocoding appropriately called Reverse geocoding. Let us not waste time and start doing our new section of android location based services J.
10.1 Introduction
Reverse geocoding is the process of back coding of a point/location i.e. from latitude/longitude to street address. The Geocoder object converts the latitude and longitude into an address using the getFromLocation() method. Once the address is obtained, we will display it using the Toast class. Usually geocoder object returns a list of possible address matches. If the Geocoder could not resolve any addresses for the specified coordinate, it returns null. We already know the details of geocoding and reverse geocoding process so we shall not go in depth as it would be of no use. Let us find the practical usage of this functionality.
10.2 Example
Create a project and name it as you like. I am naming it GeoCodingExample app. In this project we shall obtain the street address of tapped or touched location on emulator. Open your activity_main.xml file and coe it as shown in the following listing:
<RelativeLayout xmlns:android="http://schemas.android.com/apk/res/android"
    xmlns:tools="http://schemas.android.com/tools"
    android:layout_width="fill_parent"
    android:layout_height="fill_parent"
    android:paddingBottom="@dimen/activity_vertical_margin"
    android:paddingLeft="@dimen/activity_horizontal_margin"
    android:paddingRight="@dimen/activity_horizontal_margin"
    android:paddingTop="@dimen/activity_vertical_margin"
    tools:context=".MainActivity" >
    <com.google.android.maps.MapView
        android:id="@+id/mapView"
        android:layout_width="fill_parent"
        android:layout_height="fill_parent"
        android:apiKey="<KEY>"
        android:clickable="true"
        android:enabled="true" >
    </com.google.android.maps.MapView>
</RelativeLayout>
Figure activity_main.xml
The graphical layout of this application should look similar to the following snapshot:
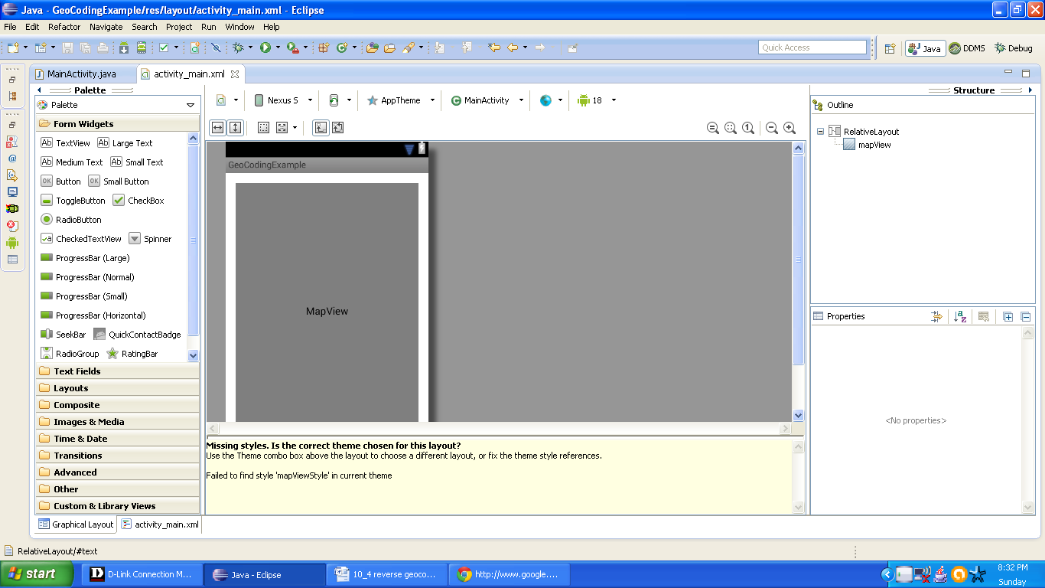
Figure Graphical layout of application
Open the main activity file and populate the class with following lines of code:
package com.android.tution.GeoCodingExample;
import java.io.IOException;
import java.util.List;
import java.util.Locale;
import android.graphics.Bitmap;
import android.graphics.BitmapFactory;
import android.graphics.Canvas;
import android.graphics.Point;
import android.location.Address;
import android.location.Geocoder;
import android.os.Bundle;
import android.view.KeyEvent;
import android.view.Menu;
import android.view.MotionEvent;
import android.widget.Toast;
import com.google.android.maps.GeoPoint;
import com.google.android.maps.MapActivity;
import com.google.android.maps.MapController;
import com.google.android.maps.MapView;
import com.google.android.maps.Overlay;
public class MainActivity extends MapActivity {
    MapView mapView;
    MapController mc;
    GeoPoint gp;
    class MapOverlay extends com.google.android.maps.Overlay {
        @Override
        public boolean draw(Canvas arg0, MapView arg1, boolean arg2, long arg3) {
            // TODO Auto-generated method stub
            super.draw(arg0, mapView, arg2);
            Point screenPts = new Point();
            mapView.getProjection().toPixels(gp, screenPts);
            Bitmap bmp = BitmapFactory.decodeResource(getResources(),
                    R.drawable.ic_launcher);
            arg0.drawBitmap(bmp, screenPts.x, screenPts.y - 50, null);
            return true;
            // return super.draw(arg0, arg1, arg2, arg3);
        }
Figure First half of code
Second part of class is as shown in the following listing:
@Override
        public boolean onTouchEvent(MotionEvent event, MapView mapView) {
            // ---when user lifts his finger---
            if (event.getAction() == 1) {
                GeoPoint gp = mapView.getProjection().fromPixels(
                        (int) event.getX(), (int) event.getY());
                ;
                Geocoder geoCoder = new Geocoder(getBaseContext(),
                        Locale.getDefault());
                try {
                    List<Address> addresses = geoCoder.getFromLocation(
                            gp.getLatitudeE6() / 1E6,
                            gp.getLongitudeE6() / 1E6, 1);
                    String add = " ";
                    if (addresses.size() > 0) {
                        for (int i = 0; i < addresses.get(0)
                                .getMaxAddressLineIndex(); i++)
                            add += addresses.get(0).getAddressLine(i) + "\n";
                    }
                    Toast.makeText(getBaseContext(), add, Toast.LENGTH_SHORT)
                            .show();
                } catch (IOException e) {
                    e.printStackTrace();
                }
                return true;
            }
            return false;
        }
    }
Figure Second half of class
Third half of class is as shown in the following listing:
@Override
    protected void onCreate(Bundle savedInstanceState) {
        super.onCreate(savedInstanceState);
        setContentView(R.layout.activity_main);
        mapView = (MapView) findViewById(R.id.mapView);
        mapView.setBuiltInZoomControls(true);
        // mapView.setStreetView(true);
        mapView.setSatellite(true);
        mc = mapView.getController();
        String coordinates[] = { "1.352566007", "103.78921587" };
        double lat = Double.parseDouble(coordinates[0]);
        double lng = Double.parseDouble(coordinates[1]);
        gp = new GeoPoint((int) (lat * 1E6), (int) (lng * 1E6));
        mc.animateTo(gp);
        mc.setZoom(13);
        MapOverlay mapOverlay = new MapOverlay();
        List<Overlay> listOfOverlays = mapView.getOverlays();
        listOfOverlays.clear();
        listOfOverlays.add(mapOverlay);
        mapView.invalidate();
    }
    @Override
    public boolean onKeyDown(int keyCode, KeyEvent event) {
        // TODO Auto-generated method stub
        MapController mc = mapView.getController();
        switch (keyCode) {
        case KeyEvent.KEYCODE_3:
            mc.zoomIn();
            break;
        case KeyEvent.KEYCODE_1:
            mc.zoomOut();
            break;
        }
        return super.onKeyDown(keyCode, event);
    }
    @Override
    public boolean onCreateOptionsMenu(Menu menu) {
        // Inflate the menu; this adds items to the action bar if it is present.
        getMenuInflater().inflate(R.menu.main, menu);
        return true;
    }
    @Override
    protected boolean isRouteDisplayed() {
        // TODO Auto-generated method stub
        return false;
    }
}
Figure Third half of class
Okay guys we are done with coding section. Our last task is to modify the manifest file. So open the android manifest file and code it as shown in the following listing:
<?xml version="1.0" encoding="utf-8"?>
<manifest xmlns:android="http://schemas.android.com/apk/res/android"
    package="com.android.tution.GeoCodingExample"
    android:versionCode="1"
    android:versionName="1.0" >
    <uses-sdk
        android:minSdkVersion="8"
        android:targetSdkVersion="18" />
    <uses-permission android:name="android.permission.ACCESS_COARSE_LOCATION" />
    <uses-permission android:name="android.permission.ACCESS_FINE_LOCATION" />
    <uses-permission android:name="android.permission.INTERNET" />
    <application
        android:allowBackup="true"
        android:icon="@drawable/ic_launcher"
        android:label="@string/app_name"
        android:theme="@style/AppTheme" >
        <uses-library android:name="com.google.android.maps" />
        <activity
            android:name="com.android.tution.GeoCodingExample.MainActivity"
            android:label="@string/app_name" >
            <intent-filter>
                <action android:name="android.intent.action.MAIN" />
                <category android:name="android.intent.category.LAUNCHER" />
            </intent-filter>
        </activity>
    </application>
</manifest>
Figure manifest file
Let us test our application and find out the output. Create a suitable emulator and run the application. So the output should look similar to the following snapshot:
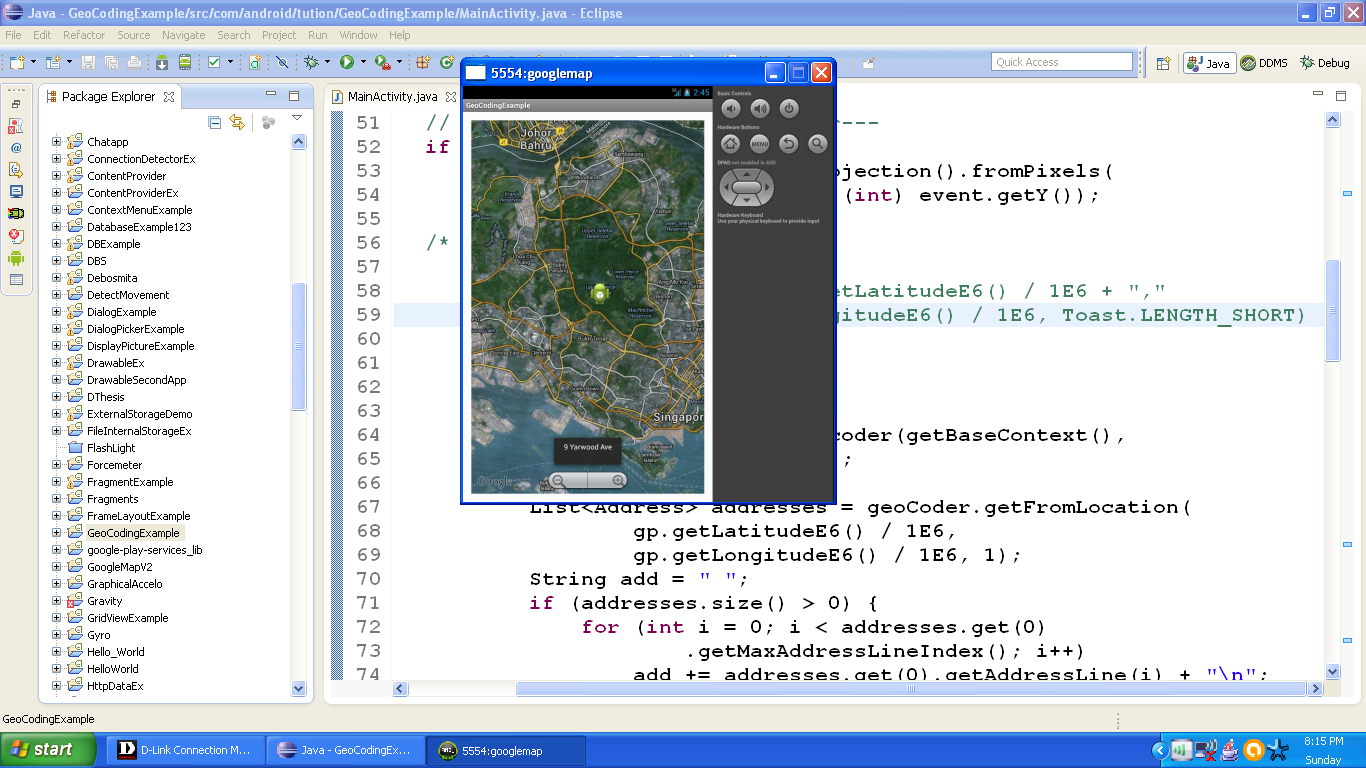
Figure Output of reverse geocoding app
Congratulations buddiesJ!! Hope you enjoyed the tutorial. See you in the next section. Till then keep practicing. Happy App DevelopingJ!!!!