
OpenGL ES Tutorial
Let us study today OpenGL ES. This is the graphics library which we use for 2D and 3D graphics utilities. So let us not waste time and find out what OpenGL is and how android knows this guy!!!
7.3.1 Introduction
Open GL stands for Open Graphics Library. It was developed by Silicon Graphics Inclusive (SGI). It is a multi-platform, cross language API which is used for rendering the 2D and 3D graphics. It interacts with Graphics Processing Unit (GPU) for achieving hardware acceleration. It is useful in virtual reality, flight simulation, gaming, etc.
It is an abstract API which is used for 2D and 3D drawing. There are functions in Open GL which are called by calling program for the implementation purpose. These function definitions are usually not language dependent. In fact, Open GL is not platform- dependent. As far as android is concerned we have Java and C language bindings.
You might be thinking about the ES. So ES in Open GL stands for Embedded Systems so it becomes Open Graphics Library for Embedded Systems (OpenGL ES). This is also known as GLES. It is designed for smartphones, tablet computers, PDAs, etc. Latest version is 3.0.
7.3.2 Android and Open GL ES
2D and 3D graphics is supported by android as it includes the open graphics library. If we speak about the particular flavor then it is Open GL ES. This API provides an software interface for 3D graphics processing hardware. We have two frameworks of android i.e., API framework and Native Development Kit (NDK). We can create and manipulate graphics with Open GL ES by the usage two main classes when we talk about the API framework and they are:
- GLSurfaceView: This is a class which is basically a View where we can draw and manipulate objects using OpenGL API. We can add our own renderer to the instance of this class.
- GLSurfaceView.Renderer: This is an interface. It defines all the methods required for drawing in the view. It consists of three methods and they are:
- onSurfaceCreated(): When GLSurfaceView is created this method is called once. It is like an one time call where this method performs actions just once when they are called.
- onDrawFrame(): Whenever GLSurfaceView is redrawn this method is called at each call. Primary execution point for drawing and re-drawing objects requires the usage of this method.
- onSurfaceChanged(): Whenever the size or orientation of the GLSurfaceView changes this method is called. So we can say that this method is called whenever the geometry of GLSurfaceView changes.
When NDK is used to create a native library that uses the OpenGL ES APIs, then applications containing library are to be deployed with devices running on specific device versions for compatibility. Different sources say that pairing should be similar to the following combination:
- OpenGL ES 1.1 should have a minSdkVersion=”4”
- OpenGL ES 2.0 should have a minSdkVersion=”5”
Now we know what this is and now we should see how this works does. So let us create a quick example and find the solution of our problem.
7.3.3 OpenGL in Android Example
package com.android.tution.OpenglExample;
import android.opengl.GLSurfaceView;
import android.os.Bundle;
import android.app.Activity;
import android.view.Menu;
public class MainActivity extends Activity {
    GLSurfaceView mySurface;
    @Override
    protected void onCreate(Bundle savedInstanceState) {
        super.onCreate(savedInstanceState);
        // setContentView(R.layout.activity_main);
        mySurface = new GLSurfaceView(this);
        mySurface.setRenderer(new GLRendererExample());
        setContentView(mySurface);
    }
    @Override
    protected void onPause() {
        // TODO Auto-generated method stub
        super.onPause();
        mySurface.onPause();
    }
    @Override
    protected void onResume() {
        // TODO Auto-generated method stub
        super.onResume();
        mySurface.onResume();
    }
    @Override
    public boolean onCreateOptionsMenu(Menu menu) {
        // Inflate the menu; this adds items to the action bar if it is present.
        getMenuInflater().inflate(R.menu.main, menu);
        return true;
    }
}
Create a project and name it as you like. I am naming it OpenglExample app. Open the main activity file and code it as shown in the following listing:
Figure - Main activity file of OpenGL example
Now create another class and name it GLRendererExample. Populate the class with following code:
package com.android.tution.OpenglExample;
import javax.microedition.khronos.egl.EGLConfig;
import javax.microedition.khronos.opengles.GL10;
import android.opengl.GLU;
import android.opengl.GLSurfaceView.Renderer;
public class GLRendererExample implements Renderer {
    private GLTriangleExample mytriangle;
    public GLRendererExample() {
        mytriangle = new GLTriangleExample();
    }
    @Override
    public void onSurfaceCreated(GL10 gl, EGLConfig config) {
        // TODO Auto-generated method stub
        gl.glDisable(GL10.GL_DITHER); // increases performance
        gl.glHint(GL10.GL_PERSPECTIVE_CORRECTION_HINT, GL10.GL_FASTEST);
        gl.glClearColor(.8f, 0f, .2f, 1f);
        gl.glClearDepthf(1f);
    }
    @Override
    public void onDrawFrame(GL10 gl) {
        // TODO Auto-generated method stub
        gl.glDisable(GL10.GL_DITHER); // increases performance
        gl.glClear(GL10.GL_COLOR_BUFFER_BIT | GL10.GL_DEPTH_BUFFER_BIT);
        gl.glMatrixMode(GL10.GL_MODELVIEW);
        gl.glLoadIdentity();
        GLU.gluLookAt(gl, 0, 0, -5, 0, 0, 0, 0, 2, 0);
        mytriangle.draw(gl);
    }
    @Override
    public void onSurfaceChanged(GL10 gl, int width, int height) {
        // TODO Auto-generated method stub
        gl.glViewport(0, 0, width, height);
        float ratio = (float) width / height;
        gl.glMatrixMode(GL10.GL_PROJECTION);
        gl.glLoadIdentity();
        gl.glFrustumf(-ratio, ratio, -1, .5f, 1, 25);
    }
}
Figure - GLRendererExample class
Create another class which would be responsible for triangle. Populate the class with the following lines of code:
package com.android.tution.OpenglExample;
import java.nio.ByteBuffer;
import java.nio.ByteOrder;
import java.nio.FloatBuffer;
import java.nio.ShortBuffer;
import javax.microedition.khronos.opengles.GL10;
public class GLTriangleExample {
    private float vertices[] = { 0f, 1f, // first point,p0
            1f, -1f, // second point p1
            -1f, -1f // third point p2
    };
    // to hold the color fr each vertex
    private float rgbvals[] = { 1, 1, 0, .5f,// first vertex
            .25f, 0, .85f, 1, // second vertex
            0, 1, 1, 1 }; // third vertex
    private FloatBuffer vertBuff, colorBuff;
    private short[] pIndex = { 0, 1, 2 };
    private ShortBuffer pBuff;
    public GLTriangleExample() {
        ByteBuffer bBuff = ByteBuffer.allocateDirect(vertices.length * 4);
        bBuff.order(ByteOrder.nativeOrder());
        vertBuff = bBuff.asFloatBuffer();
        vertBuff.put(vertices);
        vertBuff.position(0);
        ByteBuffer pbBuff = ByteBuffer.allocateDirect(pIndex.length * 2);
        pbBuff.order(ByteOrder.nativeOrder());
        pBuff = pbBuff.asShortBuffer();
        pBuff.put(pIndex);
        pBuff.position(0);
        ByteBuffer cBuff = ByteBuffer.allocateDirect(rgbvals.length * 4);
        cBuff.order(ByteOrder.nativeOrder());
        colorBuff = cBuff.asFloatBuffer();
        colorBuff.put(rgbvals);
        colorBuff.position(0);
    }
    public void draw(GL10 gl) {
        gl.glFrontFace(GL10.GL_CW);
        gl.glEnableClientState(GL10.GL_VERTEX_ARRAY);
        gl.glEnableClientState(GL10.GL_COLOR_ARRAY);
        gl.glVertexPointer(2, GL10.GL_FLOAT, 0, vertBuff);
        gl.glColorPointer(4, GL10.GL_FLOAT, 0, colorBuff);
        gl.glDrawElements(GL10.GL_TRIANGLES, pIndex.length,
                GL10.GL_UNSIGNED_SHORT, pBuff);
        gl.glDisableClientState(GL10.GL_COLOR_ARRAY);
        gl.glDisableClientState(GL10.GL_VERTEX_ARRAY);
    }
}
Figure - GLTriangleExample class
We will code the view programmatically. So our activity_main.xml file will remain unmodified and hence we don’t have to code anything. I am not showing the graphical layout as it would remain unchanged. For your satisfaction I am listing the xml layout which is as follows:
<RelativeLayout xmlns:android="http://schemas.android.com/apk/res/android"
    xmlns:tools="http://schemas.android.com/tools"
    android:layout_width="match_parent"
    android:layout_height="match_parent"
    android:paddingBottom="@dimen/activity_vertical_margin"
    android:paddingLeft="@dimen/activity_horizontal_margin"
    android:paddingRight="@dimen/activity_horizontal_margin"
    android:paddingTop="@dimen/activity_vertical_margin"
    tools:context=".MainActivity" >
    <TextView
        android:layout_width="wrap_content"
        android:layout_height="wrap_content"
        android:text="@string/hello_world" />
</RelativeLayout>
Figure - activity_main.xml file of OpenGL example
As usual our last task is to cross check the manifest file. So please go through the following lines of code for any minor or major correction:
<?xml version="1.0" encoding="utf-8"?>
<manifest xmlns:android="http://schemas.android.com/apk/res/android"
    package="com.android.tution.OpenglExample"
    android:versionCode="1"
    android:versionName="1.0" >
    <uses-sdk
        android:minSdkVersion="8"
        android:targetSdkVersion="18" />
    <application
        android:allowBackup="true"
        android:icon="@drawable/ic_launcher"
        android:label="@string/app_name"
        android:theme="@style/AppTheme" >
        <activity
            android:name="com.android.tution.OpenglExample.MainActivity"
            android:label="@string/app_name" >
            <intent-filter>
                <action android:name="android.intent.action.MAIN" />
                <category android:name="android.intent.category.LAUNCHER" />
            </intent-filter>
        </activity>
    </application>
</manifest>
Figure - Manifest file of OpenGL example
So we are done with coding part and now let us run and see how our triangle looks on emulator. Create an emulator and run the application. Output should be similar to the following snapshot:
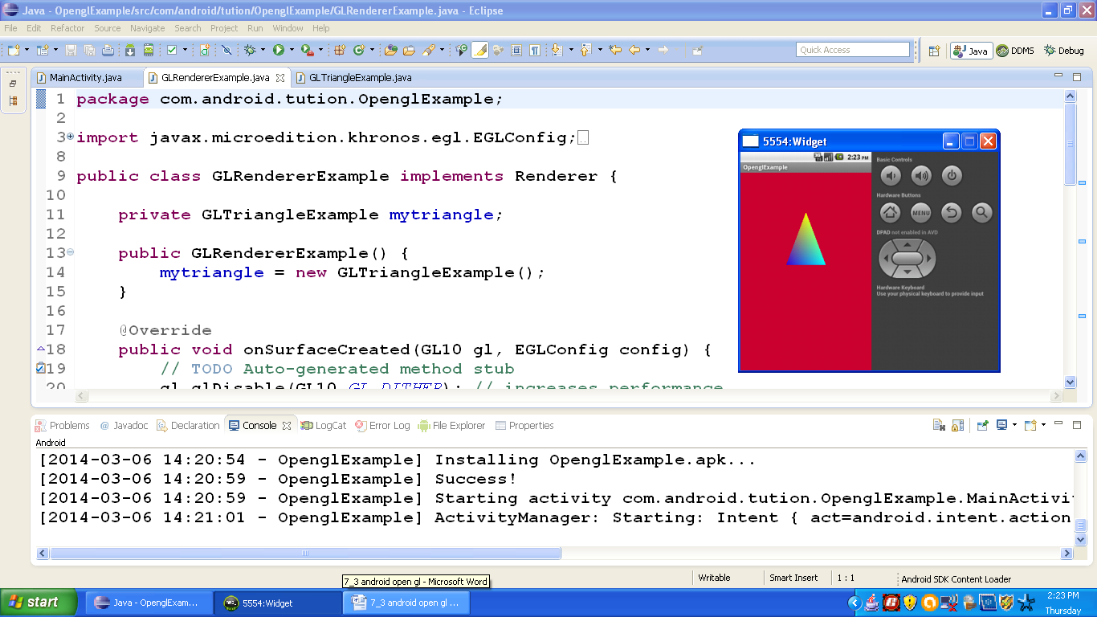
Figure - Output of OpenglExample app
Congratulations buddiesJ!!! We are done with OpenGL, Hope you enjoyed this tutorial. See you in the next section. Till then keep practicing. Happy App DevelopingJ!!!