
Welcome readers!! Hope you enjoyed last tutorial. We have had lots of heavy discussions in the previous chapter so now we shall enjoy some creativity by designing the interface. It is very important for your user interface to look good and work properly at the same time. We have to design beautiful user interface which is very intelligent also. Sort of beauty with brains. So let us start a new tour.
4.1.1 Introduction to Android basic views
We already know aout Android layouts. Android Basic views section would include following items:
- Android EditText
- Android TextBox
- Android Button
- Android Radio Button
- Android Checkbox
- Android Toggle Button
- Android Radio Group
- Android Image Button
Let us study these elements in brief.
- Button: Button is pushed or pressed or clicked. We already know how to use button widget but let us know what it is. We have attributes related to buttons. Every view should have a unique identifier which identifies the element in the project. Make sure, two elements should not share their unique ID. We implement certain methods and interfaces which listens to user input and act accordingly.
- TextView: This view is basically meant for displaying the text of application. For example the label of application is displayed here.
- EditText: This is a modification of Text View. It is editable. User can give input dynamically.
- Check Box: This widget is a two-state button. It can be either checked or unchecked.
- Radio Button: This is also a two-state button. It can be checked or unchecked. Unlike checkbox if it is checked once, cannot be unchecked. It can be checked dynamically.
- Radio Group: This houses radio buttons together. Checking any one of the radio buttons in the group unchecks rest of the buttons.
- Image Button: This a button with image. User can press or click this button. Image on the button is referenced from the src folder of our project.
It is worthless to go for theoretical or historical discussion in this area. So we shall see them practically. For better understanding let us go through an example.
4.1.2 Android basic views example
Open your IDE and create a project. Name it as you like. For me. BasicViewsExample App will work. Open your xml file and code it as shown in the following listing:
<LinearLayout xmlns:android="http://schemas.android.com/apk/res/android"
     android:layout_width="fill_parent"
     android:layout_height="fill_parent"
     android:orientation="vertical" >

     <TextView
        android:id="@+id/textView"
        android:layout_width="match_parent"
        android:layout_height="wrap_content"
        android:text="Hello Readers!!" />

     <Button
        android:id="@+id/buttonExample"
        android:layout_width="match_parent"
        android:layout_height="wrap_content"
        android:text="Example Button" />

     <CheckBox
        android:id="@+id/checkBoxExample"
        android:layout_width="match_parent"
        android:layout_height="wrap_content"
        android:text="CheckBox Example" />

     <ToggleButton
        android:id="@+id/toggleButtonExample"
        android:layout_width="wrap_content"
        android:layout_height="wrap_content"
        android:text="ToggleButton Example" />

     <RadioGroup
          android:id="@+id/radioGroupExample"
          android:layout_width="wrap_content"
          android:layout_height="wrap_content" >

        <RadioButton
           android:id="@+id/radioBtton1"
           android:layout_width="wrap_content"
           android:layout_height="wrap_content"
           android:checked="true"
           android:text="RadioButton 1" />

       <RadioButton
           android:id="@+id/radioButton2"
           android:layout_width="wrap_content"
           android:layout_height="wrap_content"
           android:text="RadioButton 2" />

       <RadioButton
           android:id="@+id/radioButton3"
           android:layout_width="wrap_content"
           android:layout_height="wrap_content"
           android:text="RadioButton 3" />
       </RadioGroup>

       <ImageButton
           android:id="@+id/imageButtonExample"
           android:layout_width="match_parent"
           android:layout_height="wrap_content"
           android:src="@drawable/ic_launcher" />

</LinearLayout>
Figure - xml file of Android BasicViewsExample App
The graphical layout of the file should be similar to the following snapshot
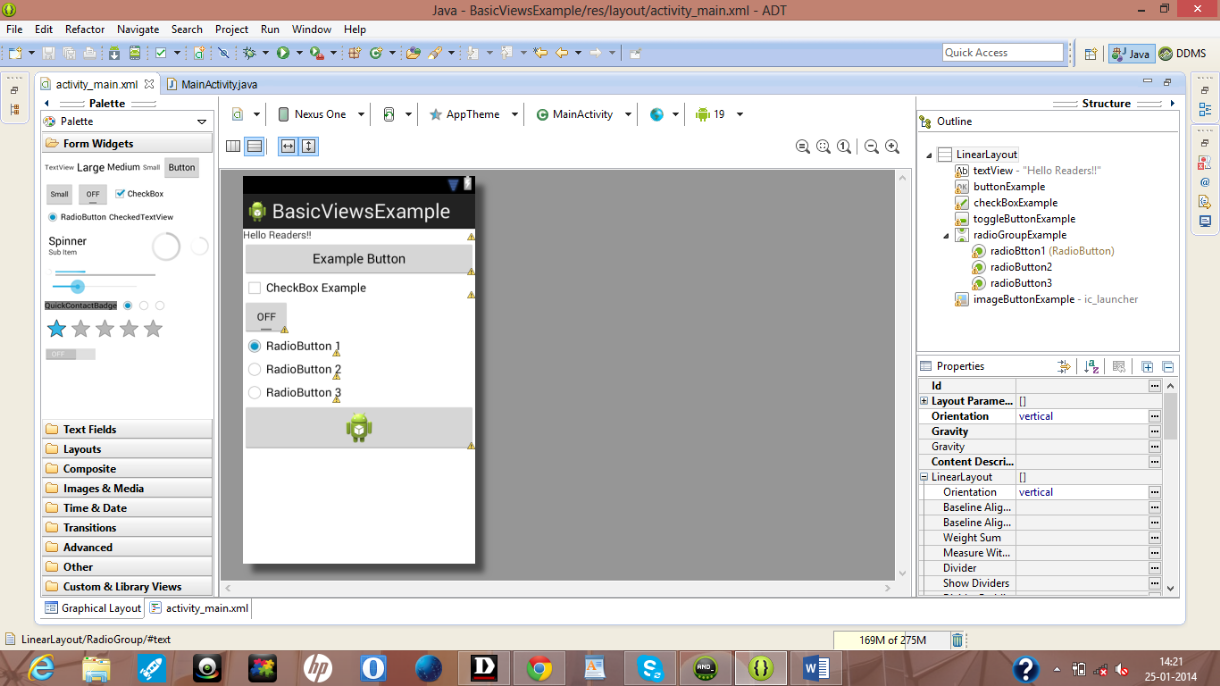
Figure - Graphical layout of the Android basic view app
Now open the main activity file and code it as shown in the following listing:
package com.android.tution.BasicViews;

import android.app.Activity;
import android.os.Bundle;
import android.view.Menu;
import android.view.View;
import android.widget.Button;
import android.widget.CheckBox;
import android.widget.ImageButton;
import android.widget.RadioButton;
import android.widget.RadioGroup;
import android.widget.RadioGroup.OnCheckedChangeListener;
import android.widget.Toast;
import android.widget.ToggleButton;

public class MainActivity extends Activity {


    @Override
    protected void onCreate(Bundle savedInstanceState) {
        setContentView(R.layout.activity_main);
        Button example = (Button) findViewById(R.id.buttonExample);
        CheckBox exampleCheckBox = (CheckBox) findViewById(R.id.checkBoxExample);
        RadioGroup exampleRadioGroup = (RadioGroup) findViewById(R.id.radioGroupExample);
        ToggleButton exampletoggleButton = (ToggleButton) findViewById(R.id.toggleButtonExample);
        ImageButton exampleImageButton = (ImageButton) findViewById(R.id.imageButtonExample);

        example.setOnClickListener(new View.OnClickListener() {

            @Override
            public void onClick(View arg0) {
                  // TODO Auto-generated method stub

                 // Toast.makeText(this, "Hey Button is pressed !!",
                 // Toast.LENGTH_SHORT).show();
                 ToastToDisplay("Hey Button is pressed!!");
            }
         });
         exampleCheckBox.setOnClickListener(new View.OnClickListener() {
             @Override
             public void onClick(View v) {
                    // TODO Auto-generated method stub
                    if (((CheckBox) v).isChecked()) {
                       ToastToDisplay("Check Box is checked");
                     } else {
                       ToastToDisplay("Check box is unchecked");
                     }
              }
          });
          exampleRadioGroup
                    .setOnCheckedChangeListener(new OnCheckedChangeListener() {
                           @Override
                           public void onCheckedChanged(RadioGroup group, int checkedId) {
                                // TODO Auto-generated method stub
                                RadioButton rb1 = (RadioButton) findViewById(R.id.radioBtton1);
                                RadioButton rb2 = (RadioButton) findViewById(R.id.radioButton2);
                                if (rb1.isChecked()) {
                                    ToastToDisplay("Radio Button 1 is checked");
                                } else if (rb2.isChecked()) {
                                    ToastToDisplay("Radio Button 2 is checked");
                                } else {
                                    ToastToDisplay("Radio Button 3 is checked");
                                }
                            }
                      });
           exampletoggleButton.setOnClickListener(new View.OnClickListener() {
                     @Override
                     public void onClick(View v) {
                         // TODO Auto-generated method stub
                         if (((ToggleButton) v).isChecked()) {
                            ToastToDisplay("Toggle button is ON");
                         } else {
                           ToastToDisplay("Toggle Button is OFF");
                         }
                     }
            });

            exampleImageButton.setOnClickListener(new View.OnClickListener() {

                  @Override
                  public void onClick(View v) {
                         // TODO Auto-generated method stub
                         ToastToDisplay("Image Button is pressed");
                  }
            });
      }
      private void ToastToDisplay(String args) {
        Toast.makeText(getBaseContext(), args, Toast.LENGTH_SHORT).show();
      }
      @Override
      public boolean onCreateOptionsMenu(Menu menu) {
            // Inflate the menu; this adds items to the action bar if it is present.
            getMenuInflater().inflate(R.menu.main, menu);
            return true;
      }
}
Figure - Main activity file of our Android basic view app
Open your manifest file and cross-check it with the following listing:
<?xml version="1.0" encoding="utf-8"?>
<manifest xmlns:android="http://schemas.android.com/apk/res/android"
     package="com.android.tution.BasicViews"
     android:versionCode="1"
     android:versionName="1.0" >

     <uses-sdk
        android:minSdkVersion="8"
        android:targetSdkVersion="18" />
     <application
          android:allowBackup="true"
          android:icon="@drawable/ic_launcher"
          android:label="@string/app_name"
          android:theme="@style/AppTheme" >
          <activity
              android:name="com.android.ttion.BasicViews.MainActivity"
              android:label="@string/app_name" >
              <intent-filter>
                     <action android:name="android.intent.action.MAIN" />

                     <category android:name="android.intent.category.LAUNCHER" />
             </intent-filter>
          </activity>
     </application>
</manifest>
Figure - Manifest file of our app
You are done. Please go through the code. It is very easy and redundant code. Every time you code for these basic views you have to code similarly. It is important to make sure of one thing that you should remember which method should be implemented for which view. Every view has got its own perspectives. Now run your application in a suitable emulator. Your homepage should be similar to the following snapshot.

Figure - Home page of Android BasicViewsExample App
Press the button saying “Example Button” and a toast message will be displayed as shown in the following listing:

Figure - Output after pressing the button
Now move to next basic view. Check the ckechbox of your app and the output should be similar to the following snapshot:
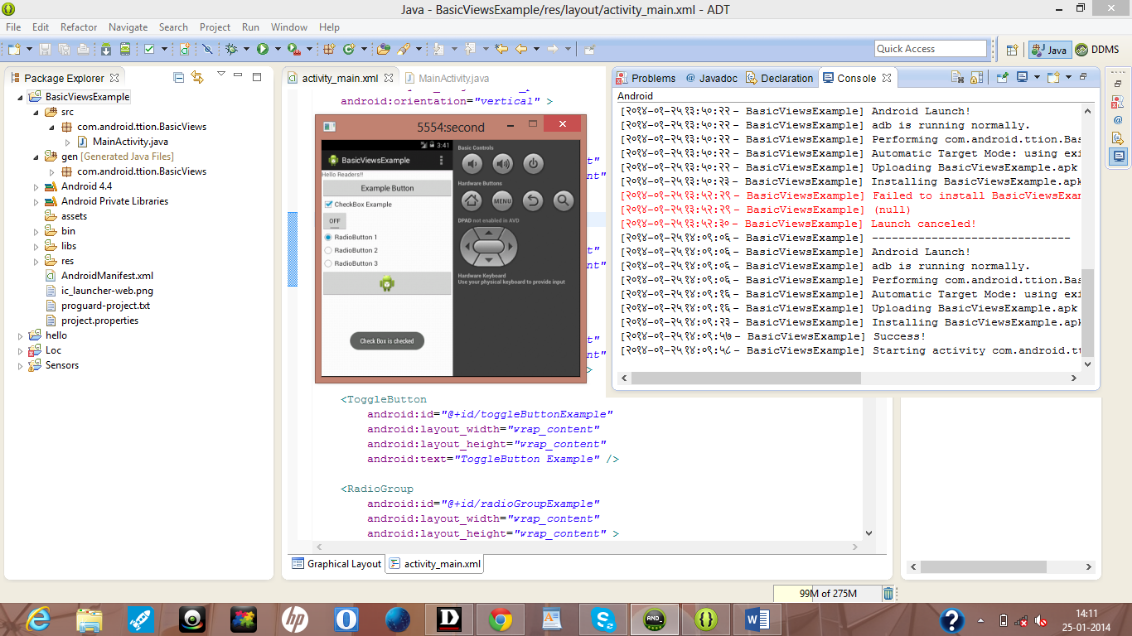
Figure - Output after checking the checkbox.
After this move to next basic view of your app which is a toggle button. Initially, it was in off state. As soon as you click the button, state of button would change to “on”. So your output should be similar to the following snapshot:
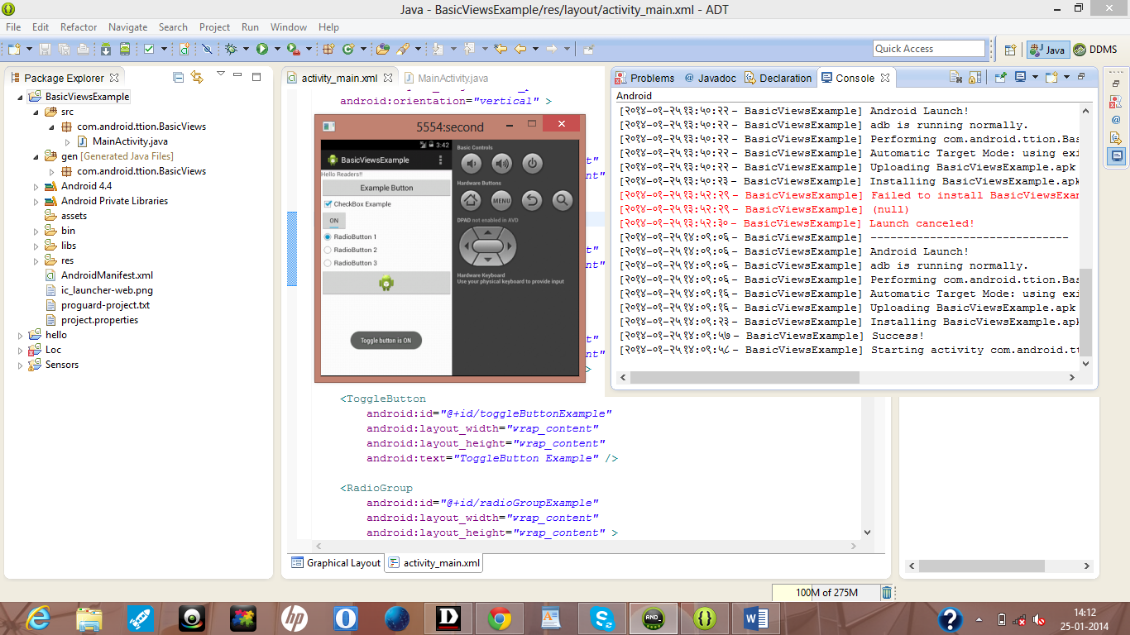
Figure - Output after pressing the toggle button
Let us find out whether writer is too smart and trying to fool us. To check her/his validity click the toggle button once again. See the output it should say something like Toggle button is off and output should be similar to the following snapshot.
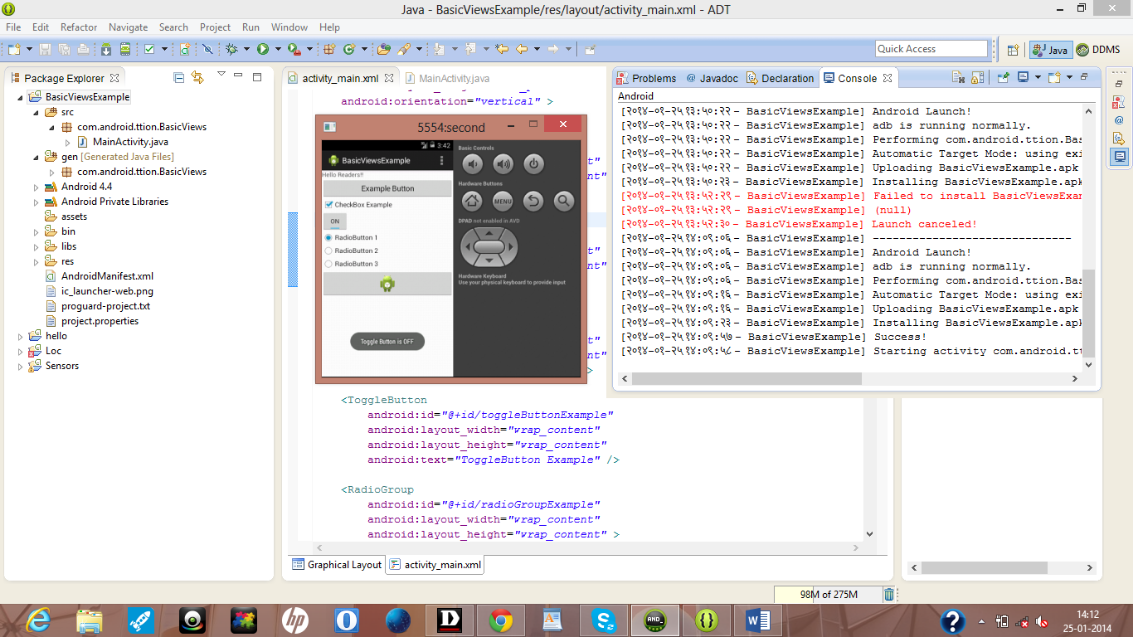
Figure - Output after repressing the toggle button
When you run a radio button group a radio button in the group would be ON by default. To check the correctness of code let us first press the third button. Output should be similar to the following snapshot.

Figure - Output after pressing the third radio button
To check programmer’s validity let us click second radio button and see if the app is responding to this change. Output should be similar to the following snapshot
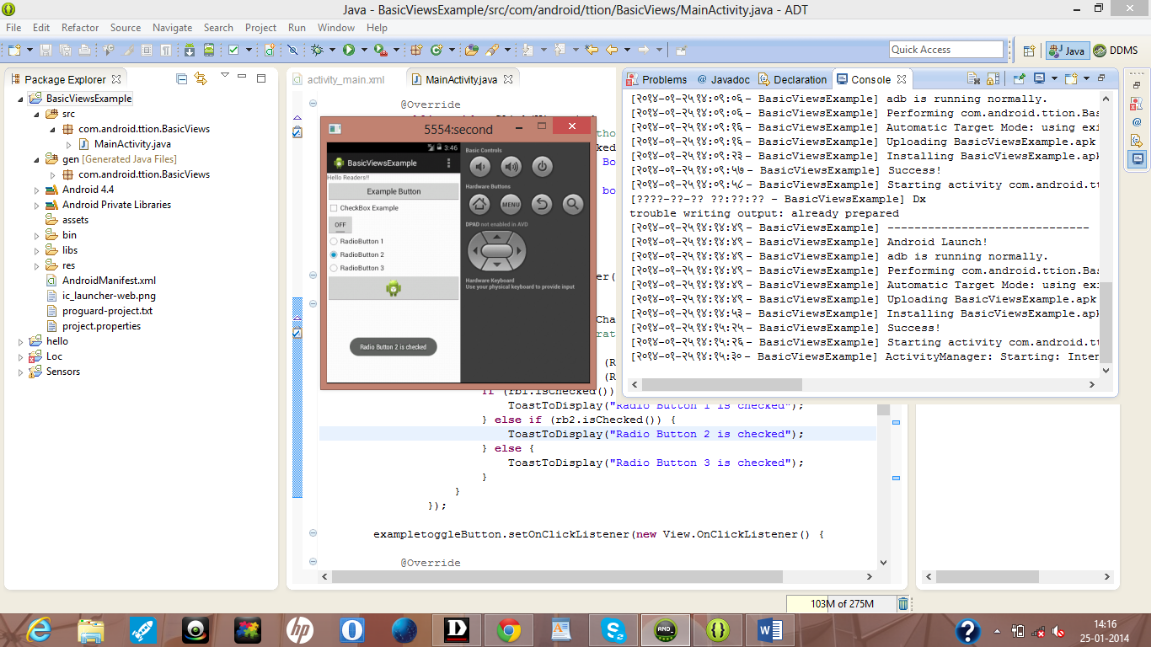
Figure - Output after pressing second radio button
Click the first radio button and check if app is responding to your click. Output should be similar to the following snapshot

Figure - Output after pressing radio button 1
Now it is the time for our last view. Click on the Image button and see the output. Output of this action should be similar to the following snapshot
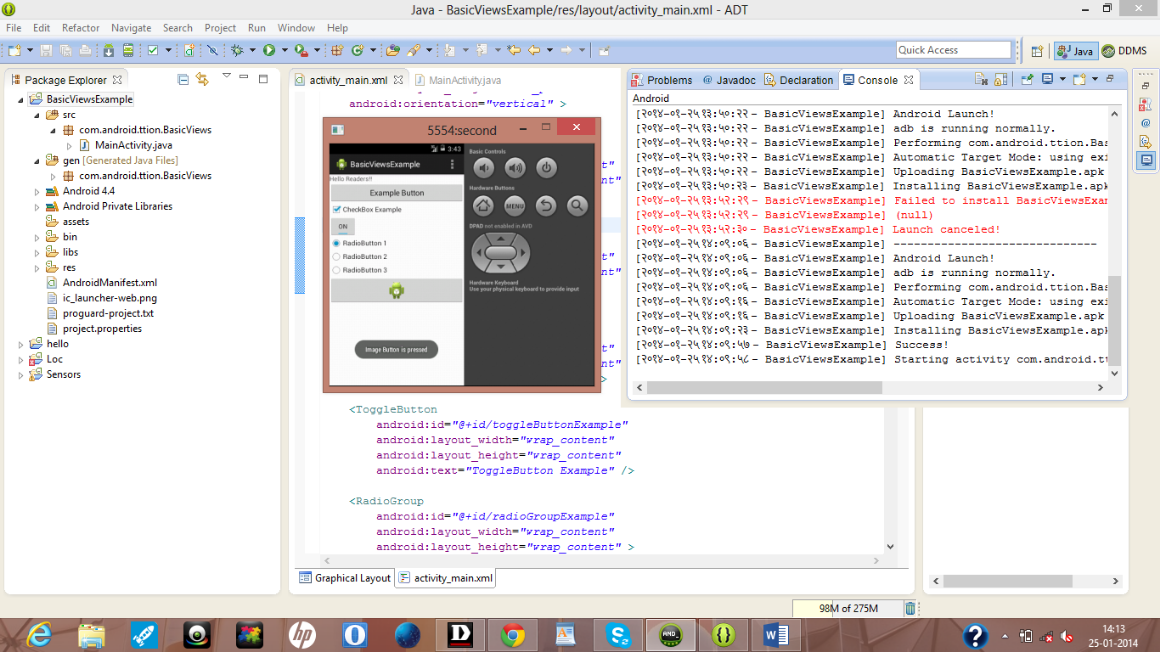
Figure - Output after pressing Image Button
Hey validity of writer is validated. The app is responding as it is programmed to do. So Congratulations!! Players you are done with the basic views. Keep practicing. Make changes in the code and find out the errors faced by you. Resolve them. See you in the next sub-section. Till then Happy App Developing!!!