
Hello ladies and gentlemenJ!! Hope all of you are doing well. Today we shall continue with testing sub-section. We shall have an overview on testing using Eclipse and other IDEs. Let us start studying without wasting any more time.
13.7.1 Eclipse
Testing from eclipse is accomplished by the usage of ADT. ADT makes it easier to create test projects. It helps to link test project quickly to the corresponding app. It automatically inserts <instrumentation> in the test package. ADT quickly imports the classes corresponding to the application under test. Run configurations for the test package can be easily created. In case we do not make use of Eclipse, ADT automatically creates test project and test package respectively.
We must first create a separate project that holds the test code while setting up a test environment for android application. Now new project undergoes the same directory structure which is followed by any Android application. Same types of source code, resources, manifest files etc are included. Test package we create is connected to application under test by <instrumentation> element. This element is present in manifest file.
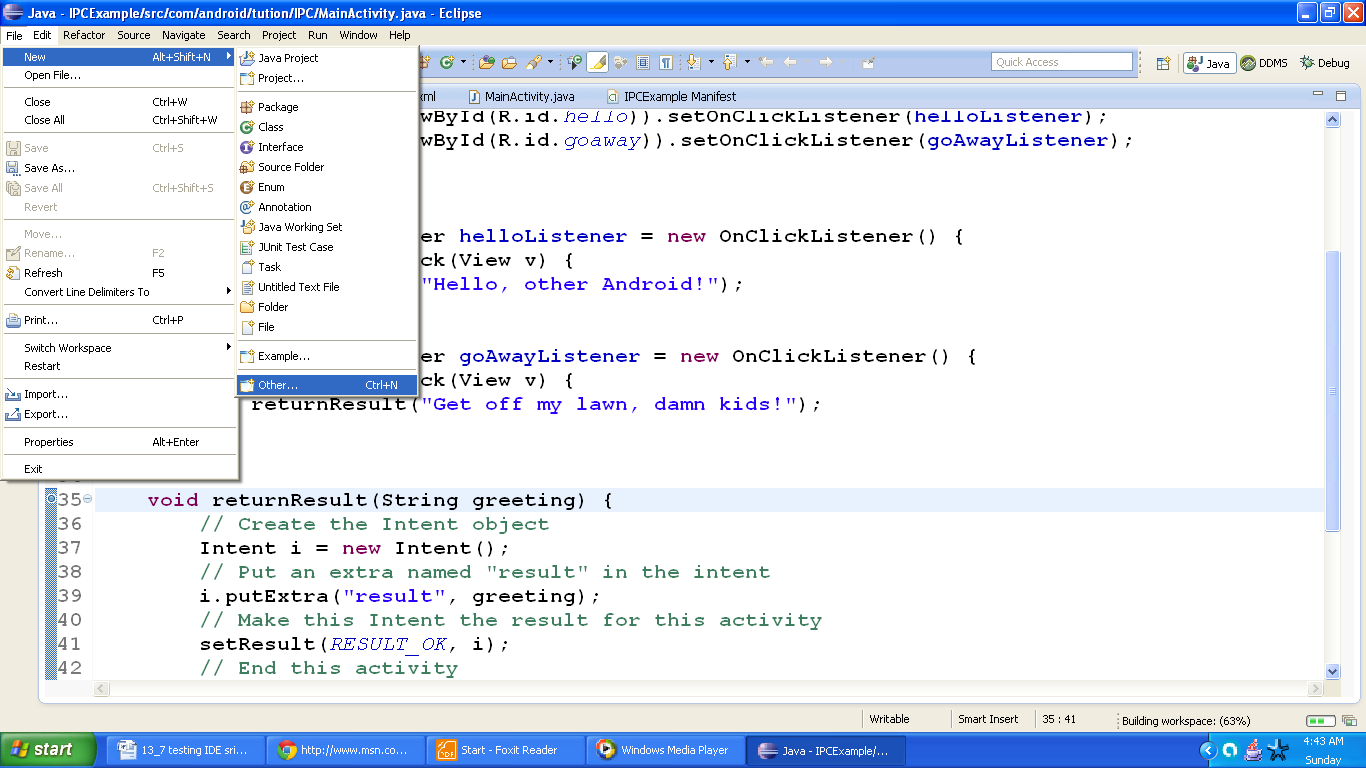
Figure (a) Creating a new test project
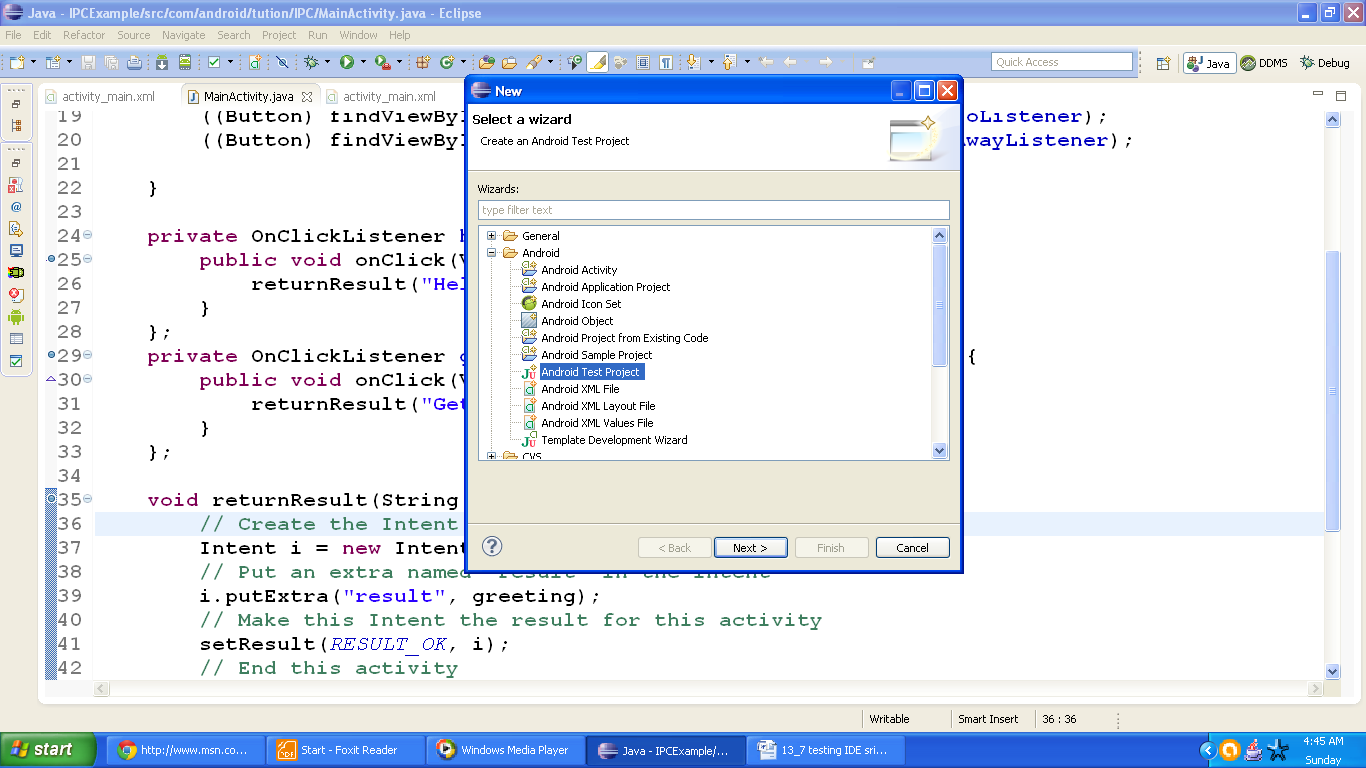
Figure (b) under select wizard, choose Android test project
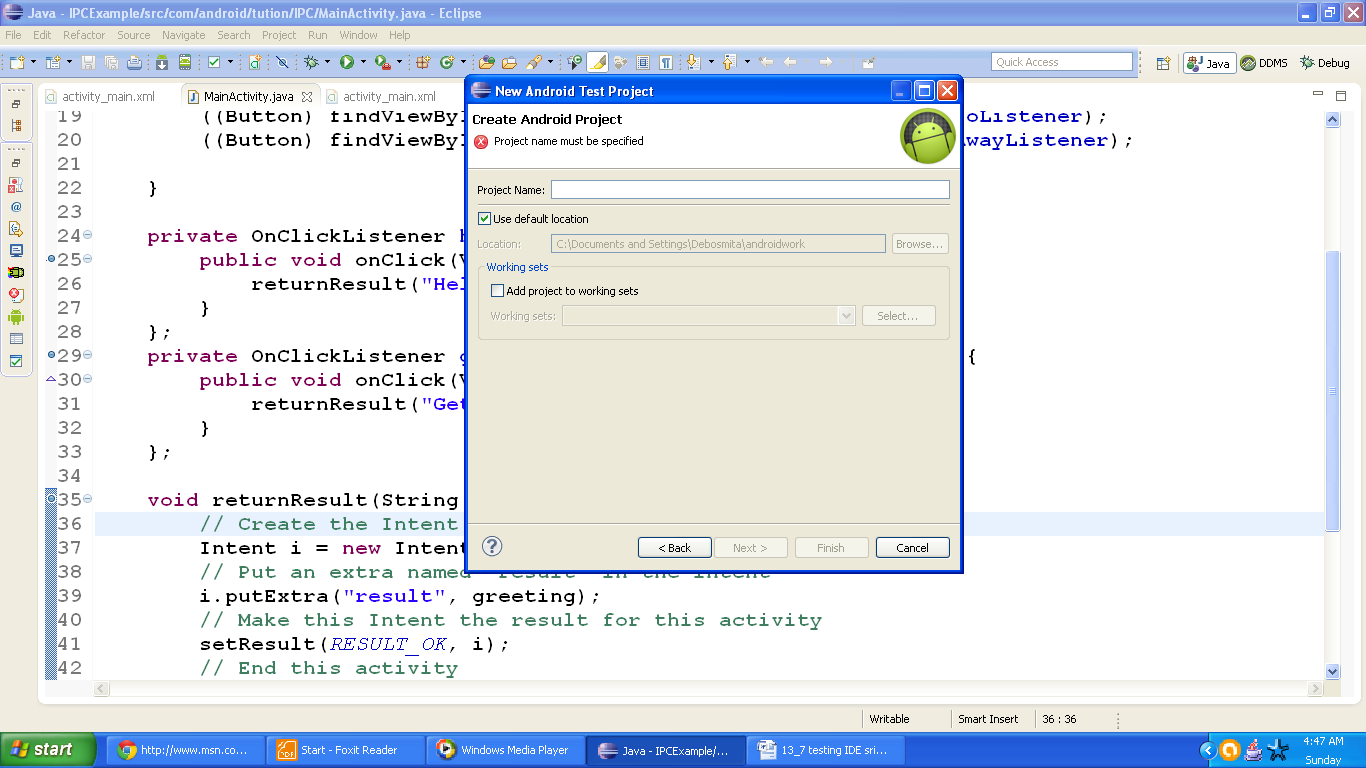
Figure (c) name your test project
After creating test project, a test package is the next target. Activity is not required in this case. But it does not mean that you cannot have activity classes, test case classes, etc. Most important note is that a test package does not have an Android GUI instead the results are displayed in JUnit view. Now we can run the entire test package or one test case class. Eclipse runs the adb command for running a test package followed by displaying output. As usual we need to either attach a device to development machine or use the Android emulator for running the test package in Eclipse using ADT.
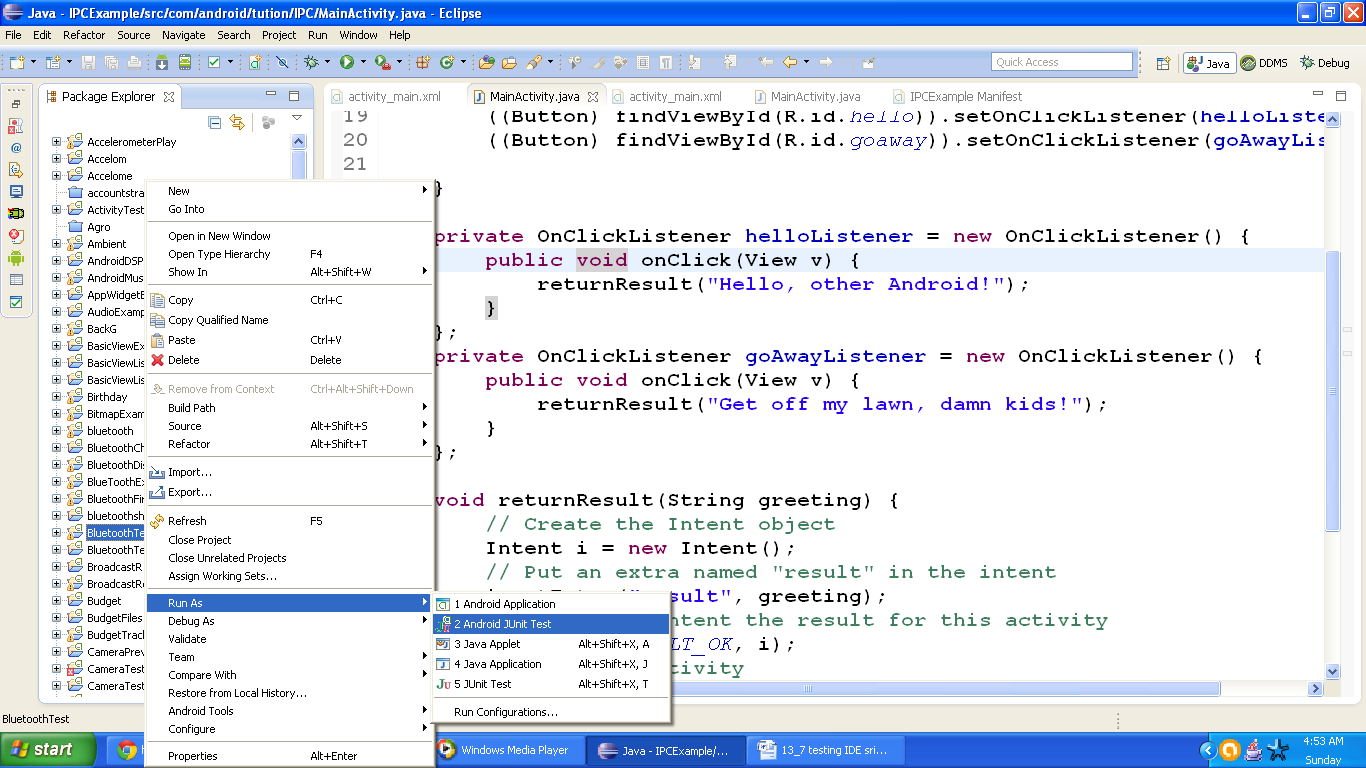
Figure Run test in android
13.7.2 Other IDE’s
We can also create and run tests directly from the command line. The android tool is used to create test projects. This tool can be used to convert existing test code into an Android test project. It can be used to add test Ant target to an existing test project. The command for creating a project is as follows
android create test-project -m <m_path> -n <p_name> -p <t_path>
Where,
-m: Represents path to the project of the application under test with respect to the test package directory
m_path: Represents main path
-n: Represents the name which you want to give to the test project
p_name: Represents project name
-p: Represents the directory in which you want to create the new test project
The android tool can be used to change the path to the project of the application under test. The command for updating project is as follows:
android update test-project -m <m_path> -p <t_path>
When test project is created, we need a test package for this project. Activity is not an mandatory requirement for test project, although application may contain activities, JUnit extensions, etc.
For running application we can use Ant to run all tests in project. This can be done by using target test. This is created automatically when you create a test project with the android tool. Main project and test project may be re-build by target is required.
We can run tests from command line using ADB. Lot of options are available in this scenario. Individual tests can be selected. Testing options can be specified. We run adb shell to start a command-line shell on device or emulator. Then we run the am instrument command in shell. The syntax of am instrument command is as follows:
am instrument [flags] <t_package>
or
am instrument [flags] <runner_class>
Where,
t_package: Android package name of the test package
runner_class: Class name of the instrumented test runner
The most common flags are:
-w: This flag forces am instrument to wait until the instrumentation terminates before terminating itself
-r: Results are in raw format
-e <test_options>: Key value pair of testing options is provided
Congratulations guysJ!! We are done with this sub-section. See you in the next sub-section with something new. Till then keep practicing and Happy App Developing!!!